The Ultimate Step-by-Step Loose-Leash Walking Guide
Master loose-leash walking with our step-by-step guide. Learn the best harnesses, treat timing, and training techniques for stress-free daily dog walks.
Introduction: Transforming Daily Walks from Tug-of-War to Tranquility
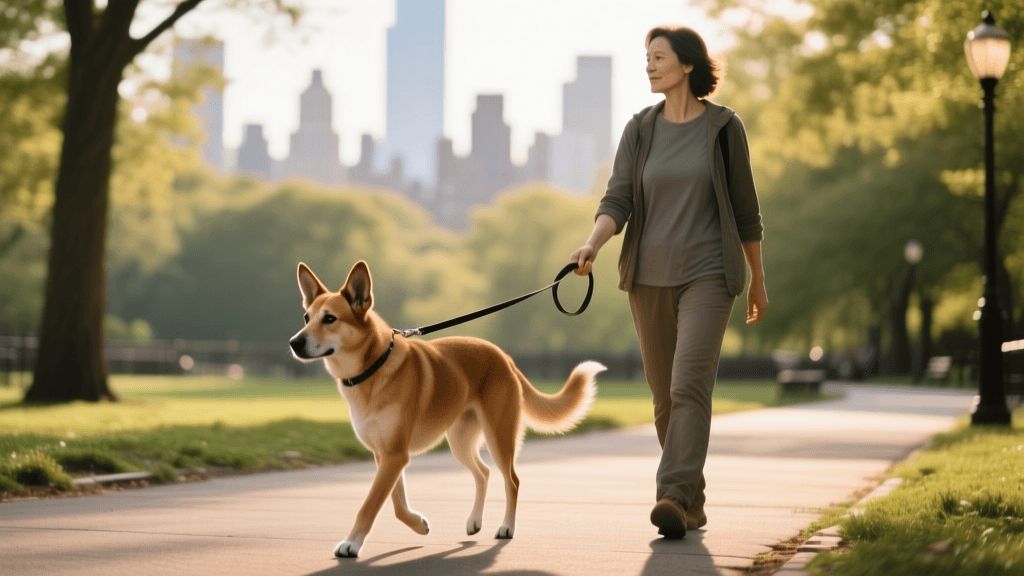
Walking your dog should be a relaxing, bonding experience, yet for millions of pet owners, it feels more like an extreme sport. If your shoulder aches and your dog seems more interested in dragging you down the street than enjoying the scenery, you are not alone. Loose-leash walking is not an innate canine behavior; it is a learned skill that requires patience, consistency, and the right methodology. According to the American Kennel Club (AKC), pulling is often a result of the "opposition reflex"—a natural instinct where dogs push against pressure rather than yielding to it.
This comprehensive, step-by-step training guide will walk you through the exact protocols, gear requirements, and behavioral conditioning techniques needed to teach your dog to walk politely by your side. Whether you have a rambunctious Golden Retriever puppy or a stubborn adult rescue, these actionable steps will revolutionize your daily routine.
Essential Gear for Loose-Leash Training
Before you begin training, you must equip yourself and your dog with the proper tools. Using the wrong equipment can inadvertently reinforce pulling or cause physical harm. Avoid retractable leashes (like the Flexi Classic Neon), as they teach dogs that pulling extends their range.
The Ideal Training Setup
- Leash: A standard 4-to-6-foot nylon or leather leash. The Humane Society of the United States (HSUS) strongly recommends fixed-length leashes for maximum control and safety. Cost: $15 - $30.
- Harness: A front-clip no-pull harness (e.g., Ruffwear Front Range or Rabbitgoo No-Pull). The front D-ring gently redirects the dog's momentum back toward you when they pull. Cost: $25 - $45.
- Treat Pouch: A quick-access magnetic pouch (e.g., PetSafe Treat Pouch) worn on your hip. Fumbling in pockets ruins your timing. Cost: $10 - $20.
- High-Value Treats: Soft, pea-sized treats (approx. 1/4 inch) like Zuke's Mini Naturals or boiled chicken breast. You need rapid consumption to maintain the training flow.
Equipment Comparison Chart
| Equipment Type | Best For | Pros | Cons | Avg. Cost |
|---|---|---|---|---|
| Front-Clip Harness | Strong pullers, beginners | Redirects momentum safely; prevents choking | Can cause chafing if fitted poorly | $25 - $45 |
| Back-Clip Harness | Small dogs, car travel | Easy to put on; comfortable for the dog | Encourages pulling (sled dog effect) | $15 - $30 |
| Head Halter (Gentle Leader) | Severe pullers, giant breeds | Maximum control with minimal physical force | Requires slow desensitization; neck injury risk if jerked | $20 - $35 |
| Martingale Collar | Sighthounds, escape artists | Prevents slipping out; limited tightening | Does not stop pulling; not for training | $10 - $20 |
Step-by-Step Training Protocol
Training should occur in low-distraction environments before moving to the busy sidewalk. Keep initial sessions short—around 5 to 7 minutes—to prevent cognitive fatigue in your dog.
Step 1: Establishing the "Reward Zone" (Indoors)
Before stepping outside, teach your dog where the "reward zone" is. This is the area directly beside your leg (usually the left side, known as the "heel" position).
- Stand still in your living room with your dog on a 6-foot leash.
- Hold a treat in your hand right at the seam of your pants on your left side.
- The moment your dog moves into that position and makes eye contact, use a marker word like "Yes!" or a clicker, and deliver the treat directly at the seam of your pants.
- Repeat this 15-20 times. You are conditioning the dog to realize that being next to your leg is the most lucrative place to be.
Step 2: The "Be a Tree" Method (Backyard)
Now, move to a slightly more distracting environment: your backyard or a quiet hallway.
- Begin walking at a normal pace. Do not hold the leash tight; allow a "J" curve in the leash, which indicates slack.
- The absolute millisecond the leash goes taut and you feel pressure, stop walking immediately. Become a tree.
- Do not yank the leash. Do not say "no." Simply freeze and wait.
- Eventually, your dog will look back at you or take a step back toward you, creating slack in the leash.
- Mark that moment with "Yes!", invite them back to your side, and reward them in the reward zone before resuming your walk.
Trainer's Tip: Timing is everything. If you take one more step while the leash is tight, you have just rewarded the pulling behavior by allowing the dog to move forward. Forward motion is the ultimate reward for a dog that wants to sniff a bush.
Step 3: The 180-Degree Direction Change
If your dog is highly distracted and the "Be a Tree" method isn't working because they are locked onto a scent, use the direction change.
- As the dog hits the end of the leash and pulls, say "Let's go!" in a cheerful tone.
- Immediately pivot 180 degrees and walk in the opposite direction.
- When the dog catches up to you and is walking by your side, mark "Yes!" and deliver a treat while still moving.
- This teaches the dog that pulling actually moves them further away from their goal, while staying by your side keeps the walk moving forward.
Step 4: Proofing the Behavior (The Sidewalk)
Once your dog understands the mechanics in the yard, it is time to face the real world. The sidewalk is filled with "triggers"—other dogs, squirrels, and discarded food wrappers.
- Pre-emptive Rewarding: If you see a trigger (e.g., a neighbor's dog) 50 feet away, begin rewarding your dog for looking at the trigger and then looking back at you. This is known as the "Engage-Disengage" game.
- Manage the Environment: If a loose dog is approaching or a distraction is too high, cross the street or create distance. Setting your dog up for failure by walking directly into a high-stress trigger will undo weeks of training.
- Variable Reinforcement: As your dog improves, stop rewarding every single step. Move to a variable schedule of reinforcement—rewarding after 5 steps, then 15 steps, then 3 steps. This builds persistence.
Troubleshooting Common Challenges
My dog only walks well when I have food in my hand.
This is called "luring dependency." To fix this, ensure your treat pouch is on your opposite hip. Use an empty hand to gesture, and only reach into the pouch after you have marked the behavior with your clicker or verbal marker. The dog must learn that the food is earned, not guaranteed by the sight of your hand.
My dog sits down and refuses to move.
This is common in puppies or fearful rescues. Do not drag them. Crouch down, offer encouragement, and use a high-value treat to lure them forward. If fear is the root cause, consult a certified professional dog trainer (CPDT) or a veterinary behaviorist to address the underlying anxiety.
Expert Insights and Final Thoughts
Consistency is the bedrock of canine behavioral conditioning. If you allow your dog to pull to the mailbox on Tuesday because you are in a hurry, but correct them for pulling on Wednesday, you will create confusion and prolong the training process. Everyone who walks the dog must adhere to the exact same rules and use the same marker words.
For further reading on canine behavioral health and walking safety, the ASPCA's Dog Training Tips provide excellent supplementary resources on positive reinforcement methodologies. Remember, loose-leash walking is a marathon, not a sprint. Celebrate the small victories, keep your frustration in check, and enjoy the journey of building a deeper, more communicative relationship with your best friend.
marcus-aldridge
All our authors care for dogs every day — read more of their work on the authors page.