Step-by-Step Guide to Crate Training Adult Rescue Dogs
Learn how to crate train an adult rescue dog with our step-by-step guide. Discover timelines, crate sizes, and positive reinforcement techniques.
Why Crate Training an Adult Rescue is Different
Adopting an adult rescue dog is a deeply rewarding experience, but it often comes with unique behavioral hurdles. Unlike puppies, adult rescues may have experienced trauma, neglect, or inconsistent living conditions that shape their current anxieties. One of the most critical skills you can teach your new companion is crate training. When done correctly, a crate becomes a safe haven rather than a punitive cage. This step-by-step guide will walk you through the process of crate training an adult rescue dog, complete with specific product recommendations, timelines, and troubleshooting strategies to ensure a smooth transition. According to the Humane Society of the United States, crates tap into a dog's natural denning instinct, providing them with a secure space to retreat when overwhelmed.
Step 1: Selecting the Right Crate and Gear
Before you begin training, you must select the appropriate crate. Size is paramount. Your dog should be able to stand up without crouching, turn around comfortably, and lie down stretched out. If the crate is too large, they may use one corner as a bathroom. To measure your dog correctly, use a soft measuring tape:
- Length: Measure from the base of the tail to the tip of the nose, then add 2 to 4 inches.
- Height: Measure from the floor to the top of their head (or the tip of their ears if they are erect), then add 2 inches.
For growing dogs or rescues whose final size is uncertain, purchase a wire crate with an adjustable divider panel. Below is a comparison of the most common crate types:
| Crate Type | Pros | Cons | Average Cost |
|---|---|---|---|
| Wire Crates (e.g., Midwest Homes for Pets iCrate) | Excellent visibility, folds flat, adjustable dividers. | Can feel exposed, heavier. | $40 - $80 |
| Plastic Crates (e.g., Petmate Sky Kennel) | Den-like feel, airline approved, draft-free. | Poor ventilation in heat, bulky storage. | $50 - $120 |
| Soft-Sided Crates (e.g., EliteField 3-Door) | Lightweight, portable, easy to store. | Easily destroyed by anxious chewers, hard to clean. | $30 - $60 |
Recommendation: For most anxious rescue dogs, a wire crate draped with a breathable cover or a plastic kennel offers the best balance of security and durability. Avoid soft-sided crates until your dog is fully house-trained and shows zero signs of separation anxiety.
Step 2: Setting Up the Environment
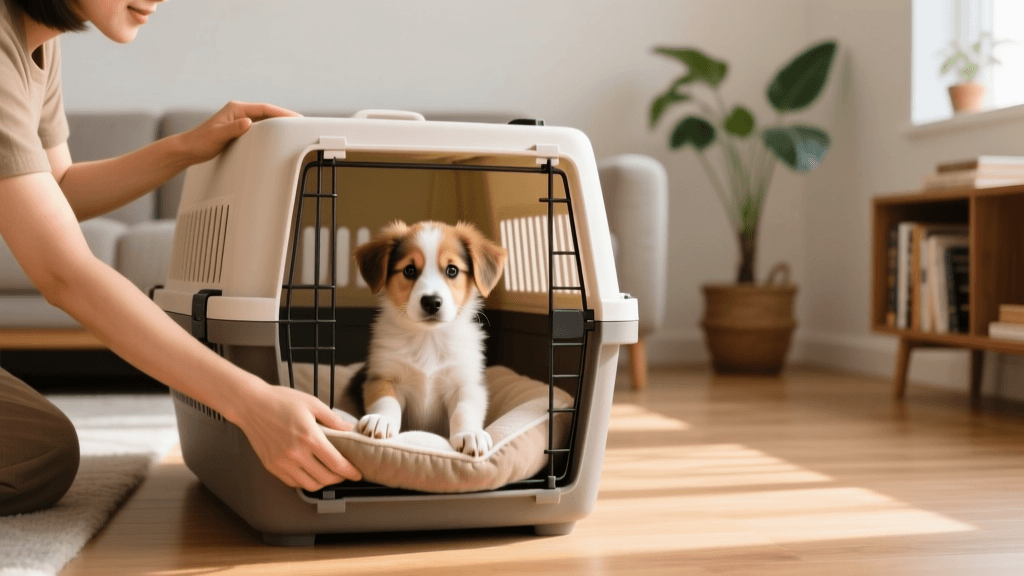
Location is just as important as the crate itself. Place the crate in a high-traffic family area, like the living room, so the dog does not feel isolated or banished. Outfit the interior with a durable, washable bed. For highly anxious rescues, consider investing in a veterinarian-recommended calming aid like the SmartPetLove Snuggle Puppy (approx. $40), which mimics the heartbeat and body heat of a littermate to soothe nerves. Always have high-value treats on hand, such as boiled chicken breast or Zuke's Mini Naturals, and a classic KONG rubber toy stuffed with frozen peanut butter to create prolonged positive associations.
Step 3: The Introduction Phase (Days 1–3)
Never force a rescue dog into a crate. Forcing them will trigger a fear response and set your training back weeks. Start by tossing high-value treats near the crate opening. If they retrieve it and step back out, praise them calmly with a marker word like "Yes!". Play the 'In and Out' game: toss a treat inside, say "Go to Bed", and when they enter, mark with "Yes!" and toss another treat outside so they have to exit to get it. This builds a positive loop of entering and exiting without the pressure of being trapped. Once they are comfortably entering, begin feeding their regular meals (like Purina Pro Plan or Royal Canin) near the crate, then just inside the doorway, and finally at the very back. Leave the door completely open and unfastened during this phase. Expect this step to take anywhere from a few hours to three full days, depending on the dog's trauma history.
Step 4: Closing the Door and Building Duration (Days 4–7)
Once your rescue dog willingly enters the crate to eat or chew a KONG, quietly latch the door. Do not make a big deal out of it. Sit nearby and read a book or watch TV. After 5 to 10 minutes, open the door before they finish their chew or meal. Gradually increase the time the door remains closed by 5-minute increments. If the dog whines, wait for a brief moment of silence before opening the door. Opening it while they are vocalizing reinforces the whining behavior. The American Kennel Club emphasizes that patience during this closure phase is critical to preventing long-term claustrophobia and building genuine trust.
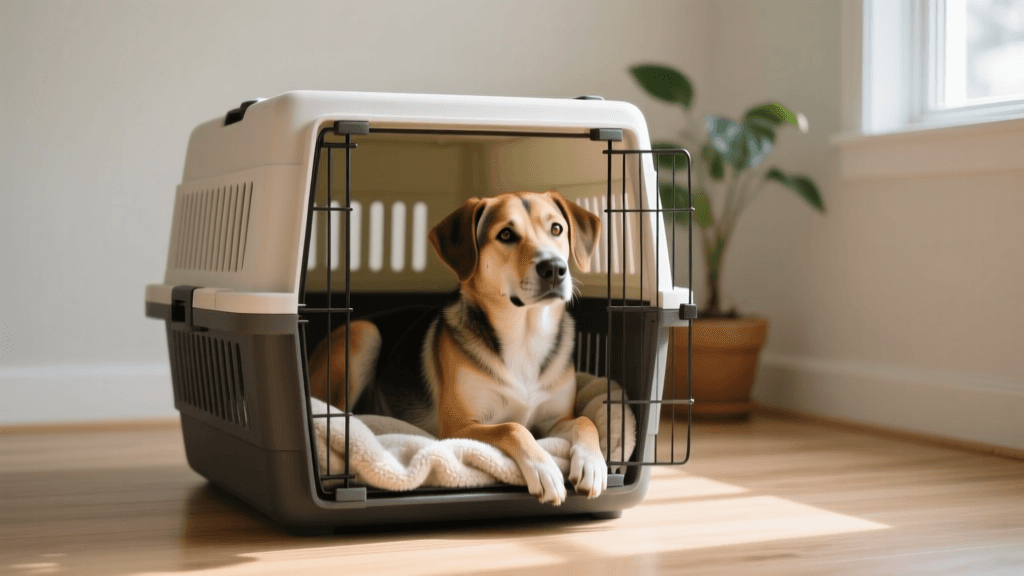
Step 5: Leaving the Room and Overnight Stays (Week 2 and Beyond)
Begin practicing short departures. Give your dog a stuffed KONG, close the crate, and leave the room for two minutes. Return calmly, without exuberant greetings. Slowly extend your absences to 5, 10, 15, and eventually 30 minutes. When leaving the house for longer periods (1-4 hours), ensure your dog has received adequate physical exercise and mental enrichment beforehand. A tired dog is much more likely to sleep peacefully in their crate. A 30-minute sniffari walk or a 15-minute flirt pole session can make a world of difference in their ability to settle down. For overnight stays, place the crate in your bedroom initially. The sound and scent of your breathing will reassure a nervous rescue. As they grow comfortable, you can gradually move the crate to your preferred permanent location, shifting it a few feet every night.
Troubleshooting Common Rescue Dog Challenges
Whining and Barking
Differentiate between attention-seeking whining and genuine distress. If your dog has been adequately exercised, has recently eliminated outside, and is simply barking to demand freedom, you must ignore the behavior entirely. Yielding to demands teaches the dog that barking is the key to opening the door. Wait for at least three seconds of complete silence before rewarding them with your presence or by opening the latch.
Potty Accidents in the Crate
If your dog soils the crate, they are either being left in for too long, or the crate is too large. Clean the crate thoroughly with an enzymatic cleaner like Nature's Miracle to completely eradicate the scent, which prevents repeat offenses. Adjust your feeding schedule so they are not eating right before bedtime, and ensure they have ample opportunity to eliminate outside before crating.
Panic and Destruction
If your dog breaks teeth, claws at the metal until their paws bleed, or salivates excessively, they may suffer from severe confinement distress or isolation distress. In these cases, stop crate training immediately and consult a certified veterinary behaviorist. Gate training or using a dog-proofed exercise pen may be safer alternatives.
Crate training should never be used as a punishment. The ultimate goal is to build a positive emotional response where the dog actively chooses to enter their safe space when they need a break from household stimulation.
Conclusion
Crate training an adult rescue dog requires empathy, high-value rewards, and an abundance of patience. By respecting their pace, utilizing the right gear, and following a structured step-by-step protocol, you can transform a frightening metal cage into a beloved personal sanctuary. Remember that every rescue dog has a unique timeline; celebrate the small victories and adjust your strategy as you learn more about your new best friend's specific needs.
anouk-beaumont
All our authors care for dogs every day — read more of their work on the authors page.