Step-by-Step Guide to Stress-Free Car Travel With Your Dog
Learn how to safely and calmly travel with your dog. This step-by-step car training guide covers gear, desensitization, and motion sickness tips.
Transforming Car Rides into Positive Experiences
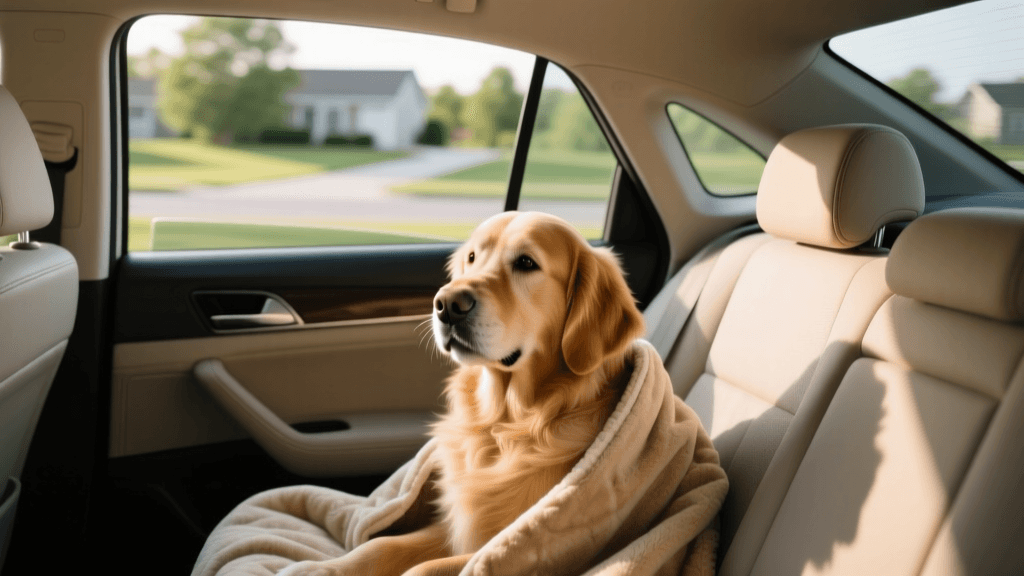
Traveling with your dog should be a joyful experience, whether you are embarking on a cross-country road trip or simply heading to the local veterinary clinic. However, for many pet parents, car rides are fraught with anxiety, whining, pacing, and even motion sickness. If your dog views the car as a terrifying metal box rather than a gateway to adventure, it is time to change the narrative. This comprehensive, step-by-step guide will walk you through the exact protocols needed to transform your dog into a calm, confident, and safe car traveler.
Step 1: Select the Right Safety Restraint
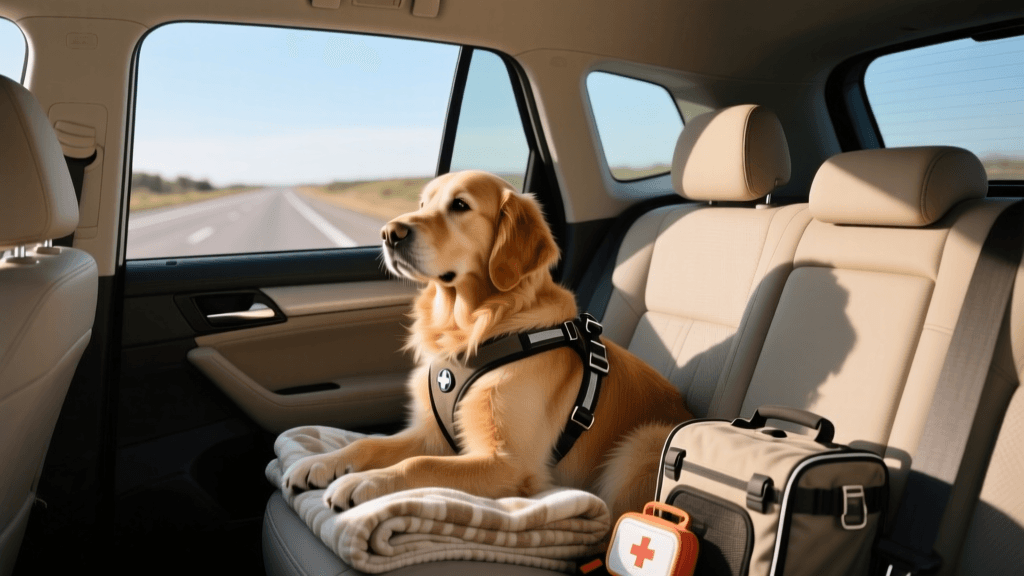
Before any behavioral training begins, you must ensure your dog is physically secure. According to the ASPCA, an unrestrained 50-pound dog in a 35 mph crash becomes a 1,500-pound projectile, posing a lethal risk to both the pet and the human passengers. The gold standard for pet travel safety is the Center for Pet Safety (CPS), an independent organization that conducts rigorous crash testing on pet travel gear.
Comparing Canine Car Restraint Options
| Restraint Type | Example Product | Est. Cost | Pros | Cons | Safety Rating |
|---|---|---|---|---|---|
| Crash-Tested Harness | Sleepypod Clickit Sport | $100 - $130 | Easy to use, doubles as walking harness | Not all dogs tolerate chest pressure | 5-Star (CPS Certified) |
| Hard-Sided Crate | Ruff Land Performance Kennel | $300 - $400 | Maximum protection, prevents roaming | Heavy, takes up cargo space | 5-Star (CPS Certified) |
| Cargo Barrier | Bushwacker Pet Barrier | $50 - $80 | Keeps dog out of front seat | Does not protect in a crash | Not Crash-Tested |
How to Measure Your Dog for a Crate
If you opt for a hard-sided crate, proper sizing is critical for safety. A crate that is too large allows the dog to be thrown around during sudden stops. Measure your dog from the tip of their nose to the base of their tail, and add exactly 4 inches. For height, measure from the top of their head to the floor and add 2 inches. This ensures they can stand and turn around, but not gain enough momentum to injure themselves during impact.
Step 2: Desensitize the Stationary Vehicle
If your dog pants, drools, or refuses to approach the car, you must break their negative emotional association. Start with the car parked in the driveway, engine off. We call this the 'Car is a Cafe' method. Spend 10 to 15 minutes a day for a week doing the following:
- Day 1-2: Toss high-value treats (like freeze-dried liver or boiled chicken breast) near the car. Do not force the dog inside. Let them eat and walk away.
- Day 3-4: Toss treats onto the car seat or into the crate. Praise calmly when they step inside to retrieve the food.
- Day 5-7: Introduce a lick mat (such as the Hyper Pet IQ Treat Mat, approx. $15) smeared with dog-safe peanut butter or plain Greek yogurt. Place it in their designated car spot. Let them lick for 5 minutes, then calmly end the session.
This protocol utilizes classical conditioning, pairing the previously scary environment with a highly rewarding, soothing activity.
Step 3: Introduce the Engine and Short Movements
Once your dog is happily entering the stationary car, it is time to add the sensory triggers of driving: sound and vibration.
- Session 1: Secure your dog in their restraint. Turn on the engine. Sit in the driver's seat for 3 minutes, feeding treats periodically. Turn the engine off and let the dog out.
- Session 2: Turn on the engine, put the car in reverse, back up 10 feet, and pull forward. Turn off the car and reward.
- Session 3: Drive to the end of the driveway and back. Keep the radio off and speak in a calm, low tone.
- Session 4: Drive around the block (approx. 3 minutes). End the drive at a fun location, like a nearby park, rather than the vet clinic.
Keep these early sessions under 10 minutes. If your dog shows signs of stress (panting, yawning, whining), you have progressed too quickly. Return to the previous step for a few more days.
Step 4: Manage Motion Sickness and Anxiety
Canine motion sickness is incredibly common, particularly in puppies whose inner ear structures are not fully developed. The American Kennel Club notes that anxiety can also trigger physical nausea, creating a vicious cycle. To break this cycle, implement the following management strategies:
- Fasting Protocol: Withhold solid food for 3 to 4 hours before a car trip. A slightly empty stomach significantly reduces the likelihood of vomiting. Provide a few ice cubes instead of a full water bowl right before departure.
- Pheromone Therapy: Spray Adaptil (a synthetic dog-appeasing pheromone) on your dog's car blanket or harness 15 minutes before loading them into the car. This mimics the calming pheromones of a nursing mother.
- Temperature Control: Keep the car cool, ideally around 68°F (20°C). Crack a window slightly to allow fresh air circulation and provide familiar scent markers from the outside environment.
- Veterinary Medication: For severe cases, consult your veterinarian about anti-nausea medications like Cerenia (maropitant citrate) or mild anti-anxiety supplements containing L-theanine or ginger root.
Step 5: Plan Your Route and Pit Stops
For trips longer than two hours, strategic planning is essential for your dog's physical and mental well-being. Dogs do not sweat like humans, and prolonged confinement can lead to dehydration and stiffness.
- The 2-Hour Rule: Stop every 2 to 3 hours for a 10-minute break. Allow your dog to walk on a leash, sniff, and relieve themselves.
- Hydration Station: Offer 4 to 8 ounces of fresh water at each stop using a collapsible silicone travel bowl.
- Never Leave Them Unattended: Even on mild days, the temperature inside a parked car can rise by 20 degrees in just 10 minutes, leading to fatal heatstroke.
The Ultimate Canine Travel Kit
Pack a dedicated tote bag that stays in the trunk. It should include:
- Collapsible water bowl and a sealed jug of fresh water
- Poop bags and enzymatic stain remover for accidents
- A familiar, unwashed blanket that smells like home
- An extra leash and a secure, well-fitted harness
- A canine first-aid kit (gauze, vet wrap, saline solution)
Troubleshooting Common Car Training Issues
My dog whines the entire ride: Whining is often an expression of frustration or anxiety. Ensure you are not accidentally reinforcing the behavior by talking to them or petting them while they whine. Ignore the vocalization, and only offer praise and treats during moments of silence.
My dog drools excessively: Excessive drooling is a primary physiological indicator of nausea or extreme fear. If drooling occurs before the car even moves, return to Step 2. If it occurs during movement, consult your vet for anti-nausea interventions as outlined in Step 4.
Conclusion
Patience is the most critical tool in your car training arsenal. Depending on your dog's history and temperament, achieving a completely stress-free car ride could take a few weeks or a few months. By prioritizing safety with CPS-certified gear, utilizing positive reinforcement, and managing the physical symptoms of motion sickness, you will eventually turn the car into your dog's favorite place to be. Happy travels!
priya-sutaria
All our authors care for dogs every day — read more of their work on the authors page.