DIY Backyard Agility Training: Homemade Obstacle Guide
Learn how to build DIY backyard agility obstacles for dog training. Save money with homemade jumps, weaves, and tunnels using household items.
Introduction to Backyard Agility Training
Agility training is one of the most exhilarating and rewarding activities you can share with your dog. It provides intense physical exercise, crucial mental stimulation, and a profound bonding experience. However, purchasing a full set of commercial agility equipment can easily cost anywhere from $300 to over $1,000. For many dog owners, this high barrier to entry makes the sport seem inaccessible. Fortunately, with a little creativity and some basic hardware store supplies, you can create a highly effective, safe, and engaging DIY backyard agility course for a fraction of the price.
According to the American Kennel Club (AKC), agility is a fast-paced sport where a handler directs a dog through an obstacle course in a race for both time and accuracy. While competitive regulations are strict, backyard training is all about building confidence, improving obedience, and having fun. In this comprehensive guide, we will explore how to build homemade agility obstacles, complete with exact measurements, material costs, and step-by-step training protocols.
Why Choose DIY Agility Equipment?
Building your own equipment offers several distinct advantages beyond just saving money. First, it allows for complete customization. You can adjust the height and width of obstacles to perfectly suit your dog's breed, size, and current skill level. Second, the process of building and training together fosters a unique sense of teamwork. Finally, DIY equipment is often lightweight and modular, making it easy to dismantle and store in a garage or shed when not in use.
"Agility is not just about speed; it is about the communication, trust, and bond between the handler and the dog. The equipment is simply the medium through which that relationship is expressed."
Step-by-Step Guide to Homemade Agility Obstacles
Below are three foundational obstacles you can build this weekend, complete with material lists, measurements, and training tips.
1. The Adjustable PVC Bar Jump
The bar jump is the most fundamental obstacle in agility. It teaches your dog to gauge distance, lift their paws, and follow directional cues.
Materials and Measurements:
- PVC Pipe (1/2-inch diameter): Two 18-inch pieces (bases), two 36-inch pieces (uprights), one 48-inch piece (crossbar).
- PVC T-Connectors: 2 pieces.
- PVC End Caps: 4 pieces (for the base feet).
- Paracord or Bungee Cord: To create adjustable jump cups.
- Estimated Cost: $12 - $18
- Build Time: 45 minutes
Assembly Instructions:
- Attach the T-connectors to the ends of the two 36-inch upright poles.
- Insert the 18-inch base pieces into the left and right sides of the T-connectors to form a stable 'T' shape.
- Cap the ends of the base pieces with end caps to prevent dirt and moisture from entering the pipes.
- Drill small holes every 4 inches up the sides of the uprights. Thread your paracord through these holes to create adjustable loops that will hold the 48-inch crossbar.
Training Tip:
Always start with the bar resting on the ground. Lure your dog over the bar using a high-value treat, rewarding them immediately on the other side. Gradually raise the bar in 2-inch increments only when your dog is confidently clearing the current height without knocking it down.
2. The 24-Inch Spaced Weave Poles
Weave poles are notoriously the most difficult obstacle to train, requiring immense focus and body awareness. The AKC Expert Advice on Agility Training emphasizes patience and positive reinforcement when introducing weaves.
Materials and Measurements:
- PVC Pipe (3/4-inch diameter): Six 40-inch pieces (the poles).
- Wooden Plank (2x4): One 12-foot long plank for the base.
- PVC Flanges or Pipe Straps: 6 pieces to secure the poles to the wood.
- Estimated Cost: $25 - $35
- Build Time: 1.5 hours
Assembly Instructions:
- Lay the 12-foot wooden plank flat on the ground.
- Measure and mark spots exactly 24 inches apart along the center line of the board. (Note: 24 inches is the standard regulation spacing for weave poles).
- Screw the PVC flanges or heavy-duty pipe straps into the marked spots.
- Screw the 40-inch PVC poles into the flanges. Ensure they are tight enough to stand upright but have a slight give if a dog bumps into them.
Training Tip (The Channel Method):
Do not force your dog to weave by bending the poles initially. Instead, use the "channel method" by staggering the poles slightly left and right, creating a wide hallway. Run your dog straight through the middle. Over several weeks, gradually push the poles closer to the center line until they form a straight line, naturally forcing the weaving motion.
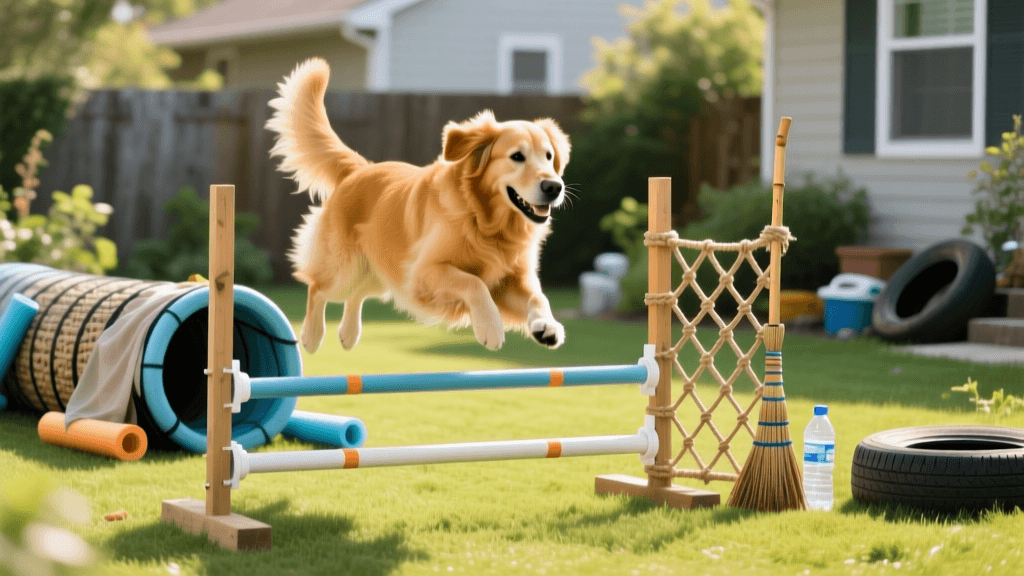
3. The Cardboard and Carpet Tunnel
Tunnels build confidence and speed. While commercial fabric tunnels are relatively inexpensive, you can build a sturdy, weather-resistant DIY version using reclaimed materials.
Materials and Measurements:
- Large Appliance Boxes: 2 or 3 (e.g., refrigerator or washing machine boxes).
- Remnant Carpet or Non-Slip Rug: To line the interior.
- Heavy-Duty Duct Tape and Zip Ties: For structural integrity.
- Estimated Cost: $5 - $10 (mostly for tape and carpet)
- Build Time: 1 hour
Assembly Instructions:
- Cut the top and bottom flaps off the boxes so they form open-ended rectangular tubes.
- Tape the boxes together end-to-end using heavy-duty duct tape, reinforcing the seams with zip ties punched through the cardboard.
- Staple or glue the carpet remnant to the inside floor of the tunnel. This provides crucial traction and prevents the cardboard from becoming slippery or muddy.
- Use landscaping stakes and bungee cords to anchor the outside of the tunnel to the ground so it doesn't tip over when your dog enters at full speed.
Training Tip:
Start by collapsing the tunnel to its shortest length (just one box). Have a helper hold your dog at the entrance while you stand at the exit with a favorite toy or treat. Call your dog enthusiastically. As they gain confidence, gradually extend the tunnel and add slight curves.
Cost and Effort Comparison Chart
Understanding the return on investment for DIY agility gear helps justify the weekend labor. Below is a comparison between homemade solutions and entry-level commercial kits.
| Obstacle Type | Estimated DIY Cost | Commercial Kit Cost | Build Time | Durability & Weather Resistance |
|---|---|---|---|---|
| Bar Jump | $15 | $60 - $120 | 45 Minutes | High (PVC is weatherproof) |
| 6 Weave Poles | $30 | $90 - $180 | 1.5 Hours | Medium (Wood base may need sealing) |
| Agility Tunnel | $10 | $80 - $150 | 1 Hour | Low (Cardboard degrades in rain) |
| Total (3 Items) | $55 | $230 - $450 | ~3.25 Hours | Varies by material choice |
Essential Safety and Training Protocols
When engaging in any canine sport, safety must remain your top priority. The American Veterinary Medical Association (AVMA) stresses the importance of monitoring joint health and preventing overexertion in active dogs.
- Respect Growth Plates: Puppies should never jump at full height or perform tight weave pole entries until their growth plates have fully closed, typically between 12 to 18 months of age depending on the breed. Keep jumps on the ground for puppies and focus on flat-work and tunnel training.
- Surface Matters: Never practice agility on concrete, asphalt, or slippery indoor flooring. Always set up your DIY course on short grass, packed dirt, or specialized rubber agility matting to prevent torn cruciate ligaments and pad abrasions.
- Warm-Up Routines: Just like human athletes, dogs need to warm up. Spend at least 5 to 10 minutes doing brisk walking, light trotting, and basic obedience stretches (like "sit pretty" or "bow") before introducing the obstacles.
- Keep Sessions Short: Agility requires immense mental focus. Limit training sessions to 10-15 minutes to prevent frustration and physical fatigue. Always end on a positive note with a jackpot reward.
Conclusion
Building a DIY backyard agility course is a deeply rewarding project that transforms your outdoor space into an interactive training ground. By utilizing affordable materials like PVC pipe and reclaimed wood, you can provide your dog with the physical and mental enrichment they crave without breaking the bank. Remember that the true value of agility lies not in the perfection of the equipment, but in the joy, communication, and teamwork you develop with your canine partner along the way. Grab your tools, gather some high-value treats, and start building your homemade agility empire today!
anouk-beaumont
All our authors care for dogs every day — read more of their work on the authors page.