DIY Backyard Agility Course: Build Dog Training Equipment
Learn how to build DIY backyard agility equipment for dog training. Save money with homemade jumps, weaves, and tunnels using PVC and wood.
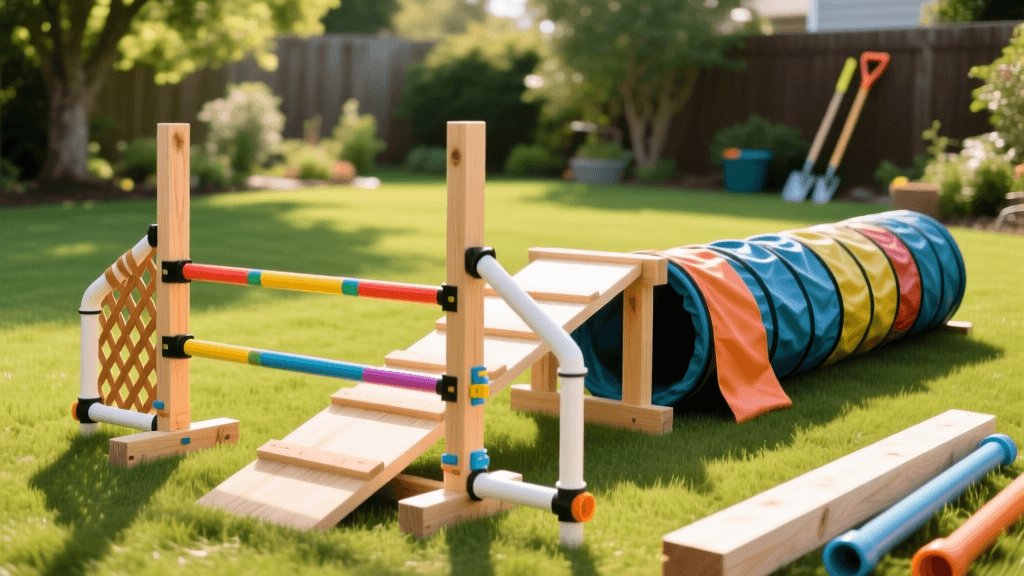
Transform Your Backyard into a Canine Training Haven
Agility training is one of the most effective ways to build obedience, enhance focus, and strengthen the bond between you and your dog. While commercial agility equipment can cost hundreds or even thousands of dollars, building your own DIY backyard agility course is a highly rewarding alternative. Not only does it save you a significant amount of money, but it also allows you to customize the equipment to your dog's specific size, skill level, and training needs. According to the American Kennel Club (AKC), agility is a fantastic outlet for a dog's natural energy and instincts, promoting both physical fitness and mental sharpness.
In this comprehensive guide, we will explore how to construct professional-grade, homemade agility obstacles using affordable materials from your local hardware store. We will also cover the behavioral conditioning techniques required to safely introduce your dog to these new challenges.
The Role of Agility in Behavioral Conditioning
Agility is not just about physical exercise; it is a profound tool for behavioral conditioning. Dogs that struggle with hyperactivity, anxiety, or lack of focus often benefit immensely from the structured environment of an agility course. Navigating obstacles requires a dog to engage in 'thinking work,' which tires their brain just as much as a long run tires their body. The Humane Society of the United States emphasizes that mental enrichment and interactive training are critical for preventing destructive behaviors born from boredom.
By using homemade equipment, you can control the difficulty level, ensuring your dog experiences success and builds confidence. This concept, known as 'shaping,' involves rewarding successive approximations of a desired behavior, which is foundational to modern, force-free dog training.
Essential Tools and Materials for Homemade Equipment
Before you begin building, you will need to gather some basic tools and materials. The beauty of DIY agility gear is that most components can be sourced from a standard hardware store for a fraction of the cost of retail kits.
- Power Drill and Bits: For making holes in PVC and wood.
- Hacksaw or PVC Pipe Cutter: For clean, precise cuts on plastic piping.
- Measuring Tape and Marker: Accuracy is vital for meeting standard training dimensions.
- 1-Inch PVC Pipes and Fittings: The backbone of most lightweight, weather-resistant DIY obstacles.
- 3/8-Inch Steel Rebar: Used to anchor lightweight PVC structures into the ground securely.
- High-Value Training Treats: Essential for luring and rewarding your dog during the conditioning phase.
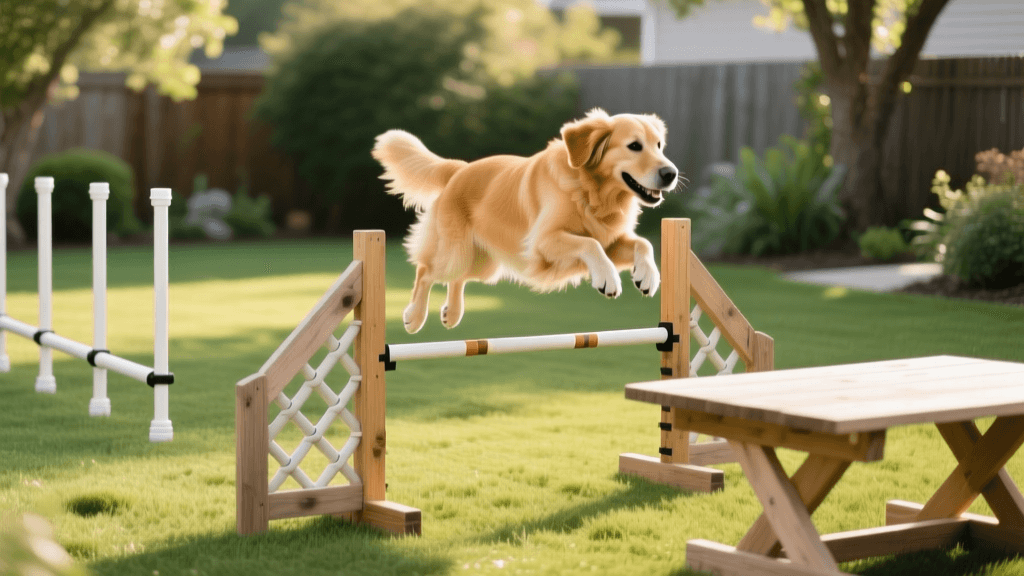
Step-by-Step: Building the Adjustable PVC Bar Jump
The bar jump is the most fundamental obstacle in agility. Building an adjustable version allows you to raise the height as your dog's confidence and jumping mechanics improve.
Materials Needed:
- Four 36-inch lengths of 1-inch PVC pipe (uprights)
- Two 48-inch lengths of 1-inch PVC pipe (base)
- Four PVC T-fittings and four PVC end caps
- One 48-inch length of 1/2-inch PVC pipe (the jump bar)
- Zip ties or bungee cords
Assembly Instructions:
- Build the Base: Attach a T-fitting to each end of the 48-inch base pipes. Insert short 6-inch PVC stubs into the side openings of the T-fittings to create a stable, wide footprint that prevents tipping.
- Create the Uprights: Drill evenly spaced holes (every 4 inches) up the length of the four 36-inch upright pipes. These holes will hold the jump bar.
- Connect Base to Uprights: Insert the uprights into the top opening of the T-fittings on your base.
- Set the Bar: Rest the 1/2-inch jump bar across the uprights. You can use zip ties looped loosely through the drilled holes to create a 'saddle' for the bar to rest on. This ensures the bar falls away safely if your dog misjudges the jump and clips it with their paws.
Step-by-Step: Homemade Weave Poles
Weave poles are notoriously difficult for dogs to master, making them an excellent exercise for focus and obedience. The The Kennel Club dictates that standard weave pole spacing should be exactly 24 inches apart to ensure proper canine biomechanics and safety.
Materials Needed:
- Six to twelve 40-inch lengths of 1-inch PVC pipe
- Six to twelve 12-inch lengths of 3/8-inch steel rebar
- A hammer or mallet
Assembly Instructions:
- Prepare the Ground: Choose a flat, grassy area in your yard to provide cushioning for your dog's spine and joints.
- Drive the Rebar: Using a mallet, drive the 12-inch rebar stakes into the ground, leaving about 4 inches exposed above the soil. Ensure each stake is exactly 24 inches apart in a straight line.
- Attach the Poles: Slip the 40-inch PVC pipes over the exposed rebar. The steel core provides rigidity, while the PVC exterior is safe and flexible if your dog bumps into it.
Training Tip: When first introducing weave poles, use the 'channel method' or 'guide wires' to help your dog understand the entry point without forcing their body into an unnatural posture.
Step-by-Step: The Landscaping Pipe Tunnel
Tunnels build a dog's confidence in enclosed, dark spaces. Commercial tunnels are expensive and heavy, but you can create an excellent DIY alternative using flexible landscaping drain pipe.
Materials Needed:
- 10 to 15 feet of 24-inch diameter flexible corrugated landscaping drain pipe
- Duct tape or heavy-duty tarp tape
- Sandbags or U-shaped landscaping stakes
Assembly Instructions:
- Smooth the Edges: Corrugated pipes can have sharp plastic burrs at the cut ends. Wrap the openings heavily with duct tape to create a smooth, safe rim for your dog to enter and exit.
- Secure the Tunnel: Lay the pipe out in a gentle curve or straight line. Use U-shaped stakes or sandbags every 3 feet to anchor the tunnel to the ground so it does not roll or collapse when your dog runs through it.
Cost Comparison: Commercial vs. DIY Agility Gear
One of the most compelling reasons to build your own equipment is the massive cost savings. Below is a comparison chart detailing the estimated costs of building your own gear versus purchasing entry-level commercial sets.
| Equipment Type | Commercial Cost (Avg) | DIY Cost (Estimate) | Estimated Savings |
|---|---|---|---|
| Adjustable Bar Jump | $120 - $180 | $25 - $35 | $85 - $155 |
| Weave Poles (Set of 6) | $150 - $250 | $40 - $55 | $110 - $195 |
| Agility Tunnel (15 ft) | $180 - $300 | $45 - $70 | $135 - $230 |
| Total Course Cost | $450 - $730 | $110 - $160 | $330 - $580 |
As the table illustrates, a DIY approach allows you to build a complete starter course for under $160, freeing up your budget for professional training classes, high-value rewards, and veterinary care.
Training Methodologies: Luring, Shaping, and Capturing
Having the equipment is only half the battle; teaching your dog to navigate it requires patience and proven behavioral conditioning techniques.
1. Luring
Luring involves using a high-value treat placed right at your dog's nose to guide them through an obstacle. This is highly effective for the tunnel and initial jump introductions. Stand at the exit of the tunnel, reach your hand in as far as you can, and use an enthusiastic voice to call your dog. Gradually reduce the distance your hand reaches into the tunnel until the dog is running through independently.
2. Shaping
Shaping is the process of rewarding small steps toward the final goal. For the weave poles, you might first reward your dog simply for looking at the first pole, then for taking a step toward it, then for walking through the first gap. Shaping builds deep cognitive engagement and problem-solving skills in your dog.
3. Capturing
Capturing involves waiting for your dog to offer a behavior naturally and then marking it with a clicker or a verbal 'Yes!' followed by a treat. If your dog naturally walks near the jump uprights, capture that attention to build a positive association with the equipment zone.
Safety, Joint Health, and Puppy Considerations
While agility is a phenomenal training tool, safety must always be the priority. Puppies under the age of 12 to 18 months (depending on the breed's expected adult size) should never be forced to jump full heights or perform tight weave pole entries. Their growth plates are still open, and high-impact activities can cause permanent orthopedic damage.
For puppies and senior dogs, keep all jump bars on the ground or at the lowest possible setting. Focus entirely on 'flatwork'—the handling, obedience, and focus exercises done around the obstacles without actually jumping. Teach your dog to sit on a 'contact zone' (a designated target mat) and wait for your release cue. This impulse control training is invaluable and translates directly to everyday obedience, such as waiting at doors or not bolting out of the car.
Conclusion
Building a DIY backyard agility course is an investment in your dog's physical health, mental well-being, and your mutual bond. By utilizing affordable materials like PVC pipe and landscaping supplies, you can create a safe, customizable training environment right at home. Remember that the true value of agility lies not in speed or competition, but in the communication, trust, and behavioral conditioning you develop with your dog along the way. Grab your drill, head to the hardware store, and start building your canine training haven today.
beth-carrasco
All our authors care for dogs every day — read more of their work on the authors page.