Build a DIY Backyard Agility Course for Dog Training
Learn to build a DIY backyard dog agility course with homemade jumps, weave poles, and tunnels. Save money and boost your pet's training today!
Why Build a DIY Dog Agility Course?
Agility training is one of the most rewarding activities you can share with your canine companion. It builds confidence, strengthens the bond between dog and handler, and provides an excellent outlet for pent-up physical and mental energy. However, purchasing a commercial-grade agility set can easily cost anywhere from $500 to over $2,000. For many dog owners, this price tag is a significant barrier to entry. Fortunately, with a little creativity and some basic hardware store materials, you can build a fully functional DIY backyard agility course for a fraction of the cost.
Building your own equipment offers distinct training advantages. You can customize the dimensions to suit your dog's specific size, breed, and skill level. Adjustable heights are particularly crucial for puppy training and senior dogs, ensuring joints are protected while they learn the foundational mechanics of the sport. According to the American Kennel Club (AKC), agility is a fantastic way to improve a dog's obedience, focus, and overall physical conditioning, making it an ideal backyard training project.
Essential Tools and Materials for DIY Agility Gear
Before heading to the hardware store, it is important to map out your course and gather the right supplies. Polyvinyl chloride (PVC) pipe is the gold standard for DIY agility equipment because it is lightweight, inexpensive, weather-resistant, and easy to cut and assemble without specialized tools.
| Material / Tool | Estimated Cost | Purpose |
|---|---|---|
| 1-inch PVC Pipe (10ft) | $4.00 each | Jump uprights and base frames |
| 3/4-inch PVC Pipe (10ft) | $3.00 each | Weave poles |
| PVC T-Connectors & End Caps | $1.50 each | Joining pipes and finishing bases |
| PVC Pipe Cutter | $15.00 | Clean, safe cuts without saws |
| Measuring Tape & Marker | $5.00 | Ensuring regulation spacing |
| U-Shaped Garden Stakes | $10.00 / pack | Anchoring tunnels and weaves |
Note: Prices are approximate and may vary based on your local hardware store and regional supply costs.
Step-by-Step Guide to Building Homemade Agility Equipment
1. The DIY PVC Jump
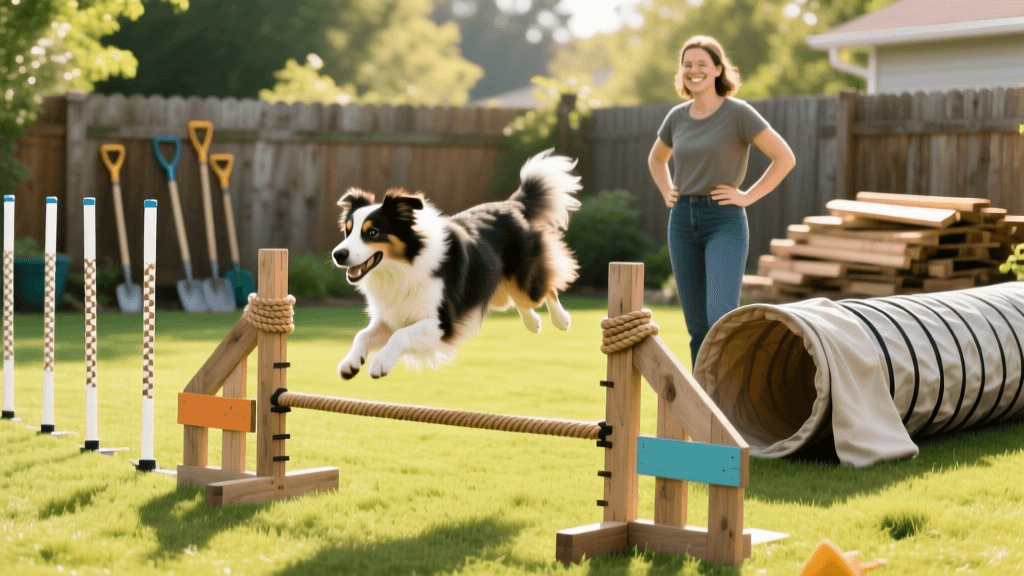
The jump is the most iconic piece of agility equipment and the easiest to build. A standard DIY jump consists of a base, two uprights, and a dislodgable jump bar.
Measurements and Assembly:
- The Base: Cut two pieces of 1-inch PVC to 24 inches each. Connect them using a T-connector in the center of a 36-inch crossbar. Add end caps to the feet to prevent the pipes from digging into your lawn.
- The Uprights: Cut two 36-inch pieces of 1-inch PVC. Insert them into the upward-facing T-connectors on your base.
- The Jump Bar: Cut a 36-inch piece of 1-inch PVC. To make it rest on the uprights, you can attach small pieces of pool noodle with zip ties to the uprights to create a cradle, or use specialized PVC jump cups if you prefer a more professional setup.
Training the Jump:
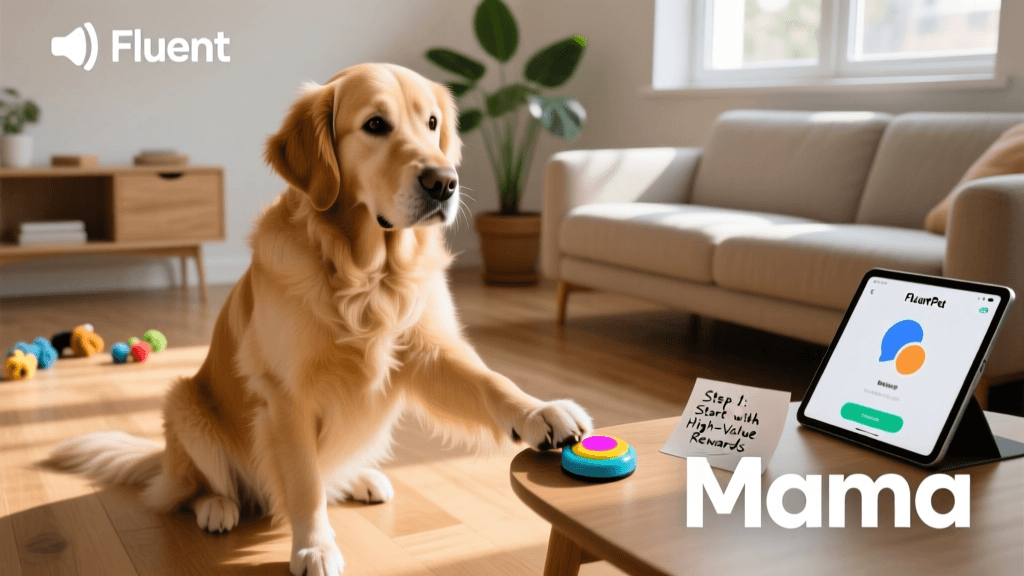
When introducing your dog to the jump, start with the bar resting directly on the ground. The Humane Society of the United States emphasizes the importance of positive reinforcement in early training stages. Use a high-value treat to lure your dog over the bar, pairing the action with a clear verbal cue like 'Over' or 'Jump'. Never force or pull your dog over the equipment. Once they confidently walk over the ground bar, gradually raise the height by a few inches at a time, always keeping the bar below your dog's elbow height during the initial learning phase.
2. Homemade Weave Poles
Weave poles are notoriously the most difficult obstacle for dogs to master, requiring intense behavioral conditioning and muscle memory. Building your own set allows you to space them out for easier initial training.
Measurements and Assembly:
- Cut twelve 36-inch lengths of 3/4-inch PVC pipe. These will serve as your upright poles.
- Cut eleven 24-inch lengths of 1-inch PVC pipe to serve as the base connectors.
- Using T-connectors, link the 24-inch base segments together in a straight line. Insert the 3/4-inch weave poles into the upward-facing T-connectors.
- Cap the ends of the base to prevent dirt and water from entering the pipes.
Training the Weave:
The standard regulation spacing for weave poles is 24 inches apart, as noted by the United States Dog Agility Association (USDAA). However, for DIY training, you can use the '2x2 method'. Start with just two poles. Stand at an angle so the dog naturally runs through the gap to get to a toy or treat on the other side. Once they master two poles, add two more, and gradually build up to twelve. This shaping technique prevents the dog from developing a habit of skipping poles, which is a common frustration in agility training.
3. The Classic DIY Tunnel
While you can build a tunnel out of flexible drainage pipe and wire hoops, the safest, most cost-effective DIY hack is to repurpose a children's pop-up play tunnel. These are widely available online or at toy stores for under $25 and are made of durable, dog-safe nylon.
Assembly and Anchoring:
A tunnel that moves or collapses while a dog is inside can cause severe fear and set your training back by months. To secure a pop-up tunnel, use U-shaped garden stakes or heavy-duty wire tent pegs. Loop the stakes over the fabric tunnel and drive them deep into the soil. For hard surfaces like concrete or artificial turf, use sandbags or cinder blocks to weigh down the tunnel's structural hoops.
Training the Tunnel:
Start with the tunnel fully compressed to just a few feet in length. Have a training partner hold your dog at the entrance while you stand at the exit. Call your dog enthusiastically using their name and the cue 'Tunnel!'. Reward them heavily the moment they exit. Gradually extend the tunnel to its full 10-to-15-foot length as their confidence grows.
Conditioning and Warm-ups: Safety First
Agility is a high-impact sport. Before asking your dog to tackle your new DIY course, it is vital to engage in proper physical conditioning and warm-ups. Just like human athletes, dogs need to prepare their muscles and joints for explosive movements.
Pro-Tip: Never allow a puppy whose growth plates have not yet closed (typically under 12 to 18 months, depending on the breed) to perform high jumps or tight weave pole entries. Focus on flatwork, tunnel runs, and low-impact obstacle familiarization to protect their developing skeletal structure.
Begin every training session with a brisk five-minute walk or a light game of tug to increase blood flow. Stretching exercises, such as 'cookie stretches' (luring your dog's nose to their hips and toes using a treat), can improve flexibility and prevent strains. Furthermore, always inspect your DIY PVC equipment before use. Check for cracks caused by UV exposure or extreme cold, and ensure no sharp plastic burrs remain from your cuts, which could scratch your dog's paws or snout.
Maximizing Your Backyard Training Sessions
Having a course in your backyard means you can train in short, highly effective bursts. Dogs learn best in sessions lasting 10 to 15 minutes. Instead of running the full course repeatedly, which can lead to exhaustion and frustration, isolate specific sequences. Practice the approach to the jump, or the entry to the weave poles, and then take a play break.
Remember to keep your handling cues consistent. Dogs read body language far better than they understand spoken words. Point your shoulders in the direction you want your dog to go, and use your outside arm to signal turns. By combining your homemade DIY equipment with structured, positive reinforcement training techniques, you will cultivate a focused, obedient, and incredibly happy agility partner right in your own backyard.
Conclusion
Building a DIY dog agility course is a highly rewarding weekend project that pays dividends in your dog's training and behavioral health. By utilizing affordable PVC materials and employing structured, reward-based training methods, you can create a safe, engaging environment that fosters obedience and physical fitness. Grab your PVC cutter, stock up on high-value treats, and start building your backyard training haven today.
anouk-beaumont
All our authors care for dogs every day — read more of their work on the authors page.