Budget DIY Dog Agility Training: Build a Backyard Course
Learn how to build a budget-friendly DIY dog agility course in your backyard. Train your dog with cheap, safe household items and expert tips.
Why Agility Training is Worth the Effort (and the Savings)
When it comes to dog training, agility is often viewed as an expensive sport reserved for professionals with sprawling facilities and high-end equipment. However, agility is fundamentally about communication, trust, and physical engagement between you and your dog. According to the ASPCA, dogs require regular physical and mental exercise to prevent behavioral issues stemming from boredom and pent-up energy. Agility provides both in spades, tiring out your dog's mind just as much as their body.
Professional agility classes can cost anywhere from $150 to $300 for a six-week session, not including the exorbitant fees for club memberships, specialized gear, or competition entries. By adopting a budget-friendly dog care mindset, you can replicate the core benefits of agility training right in your own backyard. Using inexpensive materials from your local hardware store and repurposed household items, you can build a fully functional, safe, and engaging agility course for under $30. This approach not only saves you hundreds of dollars but also allows you to train on your own schedule, reducing the stress of commuting to a training facility and keeping your dog in a comfortable, low-distraction environment.
Essential DIY Agility Equipment You Can Build for Under $30
You do not need competition-grade, heavy-duty aluminum equipment to teach your dog the fundamentals of agility. In fact, lightweight, DIY obstacles are often safer for beginners because they break away or collapse easily if your dog misjudges a jump. Here is how to build four essential obstacles on a strict budget.
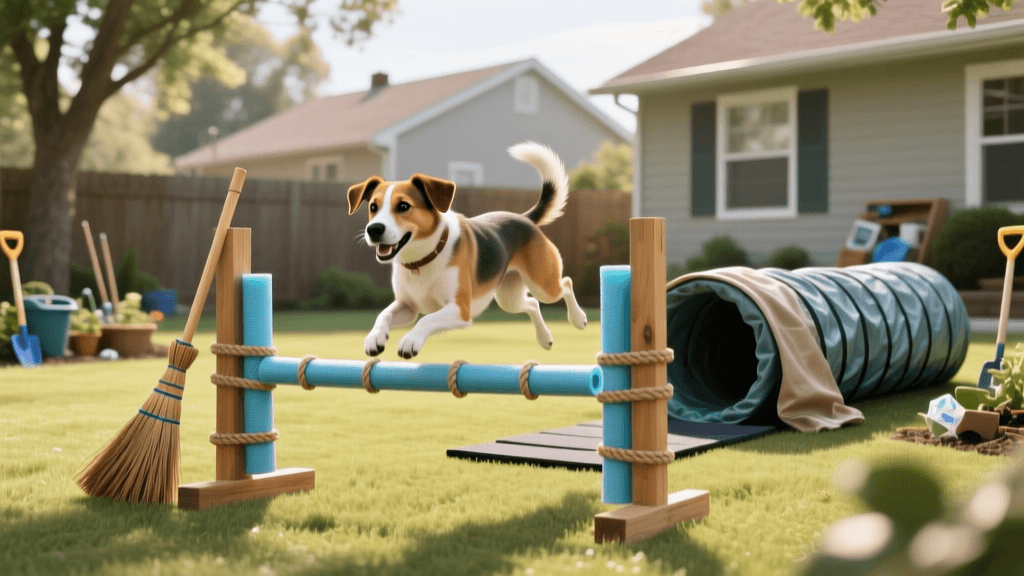
1. The PVC Jump (Cost: ~$12)
A standard jump is the cornerstone of any agility course. You can build a highly effective, adjustable jump using PVC pipes from any local hardware store.
- Materials: Three 10-foot lengths of 3/4-inch PVC pipe, four T-connectors, and four end caps.
- Measurements: Cut two 3-foot pieces for the uprights. Cut one 4-foot piece for the base, and one 4-foot piece for the crossbar. Use the remaining pipe to create adjustable support brackets.
- Assembly: Connect the base using T-connectors to form a stable T-shape or U-shape footpad. Insert the uprights. For the crossbar, simply rest it on top of the uprights using loose zip-ties or notched PVC fittings so that it falls to the ground if your dog hits it. This 'breakaway' feature prevents injuries.
2. The Hula Hoop Tire Jump (Cost: ~$5)
The 'tire' jump teaches your dog to focus on a specific opening and judge their distance.
- Materials: One standard plastic hula hoop ($2 at a dollar store), two wooden garden stakes or leftover PVC uprights, and heavy-duty bungee cords or zip-ties.
- Assembly: Drive the stakes into the ground slightly wider than the hoop. Use the bungee cords to suspend the hula hoop between the stakes. Bungee cords are ideal because they provide tension to keep the hoop upright but will snap or stretch if the dog clips the edge, ensuring a safe, budget-friendly setup.
3. The Weave Poles (Cost: ~$10)
Weave poles are notoriously difficult to train and expensive to buy. You can create a beginner set using garden supplies.
- Materials: 10 to 12 fiberglass or wooden garden stakes (often sold in packs of 10 for under $10 at garden centers).
- Measurements: Space the stakes exactly 24 inches apart in a straight line.
- Assembly: Push them securely into the soil. For beginners, you can use the 'channel method' by staggering the poles slightly to the left and right to create a wide channel for your dog to run through, gradually pushing them into a straight line as your dog's understanding improves.
4. The Cardboard Tunnel (Cost: Free to $5)
Tunnels are a dog favorite and incredibly easy to source for free.
- Materials: Large appliance boxes from a local furniture or appliance store (often given away for free) or heavy-duty moving boxes.
- Assembly: Cut the flaps off the ends of the boxes. Tape two or three boxes together using strong packing tape to create a 6-to-8-foot tunnel. To prevent the tunnel from collapsing or blowing away, place heavy rocks or bricks on the outside seams. As your dog gains confidence, you can introduce a slight curve by angling the boxes.
Cost Comparison: Professional Classes vs. DIY Backyard Course
Understanding the financial and practical differences between professional training and DIY methods can help you make the best choice for your household budget. Below is a breakdown of what to expect from both avenues.
| Feature | Professional Agility Classes | Budget DIY Backyard Course |
|---|---|---|
| Initial Cost | $150 - $300+ (per session) | Under $30 (one-time materials) |
| Equipment Quality | Competition-grade, heavy-duty | Lightweight, safe, easily replaceable |
| Schedule Flexibility | Fixed weekly class times | Train anytime, 24/7 access |
| Distraction Level | High (other dogs, people, noises) | Low (controlled home environment) |
| Instructor Feedback | Real-time professional correction | Self-guided via free online tutorials |
Step-by-Step Training Guide for Beginners
Building the equipment is only half the battle; teaching your dog to navigate it requires patience and positive reinforcement. The American Kennel Club (AKC) emphasizes that agility should always be a fun, positive experience, never forced. Here is how to introduce your dog to your new DIY course on a budget.
Step 1: Luring and Shaping
Start with the tunnel, as it is usually the most intuitive obstacle for dogs. Collapse the cardboard tunnel to just one box length. Stand at the exit, toss a high-value treat inside, and encourage your dog to walk through to get it. Gradually add more boxes to increase the length. For the jumps, start with the PVC crossbar resting directly on the grass. Lure your dog over the bar using a treat in your hand, rewarding them the moment all four paws clear the obstacle. Never punish a dog for knocking a bar down; simply reset it and try again.
Step 2: Adding Verbal Cues
Once your dog is confidently lured over or through an obstacle, introduce a verbal cue just as they begin the action. Use short, distinct words like 'Over,' 'Tunnel,' or 'Weave.' According to AKC Expert Advice on Training, keeping training sessions short—around 5 to 10 minutes—is crucial for maintaining your dog's enthusiasm and preventing mental fatigue.
Step 3: Chaining Obstacles
Once your dog masters individual obstacles, begin placing them close together. Ask for a 'Tunnel,' and as they exit, immediately guide them toward the 'Jump.' Reward heavily for completing the sequence. This teaches your dog to look to you for direction and builds the flow necessary for true agility runs.
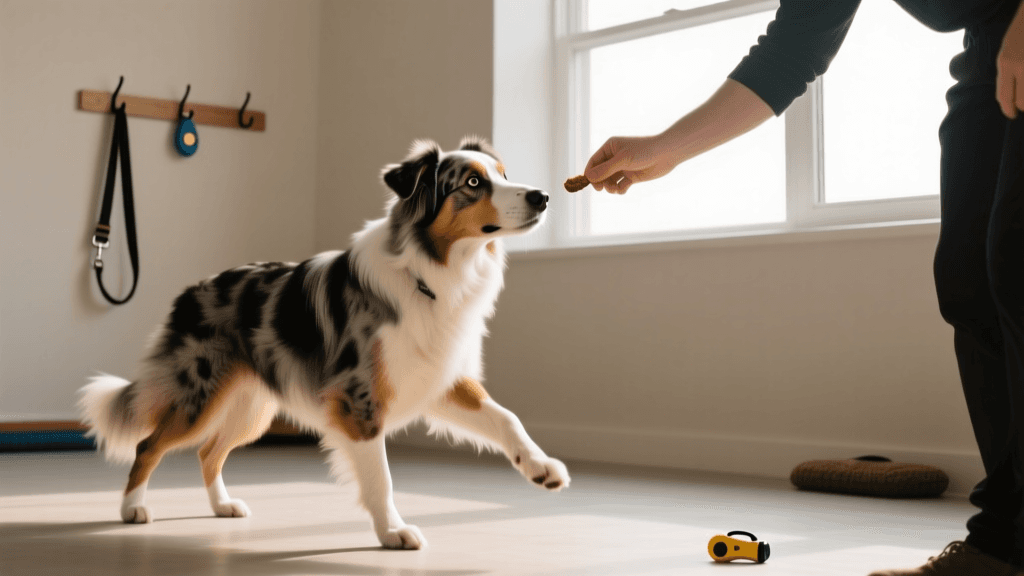
Budget-Friendly Treats and Rewards
Agility training requires a high rate of reinforcement, which means you will be handing out a lot of treats. Commercial training treats can quickly drain your wallet and often contain unnecessary fillers. To maintain a budget-friendly dog care routine, utilize these cost-effective, healthy alternatives:
- Daily Kibble Allocation: Dedicate 20% of your dog's daily kibble allowance exclusively for training. If your dog is highly food-motivated, their regular meals are enough to keep them working hard.
- Boiled Chicken Breast: Buying chicken breast in bulk, boiling it, and chopping it into pea-sized pieces is significantly cheaper per ounce than commercial freeze-dried treats. It is high-value, low-fat, and easy to digest.
- Homemade Sweet Potato Chews: Slice sweet potatoes thinly and bake them at a low temperature (250°F) for 2-3 hours until chewy. Sweet potatoes are incredibly cheap, rich in fiber, and make excellent long-lasting rewards for the end of a training session.
Note: Always factor training treats into your dog's daily caloric intake to prevent obesity, which can lead to expensive veterinary bills for joint and metabolic issues down the line.
Safety First: Keeping Your Dog Safe on a Budget
Saving money on equipment should never mean compromising on your dog's physical safety. Agility is a high-impact sport, and proper precautions are non-negotiable.
- Surface Matters: Never practice jumps or weave poles on concrete, asphalt, or slippery hardwood floors. These surfaces lack shock absorption and can cause severe joint damage or torn ligaments. Always train on grass, dirt, or budget-friendly interlocking foam mats if training indoors.
- Age Restrictions: Puppies and young dogs have open growth plates that are highly susceptible to injury. Do not allow dogs under 12 to 18 months of age to jump higher than their elbow height or perform repetitive weave pole entries. Focus on flatwork, tunnels, and ground-level targeting until they are fully mature.
- Warm-Up Routines: Just like human athletes, dogs need to warm up before sprinting and jumping. Spend 5 minutes doing light jogging, figure-eights through your legs, and gentle stretching tricks (like 'spin' and 'bow') to increase blood flow to their muscles.
Conclusion
Agility training does not require a massive financial investment to be effective, safe, and deeply rewarding. By embracing budget-friendly dog care principles, you can construct a DIY backyard course that challenges your dog mentally and physically while strengthening your bond. With a few PVC pipes, some cardboard boxes, and a pocket full of boiled chicken, you have everything you need to start your agility journey today.
tom-renshaw
All our authors care for dogs every day — read more of their work on the authors page.