Understanding Leash Reactivity: A Step-by-Step Training Guide
Discover the psychology behind leash reactivity and follow our step-by-step counter-conditioning guide to transform your dog's daily walks.
Walking your dog should be a relaxing bonding experience, but for owners of leash-reactive dogs, it often feels like navigating a minefield. Barking, lunging, and pulling at the end of the leash are common behavioral issues that can leave both the dog and the handler feeling stressed and exhausted. However, to effectively modify this behavior, we must first understand the canine psychology driving it. Leash reactivity is rarely about outright aggression; it is typically rooted in fear, anxiety, or barrier frustration.
In this comprehensive guide, we will explore the psychological triggers behind leash reactivity and provide a step-by-step counter-conditioning and desensitization (CC&D) training plan. By changing how your dog feels about their triggers, you can transform chaotic walks into peaceful outings.
The Psychology of Leash Reactivity: Fear vs. Barrier Frustration
According to behaviorists at the ASPCA, reactivity is often mislabeled by the public as aggression. In reality, a reactive dog is usually experiencing an amygdala hijack—a physiological fight-or-flight response triggered by a perceived threat. When a dog is off-leash and spots something scary, their natural instinct is to flee and create distance. The leash removes the 'flight' option, leaving the dog feeling trapped and forcing them to choose 'fight' (barking and lunging) to drive the threat away.
Conversely, barrier frustration occurs in highly social dogs who desperately want to greet other dogs or people but are physically restrained by the leash. This thwarted excitement quickly boils over into frantic barking and pulling. Understanding whether your dog is reacting out of fear (wanting distance) or frustration (wanting proximity) is crucial, though the foundational step-by-step training protocol for both remains remarkably similar: change the emotional response to the trigger.
Essential Gear for Reactive Dog Training
Before beginning your training journey, you must equip yourself with the right tools. The American Kennel Club (AKC) emphasizes that punishment-based tools like prong collars or e-collars can exacerbate fear-based reactivity by adding pain to an already stressful situation. Instead, opt for force-free, management-focused gear.
- Front-Clip Harness ($25 - $35): A front-clip harness (such as the Rabbitgoo No-Pull or Freedom No-Pull Harness) gently redirects your dog's momentum toward you when they lunge, preventing them from utilizing their full chest strength to pull.
- 6-Foot Biothane Leash ($20 - $40): Biothane is waterproof, easy to clean, and provides a secure grip. Avoid retractable leashes entirely; they teach dogs that pulling extends the leash and offer zero control in an emergency.
- High-Value Treat Pouch ($15 - $25): A quick-access pouch (like the Outward Hound Treat Pouch) worn on your hip ensures you can deliver rewards within 1.5 seconds of the desired behavior.
- High-Value Reinforcers ($10 - $20): Dry kibble will not work in high-distraction environments. Use freeze-dried beef liver, boiled chicken breast, or string cheese. The treats must be pea-sized to prevent your dog from getting full too quickly.
Step-by-Step Counter-Conditioning and Desensitization (CC&D)
Counter-conditioning changes the dog's emotional response, while desensitization involves gradual exposure to the trigger at a low intensity. Veterinary behaviorists recommend managing the dog's environment to keep them under threshold, a core tenet of Fear Free Pets certification programs. Here is how to execute the 'Engage-Disengage' game, popularized by Leslie McDevitt's Control Unleashed methodology.
Step 1: Map Your Dog's Threshold Distance
Your dog's 'threshold' is the distance at which they notice a trigger but do not react with barking or lunging. For some dogs, this is 50 feet; for others, it is 200 feet. You must start all training sessions at least 10 feet outside of this threshold. If your dog is staring intensely, panting heavily, or refusing treats, you are too close.
Step 2: The Engage-Disengage Game
Find a quiet park or a large empty parking lot where you can control the distance to triggers (like distant dogs or people).
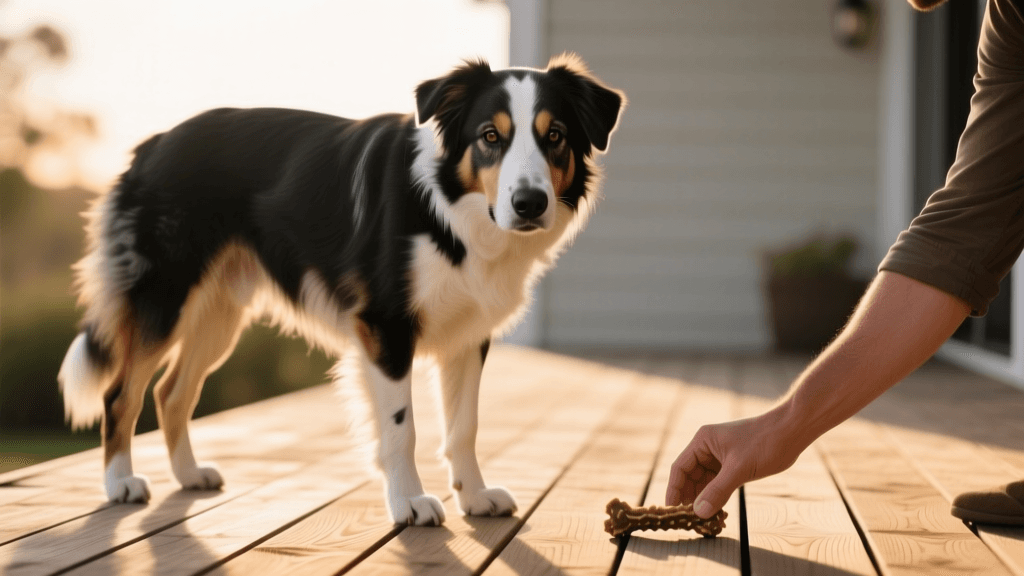
- Engage: The moment your dog looks at the trigger, mark the behavior with a verbal 'Yes!' or a clicker within 0.5 seconds.
- Disengage: Immediately deliver a high-value treat. Your dog will turn away from the trigger to eat the treat. This builds a new neural pathway: Seeing a strange dog = I turn to my human for chicken.
- Repeat: Do this 10 to 15 times per session, keeping sessions short (10-15 minutes maximum) to prevent cortisol buildup.
Step 3: The Emergency U-Turn
Sometimes, a trigger will appear unexpectedly, pushing your dog over threshold. You need an escape route. Teach the 'Let's Go!' cue in a low-distraction environment first. Say 'Let's Go!', turn 180 degrees, and run three steps away, dropping a handful of treats on the ground. When a surprise dog rounds the corner on a walk, immediately cue 'Let's Go!' to create distance before the amygdala hijack occurs.
The 4-Week Reactive Dog Training Schedule
Consistency is vital for rewiring the canine brain. Below is a structured 4-week progression plan. Remember, you can only move to the next phase if your dog remains relaxed and readily accepts treats at the current phase.
| Week | Distance to Trigger | Primary Goal | Treat Frequency | Session Length |
|---|---|---|---|---|
| Week 1 | Sub-threshold (e.g., 100+ ft) | Mark and reward for simply looking at the trigger. | 1 treat per look (Continuous) | 10 mins, 2x/day |
| Week 2 | Sub-threshold (e.g., 80 ft) | Dog voluntarily disengages and looks at handler. | Jackpot (3-5 treats) for voluntary check-ins | 15 mins, 1x/day |
| Week 3 | Approaching threshold (e.g., 50 ft) | Maintain focus on handler while trigger is moving. | Variable ratio (treat every 2nd or 3rd look) | 15 mins, 1x/day |
| Week 4 | Mild threshold testing (e.g., 30 ft) | Passing triggers on the opposite side of the street. | Continuous high-value rewards during the pass | 20 mins, 1x/day |
Tracking Progress and Understanding Canine Body Language
Success in CC&D is not just measured by the absence of barking; it is measured by the presence of relaxed body language. You must become fluent in canine calming signals and stress indicators. If your dog displays the following signs, they are nearing their threshold, and you must increase distance immediately:
- Whale Eye: Showing the whites of their eyes while keeping their head turned away from the trigger.
- Lip Licking and Yawning: When not related to food or sleepiness, these are classic appeasement behaviors indicating internal stress.
- Piloerection: Hair standing up on the back and neck (hackles).
- Tail Carriage: A stiff, high, vibrating tail or a tightly tucked tail both indicate high arousal and anxiety.
- Recovery Time: A major metric of success is how quickly your dog 'bounces back' after a trigger passes. In Week 1, it might take 5 minutes for their heart rate to settle. By Week 8, a successful dog will shake off the stress and look for a treat within 5 seconds.
Common Training Mistakes to Avoid
Even with the best intentions, handlers often make errors that inadvertently reinforce reactivity or flood the dog with fear. Avoid these common pitfalls:
1. Pushing Past the Threshold
If your dog is barking, lunging, or refusing high-value treats like roast chicken, learning has stopped. The thinking part of the brain (the prefrontal cortex) is offline. Do not try to ask for a 'sit' or 'watch me' in this state. Simply execute your Emergency U-Turn and increase distance.
2. The 'Heel' Expectation
Many owners expect a reactive dog to heel perfectly past a trigger. This is an advanced obedience skill that requires immense focus. During the rehabilitation phase, allow your dog to sniff, look around, and move loosely on the leash. Sniffing naturally lowers a dog's heart rate and promotes relaxation.
3. Inconsistent Environments
Training in a busy downtown area on day one will set your dog up to fail. Start in your living room, move to the backyard, then the front yard, then a quiet cul-de-sac, and finally a park. Gradually increase the criteria only when the dog is succeeding at the current level.
Conclusion
Understanding leash reactivity requires empathy and a shift in perspective. Your dog is not trying to be dominant or stubborn; they are struggling to cope with overwhelming emotions in a constrained environment. By utilizing proper force-free gear, respecting your dog's threshold, and diligently applying the Engage-Disengage counter-conditioning protocol, you can help your dog feel safe. Patience, consistency, and high-value rewards are your best tools in transforming your leash-reactive dog into a confident, relaxed walking companion.
jonas-cole
All our authors care for dogs every day — read more of their work on the authors page.