Step-by-Step Guide to Stress-Free Dog Nail Trimming
Learn how to train your dog for stress-free nail trimming with our step-by-step cooperative care guide. Includes tools, timing, and expert tips.
Why Cooperative Nail Care Matters for Canine Health
Regular nail maintenance is a critical, yet frequently overlooked, component of your dog's overall health and wellbeing. When a dog's nails grow too long, they can alter the animal's natural posture, leading to splayed feet, joint pain, and long-term orthopedic issues. According to the VCA Animal Hospitals, overgrown nails push the toe joints out of alignment, which can cause severe arthritis and mobility problems over time.
Despite its importance, nail trimming is a major source of anxiety for both dogs and their owners. Traditional restraint methods often lead to fear, struggling, and even aggression. This is where cooperative care comes in. Cooperative care is a force-free training methodology that empowers your dog to willingly participate in their own grooming. By breaking the process down into manageable, step-by-step phases, you can transform nail trimming from a traumatic wrestling match into a calm, rewarding bonding experience.
Understanding the Anatomy of a Dog's Nail
Before you begin training, you must understand what you are cutting. A dog's nail consists of two main parts:
- The Shell: The hard, outer keratin layer that is safe to cut.
- The Quick: The sensitive, blood-rich nerve supply inside the nail. Cutting the quick causes pain and bleeding.
In dogs with white or light-colored nails, the quick is easily visible as a pinkish-red core. In dogs with black or dark nails, the quick is hidden. The American Kennel Club (AKC) advises trimming dark nails in tiny, millimeter-sized increments. When you look at the cross-section of the freshly cut nail, a chalky white or gray center means you are safe. If you see a dark, glossy, or pinkish dot in the center, stop immediately—you are approaching the quick.
Essential Tools for Canine Nail Care
Selecting the right equipment is crucial for a smooth training process. Below is a comparison of the most common nail care tools, including estimated costs and best use cases.
| Tool Type | Product Example | Est. Cost | Pros & Cons | Best For |
|---|---|---|---|---|
| Scissor Clippers | Safari Professional Nail Trimmers | $15 - $25 | Pros: Clean cuts, easy grip. Cons: Can crush thick nails if dull. |
Medium to large breeds with thick nails. |
| Guillotine Clippers | Resco Original Guillotine | $10 - $18 | Pros: Lightweight. Cons: Blades dull quickly, hard to see cutting line. |
Small to medium breeds with softer nails. |
| Rotary Grinders | Dremel 7300-PT Pet Grooming Tool | $30 - $45 | Pros: Smooth edges, no pinching. Cons: Noise/vibration can scare dogs. |
Dogs fearful of the 'snip' sensation; thick nails. |
| Scratchboards | DIY Sandpaper Board or Nail Clutch | $20 - $35 | Pros: Dog does the work, zero restraint. Cons: Only files front nails easily. |
Highly active dogs; extreme clipper phobia. |
Note: Always keep a container of styptic powder (like Kwik Stop, approx. $8) on hand to instantly clot blood if you accidentally nick the quick.
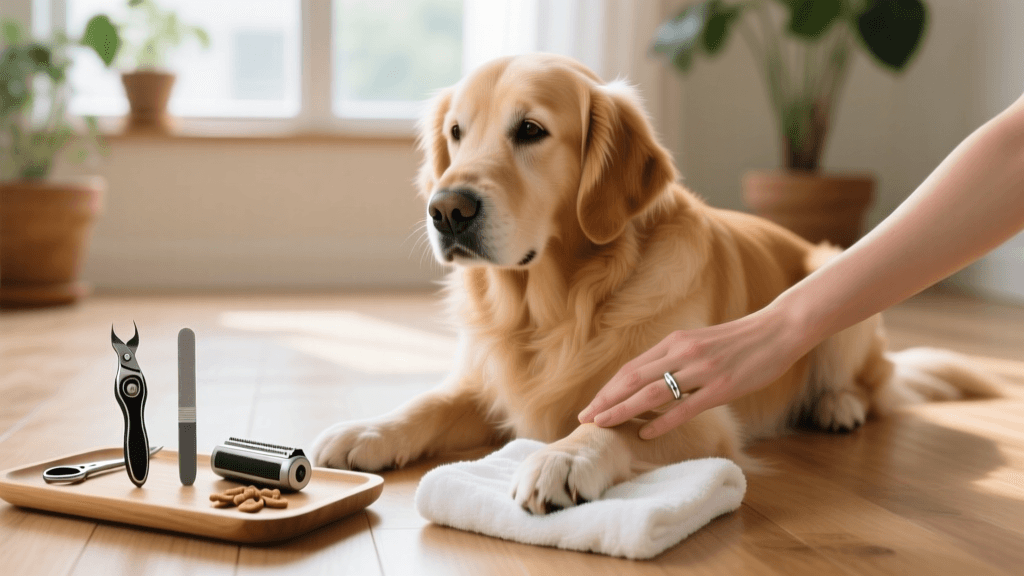
Step-by-Step Training Guide to Cooperative Nail Trimming
This training protocol requires patience. Keep all training sessions brief—3 to 5 minutes maximum—to prevent mental fatigue and frustration. Use high-value treats such as boiled chicken breast, freeze-dried liver, or squeeze cheese.
Phase 1: Desensitization to the Tools (Days 1-5)
Goal: Change the dog's emotional response to the sight of the nail clippers or Dremel.
- Place the nail clippers on the floor or a low table.
- The moment your dog looks at the clippers, mark the behavior with a clicker or a verbal 'Yes!' and toss a high-value treat.
- Repeat this 10-15 times per session. Do not attempt to touch the dog with the tool.
- Progression: Once the dog happily approaches the clippers, begin holding the tool in your hand while feeding treats continuously. When the tool goes out of sight, the treats stop.
Phase 2: Paw Handling and Consent (Days 6-10)
Goal: Teach the dog to tolerate paw manipulation and offer a 'consent' behavior.
- Sit with your dog in a comfortable, non-slip environment (use a yoga mat or carpet).
- Gently reach toward your dog's paw. If they allow you to touch it, mark and reward.
- Gradually increase the criteria: touch the paw, then hold the paw, then gently isolate a single toe.
- The Consent Test: Introduce a 'chin rest' or 'mat target'. Ask your dog to place their chin on a designated cushion or target mat. This becomes their 'green light' for grooming. If they lift their head or pull their paw away, stop immediately. This teaches the dog that they have control, which drastically reduces panic and defensive aggression.
Phase 3: Tool Introduction and Sound Desensitization (Days 11-15)
Goal: Introduce the physical sensation and sound of the tool without cutting.
- For Scissor/Guillotine Clippers: Hold a single toe (while the dog is on their consent target). Gently tap the clippers against the nail. Mark and reward. Open and close the clippers near the nail to simulate the 'snip' sound, then reward.
- For Rotary Grinders (Dremel): The sound and vibration are major triggers. Start by turning the Dremel on in another room while feeding your dog treats. Over several days, bring the running Dremel closer. Once the dog is relaxed near the noise, turn it off and gently touch the side of the plastic casing (not the spinning head) to the dog's nail. Reward heavily.
Phase 4: The First Trim (Day 16 and Beyond)
Goal: Successfully trim the nail while maintaining a low-stress environment.
- Set up your station with treats, styptic powder, and your chosen tool.
- Ask for your dog's consent behavior (e.g., chin rest).
- Isolate one toe. Position the clippers at a 45-degree angle, avoiding the quick.
- Take off only 1 millimeter. Mark, reward, and release the dog from the consent position.
- For the first week of actual trimming, only trim one or two nails per session. It is far better to do one nail a day for a week than to force a full pawdicure and ruin the dog's trust.
Recognizing and Responding to Stress Signals
Even with careful cooperative care training, dogs can become overwhelmed. The ASPCA emphasizes the importance of reading canine body language to prevent bites and trauma. Watch for these subtle signs of stress:
- Lip licking or yawning (when not tired)
- Whale eye (showing the whites of the eyes)
- Panting in a cool environment
- Freezing or stiffening of the body
- Tucked tail or pinned ears
Trainer's Rule of Thumb: If you see three or more stress signals, the session is over. Put the tools away, give your dog a decompression walk, and take a step back in your training phases the next day.
First Aid: What to Do If You Cut the Quick
Accidents happen, even to professional groomers. If you cut the quick, your dog will likely yelp and the nail will bleed profusely. Do not panic. Your dog will mirror your emotional state.
- Calmly restrain the paw with a gentle but firm grip.
- Dip a pinch of styptic powder (like Kwik Stop) directly onto the bleeding tip of the nail.
- Apply gentle, continuous pressure with your finger or a cotton pad for 5 to 10 seconds.
- If bleeding persists, reapply the powder and hold for another 10 seconds.
- Once the bleeding stops, offer a 'jackpot' reward (a large handful of high-value treats) to end the session on a positive note. Avoid hard surfaces or vigorous running for 30 minutes to prevent the clot from dislodging.
Alternative Options for Severe Phobias
If your dog exhibits extreme fear, panic, or aggression despite weeks of step-by-step cooperative care training, do not force the issue. Chronic stress suppresses the immune system and damages the human-animal bond. In these cases, consult a certified fear-free groomer or a veterinary behaviorist. Many veterinary clinics now offer 'Fear Free' grooming appointments, which may utilize temporary anti-anxiety medications like Trazodone or Gabapentin to safely facilitate nail care while a long-term desensitization protocol is developed.
Conclusion
Teaching your dog to accept nail trimming is a marathon, not a sprint. By utilizing cooperative care techniques, investing in the right tools, and respecting your dog's consent and stress signals, you can protect their orthopedic health without compromising their mental wellbeing. Remember that every positive, low-stress interaction builds a foundation of trust that will benefit your dog's veterinary and grooming care for the rest of their life.
marcus-aldridge
All our authors care for dogs every day — read more of their work on the authors page.