12-Week Leash Reactivity Progression Plan for Rescue Dogs
Transform your rescue dog's walks with our 12-week leash reactivity progression plan. Learn thresholds, treat values, and desensitization techniques.

Understanding Leash Reactivity and the Threshold Concept
Bringing home a rescue dog is a deeply rewarding experience, but it often comes with unique behavioral challenges. One of the most common and stressful issues new owners face is leash reactivity—manifesting as lunging, barking, or freezing when encountering other dogs, cyclists, or strangers while on a walk. Reactivity is rarely rooted in true aggression; more often, it is a fear-based response or a result of barrier frustration. To successfully rehabilitate a reactive rescue dog, you cannot simply rely on sporadic training sessions. You need a structured, measurable training progression plan that systematically rewires your dog's emotional response to triggers.
According to the ASPCA's comprehensive dog training resources, positive reinforcement and desensitization are the gold standards for modifying fear-based behaviors. The cornerstone of this progression plan is understanding your dog's 'threshold.' The threshold is the exact distance at which your dog notices a trigger but remains cognitively engaged and capable of learning. Once a dog crosses that invisible line and enters the 'red zone,' the amygdala hijacks their brain, and no amount of treats or commands will penetrate. This 12-week plan is designed to keep your dog strictly under threshold while gradually shrinking their reactivity bubble.
Essential Gear and Budgeting for Success
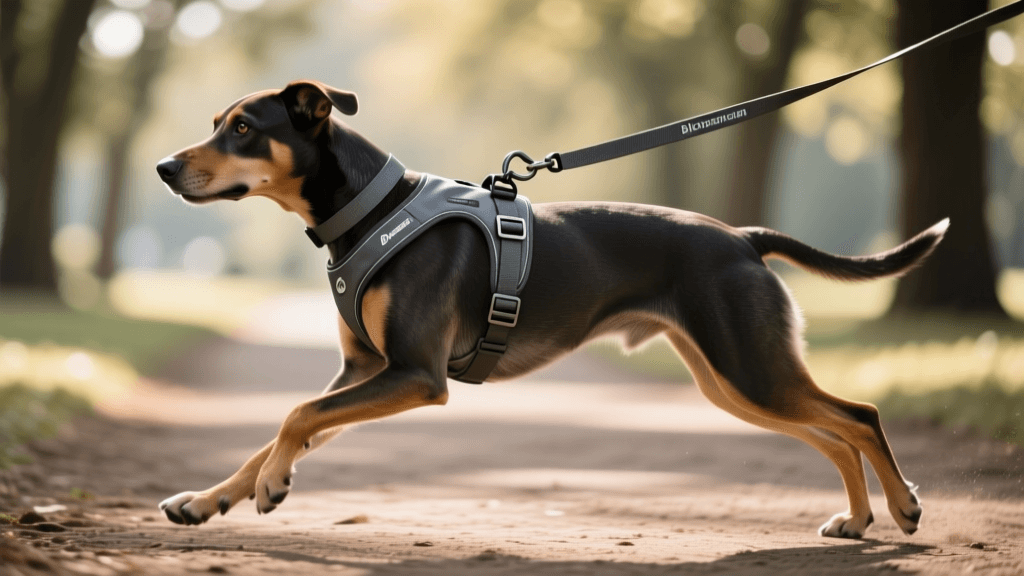
Before initiating the progression plan, you must equip yourself with the right tools. Relying on standard nylon collars or retractable leashes will actively sabotage your training by adding physical tension and reducing your control. Budget approximately $100 to $130 for the following foundational gear:
- Rabbitgoo No-Pull Dog Harness ($25 - $30): A front-clip harness is non-negotiable for reactive dogs. If your dog lunges, the front clip gently redirects their momentum back toward you, preventing them from gaining the physical leverage needed to pull.
- 6-Foot Biothane Leash and 30-Foot Long Line ($45 total): Biothane is waterproof, easy to sanitize, and provides a secure grip even when wet. Avoid retractable leashes entirely, as they teach dogs that pulling yields more freedom.
- Ruffwear Treat Trader Pouch ($25): Timing is everything in reactivity training. You need a treat pouch with a magnetic closure or quick-access opening that allows you to deliver rewards within two seconds of a marked behavior.
- High-Value and Low-Value Treats ($20 - $30): Stock up on Zuke's Mini Naturals ($6 per bag) for low-distraction indoor work, and Stella & Chewy's Freeze-Dried Beef Liver ($15 per bag) for high-stakes outdoor exposure. The treat value must match the difficulty of the environment.
The 12-Week Leash Reactivity Progression Plan
Phase 1: Weeks 1-3 (Baseline and Indoor Engagement)
The first three weeks focus entirely on building a robust reinforcement history in a zero-distraction environment. Your goal is to teach your dog that engaging with you is the most rewarding activity available. Spend 10 minutes daily playing the 'Find It' game: toss a piece of Zuke's Mini Natural onto the floor and say 'Find it!' This builds a positive association with sniffing the ground, which will serve as an emergency management tool later. Next, practice the 'Name Game.' Say your dog's name once. The exact second they make eye contact, mark the behavior with a crisp 'Yes!' and deliver a treat within two seconds. Repeat this 50 times per session until the eye contact is instantaneous and automatic.
Phase 2: Weeks 4-6 (Outdoor Threshold Mapping)
Transition to a quiet outdoor environment, such as an empty park at dawn. Attach the 30-foot long line to give your dog space to decompress. Your sole objective in Phase 2 is data collection. When a trigger (e.g., a distant dog) appears, observe your rescue's body language. Are their ears pinned? Is their tail stiff? Are they refusing your high-value freeze-dried liver? If yes, you are over threshold. Use a physical marker (like a tree or a parked car) to measure the distance. If your dog reacts at 30 feet, your working threshold is 40 feet. Spend these three weeks walking exclusively at or beyond this safe distance, rewarding your dog heavily for offering voluntary check-ins (looking at you without being prompted).
Phase 3: Weeks 7-9 (The Engage-Disengage Game)
Now that you know your threshold distance, you will implement the Engage-Disengage protocol. Stand at your mapped safe distance (e.g., 45 feet) from a predictable trigger, like a neighbor walking their dog. Step 1 (Engage): The moment your dog looks at the trigger, mark the behavior with 'Yes!' within 0.5 seconds. Step 2 (Disengage): Your dog will turn their head toward you expecting the reward. Deliver the high-value treat immediately. If your dog stares at the trigger for more than three seconds without disengaging, you are too close. Calmly increase the distance by 10 feet and try again. This phase teaches the dog that the presence of a trigger predicts a high-value reward from the handler, fundamentally changing their emotional response from fear to anticipation.
Phase 4: Weeks 10-12 (Real-World Distraction Proofing)
As noted by the American Kennel Club's expert training hub, consistency and gradual exposure are vital for long-term behavioral modification. In the final phase, you will begin to systematically decrease the distance to triggers by no more than 10% each week, provided the dog remains relaxed and continues to take treats softly. Introduce variable environments: walk past a fenced dog park on the opposite side of the street, or practice near a tennis court. If your dog has a reactive outburst, do not scold them. Simply execute an 'Emergency U-Turn,' create distance until they decompress, and end the session on a positive note with a simple obedience cue they know well.
Progression Tracking Matrix
Use the following matrix to track your weekly progression. Do not advance to the next phase until your dog consistently meets the criteria for three consecutive sessions.
| Phase | Timeline | Target Distance | Treat Value | Session Length | Success Metric |
|---|---|---|---|---|---|
| Phase 1 | Weeks 1-3 | 0 ft (Indoor) | Low (Zuke's) | 10 mins | Instant eye contact on name cue |
| Phase 2 | Weeks 4-6 | Over Threshold (40+ ft) | Medium (Cheese) | 20 mins | Voluntary check-ins every 2 mins |
| Phase 3 | Weeks 7-9 | At Threshold (30 ft) | High (Freeze-Dried) | 15 mins | Disengages from trigger in <3 sec |
| Phase 4 | Weeks 10-12 | Decreasing (20 ft) | High (Freeze-Dried) | 30 mins | Passes trigger without lunging |
Troubleshooting Setbacks and Plateaus
Reactivity training is rarely a straight line. You will encounter days where your rescue dog seems to regress. This is usually caused by 'trigger stacking,' a phenomenon where multiple minor stressors (e.g., loud garbage trucks, a change in barometric pressure, and a distant dog) compound to lower the dog's overall threshold. When trigger stacking occurs, abandon the progression plan for the day and revert to Phase 1 indoor games to help your dog's nervous system reset.
Progress in reactivity training is rarely linear. A setback is simply data telling you the environment was too stimulating for the current stage of your progression plan. Adjust your distance, upgrade your treats, and try again tomorrow.
By committing to this 12-week progression plan, utilizing high-value reinforcement, and respecting your rescue dog's threshold boundaries, you will transform chaotic, stressful walks into structured, enjoyable bonding experiences. Patience, precise timing, and unwavering consistency are your most powerful tools in this behavioral rehabilitation journey.
aaron-whyte
All our authors care for dogs every day — read more of their work on the authors page.