Home Dog-Proofing: Before and After Safety Transformations
Discover essential before and after home transformations for getting a dog. Learn dog-proofing costs, safety upgrades, and setup tips for new owners.

The 'Before' State: A Human Home Through a Dog's Eyes
Bringing a new dog home is one of life’s most exciting milestones. However, the transition from a human-centric living space to a canine-safe sanctuary requires deliberate planning. When you are in the 'Getting a Dog' phase, it is easy to focus on buying beds, toys, and premium kibble while overlooking the hidden hazards lurking in your home. To a curious puppy or an anxious rescue dog, a standard living room is an obstacle course of electrical cords, toxic houseplants, and choking hazards.
Transforming your home is not just about preventing destruction; it is about creating an environment where your new dog can decompress, explore safely, and thrive. This guide walks you through the essential before-and-after transformations required to dog-proof your home, complete with specific product recommendations, measurements, and estimated costs to help you budget for your new arrival.
The Living Room: From Hazard Zone to Safe Haven
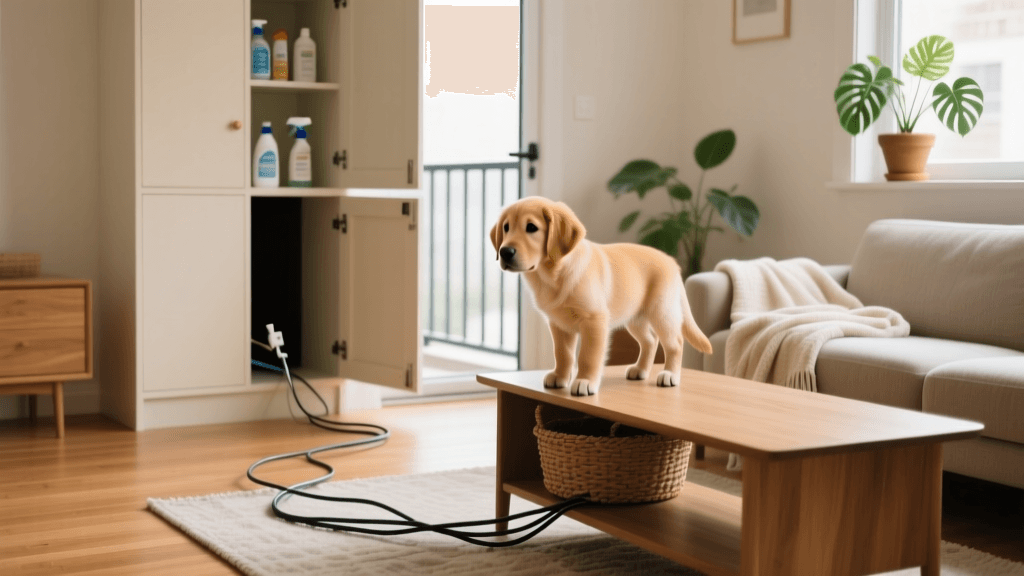
Before: Exposed Cords and Toxic Greenery
In a typical 'before' scenario, television and lamp wires dangle near the floor, and popular but toxic houseplants like pothos, snake plants, or peace lilies sit at tail-wagging height. According to the ASPCA Animal Poison Control, ingestion of common household plants and electrical cord chewing are among the top reasons for emergency veterinary visits in new puppies and dogs.
After: Concealed Wires and Pet-Safe Landscaping
The Transformation: Swap toxic plants for dog-safe alternatives like spider plants, calatheas, or Boston ferns. For electrical hazards, install rigid J-Channel cord raceways along your baseboards. Unlike flexible cord sleeves, which determined chewers can bite through, hard PVC raceways are virtually indestructible to canine teeth.
- Product Pick: Yecaye or J-Line PVC Cable Management Channels (approx. $25 for a 120-inch kit).
- Furniture Protection: Apply a pet-safe deterrent like Grannick’s Bitter Apple Spray to the corners of wooden furniture and baseboards to discourage teething puppies.
- Estimated Cost: $40 - $75
The Kitchen and Dining Area: Securing the Heart of the Home
Before: Open Trash and Accessible Cleaners
The kitchen is arguably the most dangerous room for a new dog. Before dog-proofing, trash cans are often open or easily tipped, exposing dogs to cooked bones (which can splinter and puncture the intestines), xylitol-sweetened gum, and grape residue. Furthermore, cleaning supplies stored under the sink pose severe chemical burn risks.
After: Fortified Waste and Locked Cabinets
The Transformation: Upgrade to a heavy-duty, step-operated trash can with a secure lid that requires human weight to open. Install magnetic child-proof locks on all lower cabinets containing chemicals, dishwasher pods, or human medications.
- Product Pick: Simplehuman 50-Liter Step Trash Can (approx. $100) and Safety 1st Magnetic Locking System (approx. $20 for a multi-pack).
- Food Storage: Move all onions, garlic, chocolate, and macadamia nuts to upper pantry shelves at least 5 feet off the ground.
- Estimated Cost: $120 - $150
The Bathroom and Laundry: Overlooked Danger Zones
Before: Open Toilets and Detergent Pods
Bathrooms often feature open toilet bowls, which can be a drowning hazard for small breeds or a source of toxic blue cleaning water for larger dogs. Laundry rooms frequently store brightly colored detergent pods that look remarkably like chew toys to a dog's eyes.
After: Latched Lids and Elevated Storage
The Transformation: Install a simple toilet lid lock or make it a strict household rule to keep the bathroom door closed at all times using a door knob cover or a high hook-and-eye latch. In the laundry room, move all detergents, stain removers, and dryer sheets to wire shelving units that are at least 4 feet high.
- Product Pick: Safety 1st Toilet Lid Lock (approx. $8) and Waddler Door Knob Covers (approx. $12).
- Estimated Cost: $20 - $30
The Decompression Room: Creating a Canine Sanctuary
Before: A Standard Spare Bedroom or Office
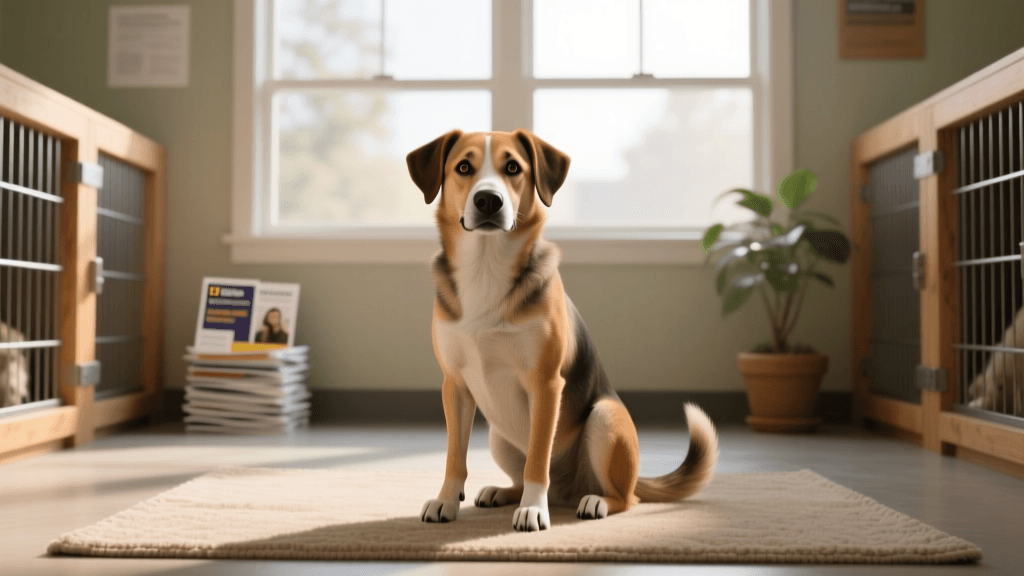
Many new owners place a dog bed in a busy hallway or a spare room filled with clutter, expecting the dog to instantly relax. For rescue dogs, this overstimulating environment can lead to pacing, whining, and destructive anxiety.
After: A Sensory-Friendly Safe Space
The Transformation: Designate one quiet room as the 'decompression zone.' Clear the floor of all non-dog items. Set up a sturdy wire crate covered with a breathable blanket to create a den-like atmosphere. Introduce a white noise machine to drown out street sounds and an Adaptil pheromone diffuser to promote calmness. This room serves as the dog's baseline for the first 7 to 14 days, allowing them to adjust to their new home without being overwhelmed by the entire house.
- Product Pick: Hatch Restore White Noise Machine (approx. $130) and Adaptil Dog Calming Diffuser (approx. $25).
- Timing: Set up this room at least 48 hours before your dog arrives so the pheromones can circulate.
- Estimated Cost: $150 - $200
The Yard and Outdoor Perimeter: Escape-Proofing
Before: Standard Fencing with Hidden Gaps
A standard wooden or chain-link fence might look secure to a human, but dogs are master escape artists. Gaps wider than 3 inches under the fence, loose boards, and gates without secure latches are invitations for a dog to bolt.
After: Dig-Proofed and Gap-Sealed Boundaries
The Transformation: Walk the entire perimeter of your yard. The American Kennel Club highly recommends checking for small holes or loose boards where a dog could squeeze through or get their head stuck. Install an L-footer wire barrier along the bottom of the fence to prevent digging, and add a carabiner clip to your gate latch to prevent wind or a clever paw from opening it.
- Product Pick: Poultry Wire or Hardware Cloth for L-footers (approx. $40 per 50-foot roll) and Master Lock Carabiner Clips (approx. $10).
- Measurements: Ensure fence height is at least 4 feet for small/medium dogs and 6 feet for large, athletic breeds.
- Estimated Cost: $50 - $150 (depending on yard size)
Before and After Dog-Proofing Summary Table
| Home Area | Before Hazard | After Transformation | Estimated Cost |
|---|---|---|---|
| Living Room | Exposed wires, toxic plants | PVC cord raceways, pet-safe greenery | $40 - $75 |
| Kitchen | Open trash, accessible chemicals | Step-trash can, magnetic cabinet locks | $120 - $150 |
| Bathroom | Open toilets, low medications | Toilet lid locks, elevated storage | $20 - $30 |
| Safe Room | Overstimulating spare room | Covered crate, white noise, pheromones | $150 - $200 |
| Yard | Fence gaps, digging zones | L-footer wire, secured gate latches | $50 - $150 |
The Emotional Transformation: From Chaos to Confidence
The physical transformations you make to your home directly impact your dog's emotional well-being. A 'before' home that is full of hazards requires constant human hovering, yelling 'no,' and physical interventions, which can damage the bond between you and your new pet and increase the dog's stress levels. The 'after' home, however, is a space of freedom and confidence. When you remove the temptation and danger, your dog is free to explore, play, and rest without constant correction.
Investing the time and budget into these before-and-after safety upgrades is one of the most profound acts of love you can offer a new dog. By viewing your home through their eyes and making these strategic modifications, you are not just preventing a trip to the emergency vet—you are laying the foundation for a lifetime of trust, safety, and companionship.
beth-carrasco
All our authors care for dogs every day — read more of their work on the authors page.