Before And After: Dog-Proofing Your Home For Adoption
Discover the ultimate before and after guide to dog-proofing your home. Learn exact transformations, costs, and safety tips for your new rescue dog.

The Ultimate Before and After Transformation: Preparing Your Home for a Rescue Dog
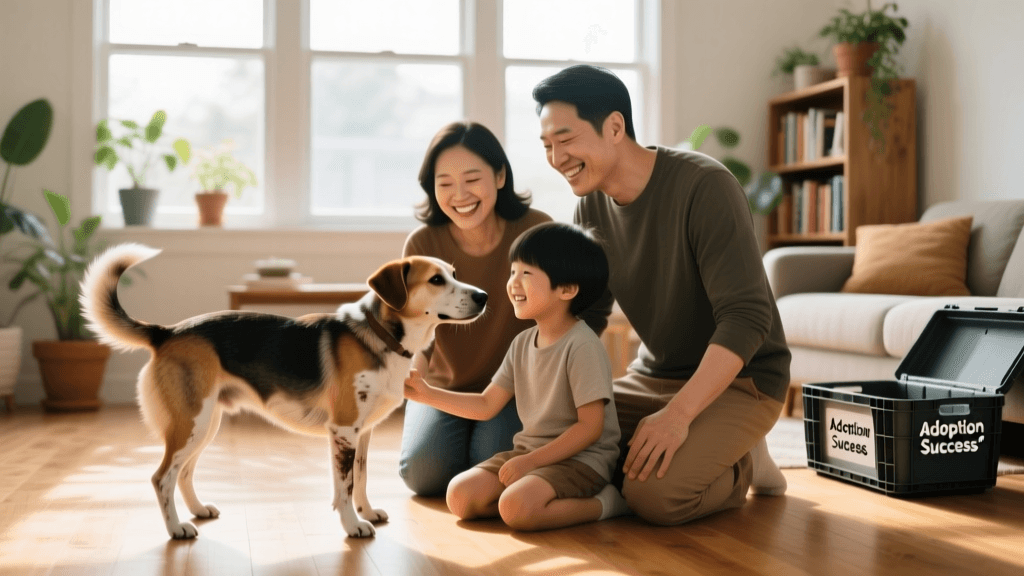
Bringing a rescue dog into your life is an incredibly rewarding experience, but the transition from a shelter or foster environment to a permanent home can be overwhelming for both the dog and the owner. Many new adopters focus heavily on buying beds, toys, and premium kibble, while entirely overlooking the physical environment the dog is about to inherit. A standard human home is filled with hidden hazards, anxiety triggers, and escape routes that can turn a joyous adoption into a stressful ordeal.
To ensure a successful transition, we must look at the concept of home preparation through a Before and After lens. By physically transforming your living spaces, you not only protect your belongings but also create a secure, low-stress sanctuary that allows your new dog to decompress and thrive. This guide will walk you through the exact transformations required to dog-proof your home, complete with specific product recommendations, measurements, and cost breakdowns.
The 'Before' State: A Human Home Through a Dog's Eyes
Before any modifications are made, a typical home is essentially an obstacle course of temptations and dangers. Electrical cords dangle at perfect chewing height. Household cleaners sit in easily accessible lower cabinets. The backyard fence might have subtle gaps, and common houseplants can pose severe toxicity risks. According to the ASPCA Animal Poison Control, thousands of pets are treated annually for accidental ingestion of household toxins, human medications, and poisonous flora. The 'before' state of your home is unpredictable, unstructured, and inherently unsafe for a curious, anxious, or bored canine.
The 'After' State: Room-by-Room Transformations
1. The Living Room: From Obstacle Course to Safe Haven
Before: The living room features exposed power strips behind the entertainment center, low-hanging window blind cords, and popular but highly toxic houseplants like Monstera Deliciosa and Pothos resting on the coffee table. Shoes and TV remotes are left casually on the rug.
After: The living room is transformed into a secure, chew-proof zone. All exposed wiring is encased in heavy-duty split-loom tubing or hard plastic cord concealers, such as the D-Line Cord Cover Kit (approx. $25 for 10 feet). Window blind cords are secured high up using cleats to prevent strangulation hazards. Toxic plants are relocated to hanging planters out of reach or replaced entirely with pet-safe alternatives like Spider Plants, Calatheas, and Boston Ferns. The ASPCA's Animal Poison Control Center maintains a comprehensive list of toxic and non-toxic plants that every new dog owner should bookmark before making any botanical purchases.
- Product Spotlight: Grannick's Bitter Apple Spray ($12). Apply this to baseboards and wooden furniture legs to deter anxious chewing during the first two weeks.
- Measurement Tip: Ensure all cord covers are flush against the baseboard with no gaps larger than 1/4 inch to prevent tiny puppy teeth from prying them open.
2. The Kitchen: Securing the Danger Zone
Before: Cleaning supplies, including bleach and ammonia-based products, are stored under the sink with standard cabinet latches. The trash can is a lightweight, open-top bin resting on the linoleum floor. Sugar-free snacks containing xylitol are kept in the lower pantry shelves.
After: The kitchen becomes a fortress of food safety. Under-sink cabinets are retrofitted with magnetic child locks, such as the Safety 1st Magnetic Locking System ($30 for a multi-pack), which require a magnetic key to open. The open trash bin is replaced with a heavy-duty, step-on stainless steel can with a locking lid, like the Simplehuman 13-Gallon Step Can ($150), preventing 'dumpster diving' which can lead to fatal intestinal blockages or pancreatitis. All foods containing xylitol (a highly toxic sugar substitute for dogs), chocolate, grapes, and onions are moved to upper cabinets at least 5 feet off the ground.
3. The Backyard: Building a Secure Perimeter
Before: The yard is enclosed by a standard 4-foot wooden privacy fence. The gate latch is a simple gravity hook. Landscaping features cocoa bean mulch (which is toxic if ingested) and decorative garden rocks that a dog might swallow.
After: The perimeter is fortified against both escape artists and diggers. The gate is upgraded with a dual-action, self-closing latch mechanism ($20) that requires a thumb press and a lift to open. To prevent digging under the fence, an 'L-footer' barrier is installed. This involves burying galvanized welded wire mesh 12 inches deep and bending it outward in an L-shape at a 90-degree angle for another 12 inches beneath the soil. When a dog attempts to dig at the fence line, they hit the wire mesh and stop. Toxic cocoa bean mulch is entirely removed and replaced with natural, untreated cedar mulch or pet-safe clover ground cover.
The Centers for Disease Control and Prevention (CDC) emphasizes that secure fencing and proper yard maintenance are critical not only for the physical safety of your dog but also for preventing neighborhood incidents and the spread of zoonotic diseases from wild animal feces.
The Decompression Room: The Ultimate Before & After
Before: The spare bedroom or laundry room is used as a catch-all for storage, filled with cardboard boxes, loose wires, and no dedicated comfort items. When the dog arrives, they are placed in this chaotic space with a simple flat bed on the floor.
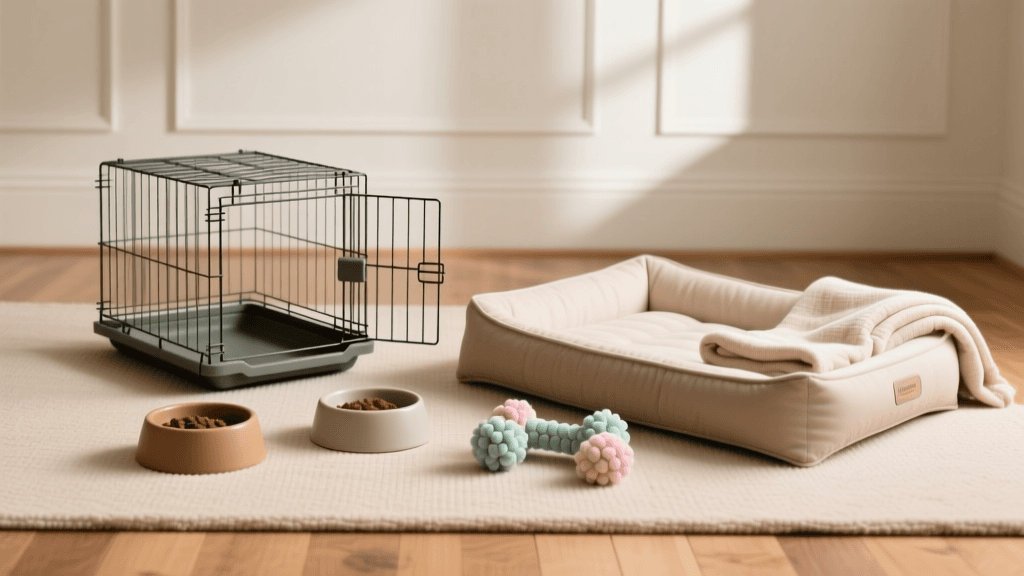
After: This space is entirely cleared out and transformed into a 'Decompression Zone'—a vital concept in modern rescue dog rehabilitation. The room is fitted with a baby gate at the doorway. Inside, you provide an elevated cot (like the Kuranda Chew-Proof Dog Bed, $130) which keeps the dog off cold floors and provides a sense of security. A white noise machine ($30) is placed near the door to muffle household sounds that might trigger shelter-induced anxiety. The room is stripped of all small objects, leaving only indestructible enrichment toys like the Kong Classic stuffed with frozen peanut butter to promote soothing licking behaviors.
Before & After Transformation: Cost and Time Breakdown
Below is a structured breakdown of the physical transformations required to prepare a standard 3-bedroom home with a fenced yard for a newly adopted rescue dog.
| Area of Home | Before (Hazard) | After (Solution) | Est. Cost | Time to Implement |
|---|---|---|---|---|
| Living Room | Exposed cords, toxic plants | Cord concealers, pet-safe flora | $45 - $70 | 2 Hours |
| Kitchen | Accessible trash, under-sink toxins | Step-can, magnetic cabinet locks | $180 - $220 | 1.5 Hours |
| Backyard | Standard latch, digging gaps | Self-closing latch, L-footer wire | $80 - $150 | 4 - 6 Hours |
| Decompression Room | Cluttered spare room, flat bed | Elevated cot, white noise, gate | $150 - $200 | 3 Hours |
| Total | Complete Home Safety Overhaul | $455 - $640 | 1 - 2 Days | |
Routine Transformations: Beyond the Physical Space
The before and after concept extends beyond physical home modifications; it also applies to your daily routines and household rhythms.
Before Adoption: Your schedule is likely spontaneous. You leave for work at varying times, eat meals at the counter, and leave food out for grazing. The house is quiet during the day and active at night.
After Adoption: Dogs, especially rescues with unknown pasts, thrive on extreme predictability. The 'after' routine involves strict scheduling. Meals are served at the exact same times daily (e.g., 7:00 AM and 6:00 PM) to regulate their digestive system and build trust. Potty breaks follow a rigid schedule: immediately upon waking, after every meal, after play sessions, and right before bed. You transition from casual neighborhood strolls to 'Sniffaris'—long, decompression walks on a 15-foot long line where the dog is allowed to dictate the pace and sniff extensively, which lowers their heart rate and reduces cortisol levels.
Conclusion: Investing in a Peaceful Transition
The transformation of your home from a human-centric environment to a dog-safe sanctuary is one of the most critical steps in the adoption process. While the upfront costs of cord protectors, secure trash cans, and fencing repairs may seem daunting, they pale in comparison to the financial and emotional toll of an emergency veterinary visit for an intestinal blockage or toxic ingestion. By embracing the 'Before and After' mindset, you are doing more than just dog-proofing your house; you are communicating to your new rescue dog that they are safe, understood, and finally home. Take the weekend before your adoption day to execute these transformations, and you will set the stage for a lifetime of trust and companionship.
beth-carrasco
All our authors care for dogs every day — read more of their work on the authors page.