Cut a Dog's Nails Without Hitting the Quick?
Learn how do you cut a dog's nails safely with our step-by-step guide covering quick identification, proper tools, bleeding control, and fear-free handling techniques.
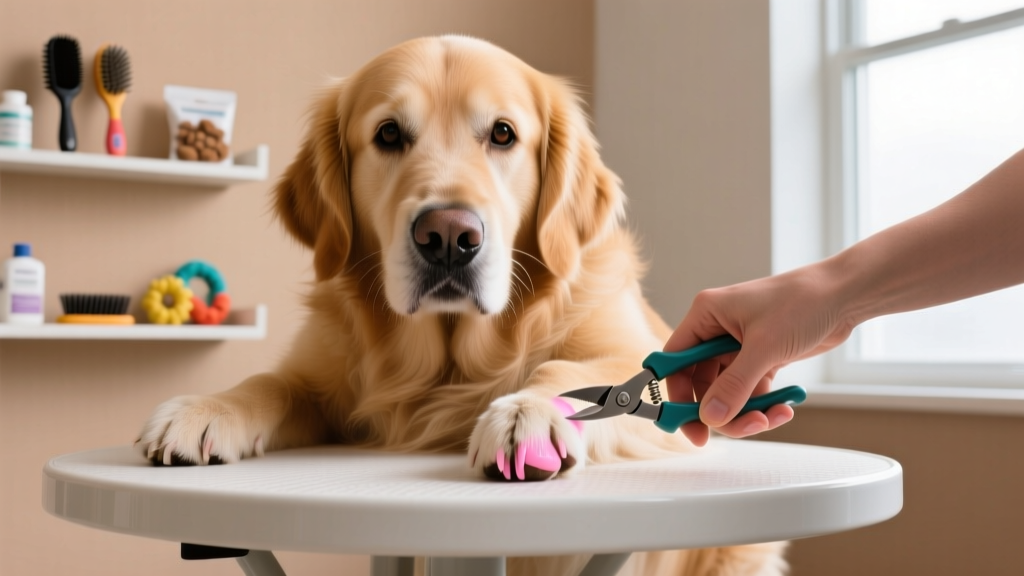
If you've ever heard that sickening crack of a nail splitting or watched your dog yelp and pull their paw away mid-trim, you already know why this question ranks among the most searched in dog care: how do you cut a dog's nails without causing pain, bleeding, or lasting fear? The answer lies in understanding nail anatomy, choosing the right tools, and building a positive association that turns a dreaded chore into a manageable routine.
Overgrown nails aren't just a cosmetic issue. According to the Merck Veterinary Manual, excessively long nails alter a dog's weight distribution, force toes to splay outward, and contribute to chronic joint stress — particularly in heavier breeds. Nail-related injuries, including quick exposure, splits, and avulsions (complete nail tears), account for a significant number of emergency grooming visits each year.
This guide walks you through the anatomy of a dog's nail, identifies the conditions that arise from improper trimming, provides a step-by-step cutting protocol, and explains exactly what to do when things go wrong — including when a nail injury crosses the line from home-treatable to vet-required.
Understanding Dog Nail Anatomy: The Quick, the Shell, and Why It Matters
Before you pick up a clipper, you need to understand what you're cutting. A dog's nail isn't a single solid structure like a human fingernail. It has two distinct components:
- The shell (unguis): The hard, keratinized outer casing. This is dead tissue and contains no nerves or blood vessels. Cutting here causes no pain.
- The quick (dermis): A living structure running through the center of the nail containing blood vessels, nerves, and connective tissue. Cutting into the quick causes immediate pain and bleeding.
In dogs with white or clear nails, the quick is visible as a pinkish-red line running through the nail's center. In dogs with dark or black nails — including breeds like Rottweilers, Dobermans, and many mixed breeds — the quick is hidden, making trimming significantly more challenging.
Key anatomical fact: The quick grows proportionally with the nail. Dogs whose nails are never trimmed develop progressively longer quicks, meaning even a moderate trim can cause bleeding. Conversely, frequent trimming causes the quick to recede over time, allowing shorter nail lengths. According to veterinary dermatologists, consistent trimming every 2-3 weeks can gradually shorten the quick over a 3-6 month period.
Nail-Related Conditions: When Improper Trimming Becomes a Health Problem
While cutting nails is a grooming task, the consequences of improper technique or neglected nails create genuine medical conditions. Here's how to identify them, organized by severity.
Early Warning Signs (Monitor at Home)
| Symptom | What It Indicates | Action |
|---|---|---|
| Clicking sound on hard floors | Nails too long, touching ground at rest | Schedule trim within 1 week |
| Splayed toes when standing | Nail pressure forcing toe joints apart | Trim immediately; monitor gait |
| Reluctance to walk on hard surfaces | Discomfort from nail pressure on toe joints | Trim nails; check for cracked nails |
| Curling nails (growing toward pad) | Severely overgrown; risk of pad penetration | Vet visit if curling into skin |
| Licking or chewing at one paw | Possible cracked nail or early infection | Inspect nails closely; apply styptic powder if bleeding |
Advanced Symptoms (Veterinary Attention Needed)
| Symptom | What It Indicates | Action |
|---|---|---|
| Visible quick exposed (red/pink tissue protruding) | Nail broken or cut too short; open wound | Apply styptic powder; vet if bleeding persists >15 min |
| Swelling around nail bed | Paronychia (nail bed infection) | Veterinary visit within 24-48 hours |
| Pus or discharge from nail | Bacterial or fungal infection | Vet visit; may require antibiotics |
| Nail growing into paw pad | Penetrating wound; high infection risk | Immediate veterinary care |
| Completely torn/avulsed nail | Traumatic injury exposing full quick and bone attachment | Emergency vet visit; may require sedation and removal |
| Limping with visible bleeding from nail | Significant trauma; possible fracture of distal phalanx | Apply pressure; emergency vet visit |
Risk Factors: Which Dogs Are Most Vulnerable to Nail Problems?
Nail Injury & Overgrowth Risk Factors
- Breed predisposition: Breeds with dewclaws (Great Pyrenees, Briards, Beaucerons) face higher risk of dewclaw curling into skin. Brachycephalic breeds and heavy-set dogs (Bulldogs, Basset Hounds) place more weight on front paws, accelerating nail wear unevenly.
- Age: Senior dogs are less active, meaning less natural nail wear. Arthritic dogs may resist paw handling, making trims difficult and leading to overgrowth.
- Weight: Overweight dogs exert more pressure on nail beds. A 2024 study in the Journal of Veterinary Internal Medicine found that dogs with a body condition score (BCS) of 7/9 or higher showed significantly more nail-related gait abnormalities.
- Environment: Dogs who walk primarily on grass or carpet experience minimal natural nail wear compared to dogs walking on concrete or asphalt.
- Coat/nail color: Dark-nailed dogs present higher trimming difficulty, increasing the frequency of quick injuries during home grooming.
- Temperament: Fearful or reactive dogs who resist paw handling are at higher risk for both overgrowth (due to avoided trims) and traumatic injury (from sudden movement during trimming).
How to Cut a Dog's Nails: Step-by-Step Protocol
The following method uses positive reinforcement and force-free handling. Never restrain a panicking dog by force — this increases injury risk and deepens fear. If your dog shows severe anxiety around nail trims, skip to the Desensitization Protocol section below.
Tools You Need
| Tool | Best For | Price Range (2026) | Recommended Models |
|---|---|---|---|
| Scissor-style clippers | Medium to large dogs (30+ lb / 14+ kg) | $12-$28 | Miller Forge Professional, Epica Professional |
| Guillotine-style clippers | Small to medium dogs (under 30 lb / 14 kg) | $8-$18 | Resco Original, Safari Professional |
| Electric nail grinder (Dremel) | All sizes; especially dark-nailed dogs | $25-$55 | Dremel PawControl 7760-PGK, Casfuy Dog Nail Grinder |
| Styptic powder | Emergency bleeding control (mandatory to have on hand) | $5-$12 | Kwik Stop, Pet MD Styptic Powder |
| High-value treats | Positive reinforcement during and after trim | $6-$15 | Freeze-dried liver, boiled chicken, Zuke's Mini Naturals |
The Trimming Process
- Position your dog comfortably. For small dogs, place them on a non-slip surface at waist height (a table with a yoga mat). For large dogs, sit on the floor beside them. Have treats within arm's reach.
- Hold the paw firmly but gently. Use your non-dominant hand to separate the toe you're working on. Apply light pressure to the toe pad — this extends the nail and stabilizes it.
- Identify the quick. In light nails: look for the pink line. Cut 2-3 mm (approximately 1/8 inch) below where the pink ends. In dark nails: look for a chalky white or gray oval appearing in the nail's cross-section as you make small cuts. The moment you see a dark dot or pinkish center in the cut surface, STOP — you are approaching the quick.
- Make small cuts at a 45-degree angle. Rather than attempting one large cut, make 3-5 small slices. This reduces splitting and gives you more control as you approach the quick.
- Don't forget the dewclaws. Located on the inner side of the leg (similar to a thumb), dewclaws don't touch the ground and never wear down naturally. They're the most likely nails to curl into the skin.
- Reward after each nail. Give a treat and verbal praise after every single nail, not just at the end. This builds a positive association.
- Know when to stop. If your dog shows escalating stress (panting, trembling, whale eye, lip licking, pulling away repeatedly), stop the session. You can trim the remaining nails tomorrow or the next day. Forcing through panic teaches your dog that nail trims are traumatic.
The Dark Nail Challenge: A Decision Framework
Dark Nail Trimming Decision Flowchart
- Make your first small cut (1-2 mm). Examine the cross-section.
- If you see only chalky white/gray material → Safe to continue cutting.
- If you see a dark or pinkish dot in the center → STOP. You are at or near the quick.
- Make a second cut 1 mm further. Re-examine.
- Still white/gray → Make one more cut, then re-examine.
- Black dot or pink center appearing → STOP immediately.
- If you're uncertain at any point → Switch to a nail grinder for the final smoothing, or stop and trim more next week. The quick will recede with regular trimming, giving you more room over time.
What to Do When You Cut the Quick: Emergency Protocol
Even experienced groomers hit the quick occasionally. Here's exactly what to do, in order:
- Stay calm. Your dog will react to your emotional state. Speak in a calm, reassuring tone.
- Apply styptic powder immediately. Pinch a generous amount between your fingers and press it directly against the bleeding nail tip. Hold firm pressure for 30-60 seconds. Kwik Stop contains both a hemostatic agent (ferric subsulfate) and a topical analgesic (benzocaine) to stop bleeding and reduce pain.
- If styptic powder isn't available: Use cornstarch or flour as a temporary substitute. Press firmly against the nail tip for 60 seconds. You can also use a bar of soap — press the nail tip directly into the soap to create a plug.
- Keep your dog still for 5-10 minutes. Activity will dislodge the clot. Keep them seated or lying down.
- Check for continued bleeding. If bleeding has stopped, reward your dog generously and end the session. If bleeding resumes, reapply styptic powder with pressure for another 60 seconds.
- Monitor for 24-48 hours. Watch for licking (which can introduce bacteria), swelling, or discharge.
When to Call the Vet After a Nail Injury
- Bleeding that does not stop after 15-20 minutes of continuous pressure and styptic powder application
- Nail torn at the base or completely avulsed (pulled out)
- Visible swelling of the toe or paw within hours of injury
- Pus, discharge, or foul odor from the nail within 24-48 hours
- Your dog won't bear weight on the affected paw after 24 hours
- The nail is growing into the paw pad skin
- Any nail injury in a dog with a bleeding disorder (hemophilia, von Willebrand disease) or on anticoagulant medication
ASPCA Animal Poison Control: (888) 426-4435 (24/7, consultation fee applies) — call if your dog ingests styptic powder or any grooming product.
Nail Bed Infections (Paronychia): Diagnosis and Treatment
When a nail injury becomes infected — or when chronic overgrowth leads to skin penetration — the resulting condition is called paronychia: an infection of the tissue surrounding the nail. This is where a grooming issue becomes a medical condition requiring veterinary diagnosis and treatment.
How Paronychia Is Diagnosed
Your veterinarian will typically follow this diagnostic process:
| Diagnostic Step | Purpose | Estimated Cost (2026) |
|---|---|---|
| Physical examination | Assess nail bed, surrounding tissue, check for foreign bodies | $55-$95 (office visit fee) |
| Cytology (skin scraping/swab) | Identify bacterial vs. fungal organisms | $40-$80 |
| Bacterial culture & sensitivity | Identify specific bacteria and effective antibiotics (if infection is recurrent or resistant) | $80-$160 |
| Fungal culture (dermatophyte test) | Rule out ringworm or yeast involvement | $60-$120 |
| Radiographs (X-rays) | Check for bone involvement (osteomyelitis) in severe/chronic cases | $150-$300 |
| Biopsy (rare cases) | Rule out nail bed tumors (melanoma, squamous cell carcinoma) if mass is present | $200-$450 |
Treatment Options Comparison
| Treatment | Used For | Duration | Success Rate | Cost Range |
|---|---|---|---|---|
| Topical antiseptic soaks (chlorhexidine 2-4%) | Mild bacterial paronychia | 2-4 weeks, daily soaks | 70-85% resolution | $15-$30 (solution) |
| Oral antibiotics (cephalexin, amoxicillin-clavulanate) | Moderate to severe bacterial infection | 3-6 weeks | 80-90% with appropriate culture-guided selection | $30-$80 (medication) |
| Oral antifungals (itraconazole, ketoconazole) | Fungal/yeast nail bed infections | 4-8 weeks | 75-85% | $40-$120 |
| Nail removal under sedation | Avulsed, severely infected, or ingrown nails | Single procedure; 2-3 weeks healing | 90%+ for resolution of local infection | $200-$500 (sedation + procedure) |
| Surgical debridement / P3 amputation | Chronic osteomyelitis or nail bed tumors | Single surgery; 4-6 weeks recovery | Varies widely by underlying cause | $500-$1,500 |
Prognosis
For most cases of simple paronychia (bacterial infection from a nail injury), prognosis is excellent with appropriate treatment. The Merck Veterinary Manual notes that most acute nail bed infections resolve within 3-4 weeks of targeted therapy. Chronic or recurrent cases — particularly those involving autoimmune conditions like symmetrical lupoid onychodystrophy (SLO) — may require long-term management with immunomodulatory drugs (cyclosporine, niacinamide/tetracycline combination) and have a more guarded prognosis for full resolution, though most dogs achieve acceptable control.
Home Care & Ongoing Nail Management
Whether you're maintaining healthy nails or managing recovery from a nail injury, consistent home care is essential.
Trimming Frequency Guidelines
| Dog Type | Recommended Trim Frequency | Notes |
|---|---|---|
| Active dog walking on concrete daily | Every 4-6 weeks | Front nails may need more frequent trims than rear |
| Moderately active dog (mixed surfaces) | Every 2-4 weeks | Listen for clicking on floors as your cue |
| Senior/sedentary dog | Every 2-3 weeks | Minimal natural wear; dewclaws especially need attention |
| Dog with overgrown quicks (recovery) | Every 1-2 weeks | Frequent small trims encourage quick recession |
| Post-injury healing | As directed by vet; typically avoid trimming affected nail for 2-3 weeks | Keep other nails trimmed to maintain balanced gait |
Post-Injury Home Care Protocol
- Days 1-3: Limit walks to leash-only on soft surfaces. Prevent licking with an Elizabethan collar (cone) or recovery suit if needed. Check the nail twice daily for swelling, discharge, or bleeding.
- Days 4-7: If healing well (no swelling, no discharge, dry nail bed), begin short walks on clean surfaces. Continue monitoring.
- Days 7-14: Gradual return to normal activity. The nail will begin regrowing if the germinal tissue was not destroyed.
- Ongoing: Keep the area clean. If your dog walks through mud or puddles, rinse the paw with lukewarm water and pat dry.
The Fear-Free Approach: Desensitization Protocol for Nail-Trim Anxiety
If your dog has had a traumatic nail trim experience — or simply finds paw handling deeply uncomfortable — a structured desensitization program can transform the experience. This protocol uses counter-conditioning and positive reinforcement, consistent with Fear Free veterinary standards.
Week 1-2: Paw handling without tools. Touch your dog's paw gently, then immediately give a high-value treat. Repeat 10-15 times per session, 2-3 sessions daily. Goal: your dog looks forward to paw touching.
Week 3-4: Introduce the tool (no cutting). Let your dog sniff the clippers or grinder. Touch the tool to a nail without cutting. Treat generously. Turn the grinder on at a distance, let them hear the sound, treat. Gradually bring it closer over multiple sessions.
Week 5-6: Single-nail trims. Trim one nail. Give 3-5 treats. End the session. The next day, trim one more nail. Build gradually.
Week 7+: Increase to 2-3 nails per session, then a full paw, then all paws. Always pair with treats. If your dog regresses at any point, drop back to the previous successful step.
For severe anxiety: Consult your veterinarian about short-acting anti-anxiety medications (such as trazodone or gabapentin) to use during nail trim sessions. These medications, combined with a desensitization protocol, can break the fear cycle without causing sedation that impairs learning. Never use acepromazine for grooming anxiety — it provides sedation without anxiolysis, meaning your dog is physically restrained but still mentally terrified.
Cost Breakdown: Nail Care and Treatment Budgeting
| Service / Item | Cost Range (2026) | Frequency |
|---|---|---|
| Professional nail trim (groomer or vet tech) | $12-$30 | Every 2-6 weeks |
| Nail trim + Dremel filing | $20-$45 | Every 2-6 weeks |
| Nail trim under sedation (vet office) | $80-$200 | As needed for anxious dogs |
| Home trim tool kit (clippers + grinder + styptic powder) | $40-$85 (one-time) | Replace clippers every 1-2 years |
| Vet visit for nail injury/infection | $120-$350 | As needed |
| Full nail bed infection treatment (visit + culture + medication) | $200-$600 | Per episode |
| Surgical nail removal or P3 amputation | $500-$1,500 | Rare; severe/chronic cases |
Annual budget estimate: For a healthy dog with regular home trims, expect $40-$85 in tools (one-time) plus $5-$15 in styptic powder refills annually. For dogs requiring professional trims, budget $120-$360 per year. For dogs with chronic nail bed conditions (like SLO), annual costs can reach $500-$1,200 including medications and follow-up visits.
Frequently Asked Questions
How do you cut a dog's nails that are black?
With dark nails, you cannot see the quick. Make very small cuts (1-2 mm at a time) and examine the cross-section after each cut. When you see a dark dot or a pinkish center appear in the nail's cut surface, stop immediately — that is the quick. Using a nail grinder (Dremel) instead of clippers gives you more control and reduces the chance of cutting too deep.
How short should I cut my dog's nails?
The ideal length is just above the ground when your dog is standing on a flat surface. You should not hear clicking when they walk on hard floors. In practice, this means cutting 2-3 mm below the quick. If the quick is very long (from infrequent trimming), cut just below where it ends and repeat every 1-2 weeks to encourage recession.
Can I use human nail clippers on my dog?
Only on very small puppies or toy breeds with tiny, thin nails. Human clippers are not designed for the thickness and curvature of most dog nails and will crush rather than cut, causing pain and splitting. Use dog-specific clippers or a grinder designed for pet nails.
What happens if you never cut your dog's nails?
Overgrown nails force the toes to rotate and splay, altering the dog's entire weight distribution. Over time, this leads to chronic joint pain, tendon strain, and postural changes. In severe cases, nails curl completely around and grow into the paw pad, creating painful penetrating wounds prone to infection. Dewclaws are especially dangerous when neglected, as they have zero ground contact and can grow in a full circle into the leg.
How do you cut a dog's nails if they hate it?
Use a gradual desensitization protocol (detailed above) paired with high-value treats. For dogs with severe fear or aggression around nail trims, consult your veterinarian about using short-acting anti-anxiety medication (trazodone 5-10 mg/kg or gabapentin 10-20 mg/kg, given 1-2 hours before the session). Alternatively, many veterinary clinics offer "sedation nail trims" where a veterinary technician performs the trim under mild sedation, eliminating the stress entirely while the behavior modification program continues at home.
Is a nail grinder better than clippers?
Grinders offer more precision and are especially helpful for dark-nailed dogs where the quick is invisible. They also produce a smooth edge rather than a sharp cut. However, some dogs are frightened by the noise and vibration. Clippers are faster and quieter but carry a higher risk of cutting the quick in a single stroke. Many owners find success using clippers for the bulk of the cut and a grinder for final smoothing.
How long does it take for a dog's nail to heal after cutting the quick?
The quick typically stops bleeding within 5-15 minutes with proper styptic powder application. The nail surface heals and seals within 24-48 hours. Full comfort usually returns within 2-3 days. If pain, swelling, or discharge persists beyond 48 hours, consult your veterinarian as this may indicate infection.
Bottom line: Learning how to cut your dog's nails safely is one of the highest-value skills you can develop as a dog owner. Regular trimming every 2-4 weeks prevents painful overgrowth, reduces joint stress, and helps you catch nail bed problems early. Keep styptic powder on hand, use positive reinforcement, and never hesitate to consult your veterinarian if you notice swelling, discharge, persistent bleeding, or behavioral changes related to your dog's paws.
Aaron Whyte
All our authors care for dogs every day — read more of their work on the authors page.