Step-by-Step Crate Training Guide for Your New Rescue
Learn how to crate train your new dog on day one with this step-by-step guide. Discover crate sizes, setup tips, and a positive reinforcement schedule.

Why Crate Training on Day One Matters
Bringing a new dog or puppy into your home is an exhilarating experience, but the first 24 hours are critical for establishing long-term boundaries and routines. Among the most vital first-day essentials is crate training. A crate is not a punishment; it is a den-like sanctuary that taps into your dog's natural instinct to seek a safe, enclosed space. When introduced correctly on day one, the crate becomes a foundational tool for potty training, preventing destructive behavior, and reducing separation anxiety. This step-by-step training guide will walk you through the exact process of introducing your new rescue or puppy to their crate using positive reinforcement, specific timing, and expert-approved methodologies.
Step 1: Selecting the Perfect Crate Size and Type
Before you begin training, you must have the right equipment. According to the American Kennel Club (AKC), a crate should be large enough for your dog to stand up, turn around, and lie down comfortably, but not so large that they can eliminate in one corner and sleep in the other. For growing puppies, purchase a crate that fits their estimated adult size and use an adjustable divider panel.
Crate Type Comparison Chart
| Crate Type | Pros | Cons | Estimated Cost | Best For |
|---|---|---|---|---|
| Wire Crate (e.g., MidWest iCrate) | Excellent ventilation, foldable, adjustable dividers | Heavy, visually obtrusive, noisy | $50 - $120 | Puppies, chewers, home use |
| Plastic/Airline Crate | Cozy den feel, travel-approved, draft-free | Poor ventilation, harder to clean | $40 - $100 | Travel, anxious dogs, drafty homes |
| Soft-Sided Crate | Lightweight, portable, easy to store | Zero chew-resistance, hard to sanitize | $30 - $80 | Travel, fully trained adult dogs |
Measurement Rule of Thumb: Measure your dog from the tip of their nose to the base of their tail (add 2 to 4 inches), and from the floor to the top of their head or ears (add 2 to 4 inches). This ensures a proper fit.
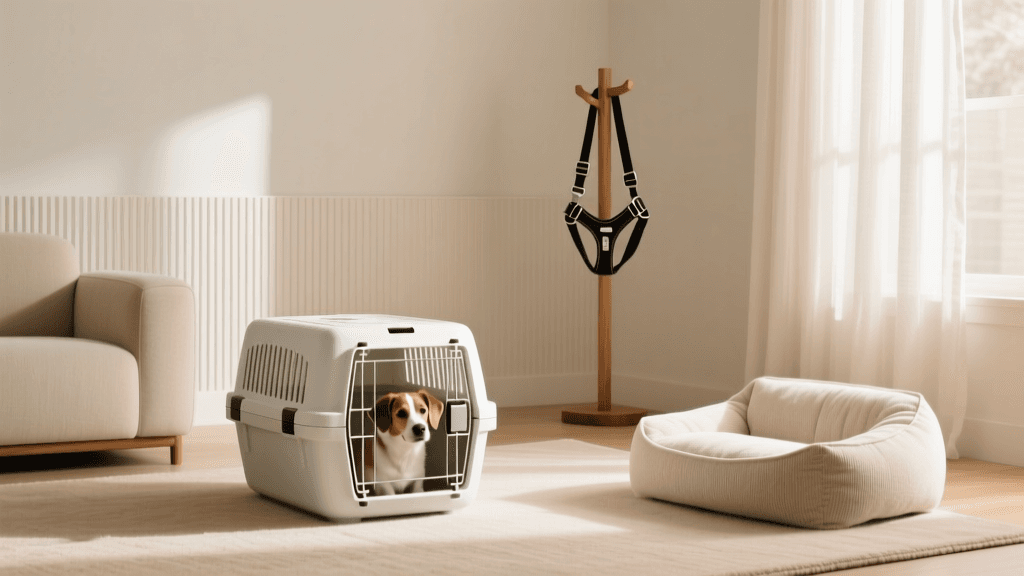
Step 2: Creating an Inviting Crate Environment
Location and comfort are paramount on day one. Place the crate in a high-traffic family area, such as the living room or near your bed, so the dog does not feel isolated. Avoid placing it in direct sunlight or near drafty vents.
- Bedding: Use a washable, durable dog bed or folded blankets. Avoid plush beds for teething puppies who might ingest stuffing.
- Enrichment: Include a KONG Classic Dog Toy ($15 - $25) stuffed with frozen peanut butter and kibble. This provides a high-value, long-lasting distraction.
- Comfort: For anxious rescues or young puppies, consider a Snuggle Puppy Behavioral Aid ($40 - $50), which includes a simulated heartbeat and heat pack to mimic littermates.
Step 3: The First Introduction (Minutes 1 to 30)
Never force your new dog into the crate. The initial introduction must be entirely voluntary and heavily rewarded. Keep the door securely propped open or removed entirely during this phase.
- The Treat Toss: Stand near the crate and toss high-value treats (like boiled chicken or hot dog pieces) just inside the doorway. Let the dog enter, eat, and exit freely. Repeat this 10 to 15 times.
- Move the Target: Gradually toss the treats further into the back of the crate. Your dog should be fully stepping inside to retrieve the reward.
- Mealtime Association: Serve your dog's first meal in their new home inside the crate. Place the food bowl at the very back. If they are hesitant, place it near the front and slowly move it back over successive meals.
"The crate should always be associated with positive experiences. Never use the crate as a place of punishment or time-outs, as this will destroy the dog's trust in their safe space."
Step 4: Building Duration and Closing the Door
Once your dog is confidently entering the crate for treats and meals, it is time to introduce the closed door. This requires patience and incremental timing.
- Phase 1 (1-5 Minutes): Give your dog a stuffed KONG inside the crate. Close the door quietly and sit right next to the crate. Do not leave the room. Open the door before they finish the KONG and whine.
- Phase 2 (5-15 Minutes): Close the door and move a few feet away. Sit quietly, read a book, or watch TV. Return, drop a treat inside through the wire, and then open the door. Repeat, gradually increasing the distance you sit from the crate.
- Phase 3 (15-30 Minutes): Close the door and briefly step out of the room for 10 seconds. Return calmly, reward quiet behavior, and let them out. Slowly extend your absence to 1 minute, 5 minutes, and eventually 30 minutes.
If your dog begins to bark or whine, do not open the door immediately. Wait for a brief pause of 3 to 5 seconds of silence before opening it. Opening the door while they are vocalizing teaches them that barking is the key to freedom.
Step 5: Conquering the First Night
Nighttime crate training is often the most challenging hurdle for new owners. Puppies and rescues are used to sleeping with littermates or previous pack members, and the sudden isolation can trigger vocalization.
The Nighttime Routine:
- Remove water 2 hours before bedtime to minimize midnight potty needs.
- Engage in 20-30 minutes of active play and training to physically and mentally exhaust the dog.
- Take them outside for a final potty break immediately before bed. Keep this trip boring and strictly business.
- Place the crate in your bedroom, ideally at eye level with your bed, so they can hear and smell you. You can slowly move the crate to its permanent location over the next few weeks.
According to the Humane Society of the United States, puppies under six months generally cannot hold their bladder for more than a few hours. Set an alarm for a midnight and 3:00 AM potty break. Carry the puppy outside to avoid accidents, let them eliminate, and immediately return them to the crate. Do not engage in play during these night breaks.
Troubleshooting Common First-Day Crate Issues
Issue: Relentless Whining and Barking
If you have ensured the dog is not needing to eliminate, is not in physical distress, and has been exercised, the whining is likely attention-seeking. The ASPCA advises that you must ignore the whining completely. Yielding to the noise reinforces the behavior. If the whining escalates to panic or self-harm (biting the bars), you may need to consult a certified professional dog trainer (CPDT) to address underlying separation anxiety.
Issue: Refusal to Enter the Crate
If your rescue dog is terrified of the crate, dismantle it if possible. Leave the bottom tray and top half separated with a blanket draped over it to create a low-profile tent. Feed all meals near, and eventually inside, this modified space for several days before reassembling it.
Final Thoughts on Day One Success
Crate training is a marathon, not a sprint. The goal of the first day is simply to build a positive association with the space, not to leave the dog locked inside for hours. By utilizing high-value treats, proper crate sizing, and incremental duration building, you are setting your new companion up for a lifetime of security, better bladder control, and well-mannered household behavior. Stick to the routine, remain patient, and celebrate the small victories as your new dog settles into their forever home.
beth-carrasco
All our authors care for dogs every day — read more of their work on the authors page.