Step-by-Step Muzzle Training Guide for Stress-Free Vet Visits
Learn how to muzzle train your dog step-by-step for stress-free vet visits. Discover the best basket muzzles, treats, and a 4-week conditioning plan.
Why Muzzle Training is a Health and Wellness Necessity
When most dog owners hear the word "muzzle," they immediately associate it with aggression or behavioral issues. However, in the realm of canine health and wellbeing, muzzle training is one of the most vital, proactive steps you can take for your dog's overall welfare. Dogs are masters at hiding pain, and even the sweetest, most docile family pet may bite reflexively if they are injured, in severe pain, or terrified during a veterinary examination.
According to VCA Animal Hospitals, reducing stress during veterinary visits is critical because high anxiety can elevate a dog's heart rate, blood pressure, and cortisol levels, potentially masking underlying health conditions or delaying recovery. By proactively muzzle training your dog using positive reinforcement, you are providing veterinary staff with a safe way to handle your dog, ensuring your pet receives the best possible medical care without the need for chemical sedation or physical restraint.
"A muzzle is not a punishment; it is a protective piece of equipment that keeps your dog safe, keeps the veterinary team safe, and allows for stress-free medical handling."
How to Measure Your Dog's Snout for a Perfect Fit
Before purchasing a muzzle, you must measure your dog's snout accurately. An ill-fitting muzzle can cause chafing, restrict breathing, or slip off during a critical moment.
- Snout Length: Measure from the tip of the nose to just below the eyes (the stop).
- Snout Circumference: Measure around the thickest part of the snout, usually about one inch below the eyes. Crucial: Measure while your dog is panting slightly to ensure they have room to open their mouth.
Snout Width and Height: Measure the width across the nose and the height from the top to the bottom of the snout.
Choosing the Right Muzzle: Basket vs. Soft
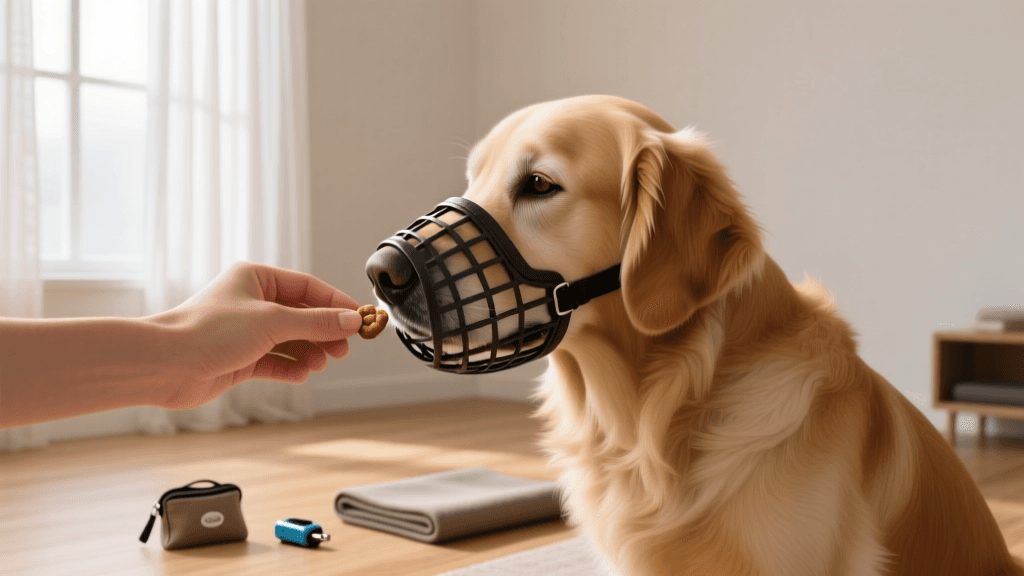
For veterinary visits and training, a basket muzzle is the gold standard. Soft nylon muzzles should only be used for very brief, highly supervised periods (like a quick nail trim) because they restrict panting, which can lead to dangerous overheating.
| Feature | Basket Muzzle (e.g., Baskerville Ultra) | Soft Nylon Muzzle |
|---|---|---|
| Panting Ability | Excellent (Full pant allowed) | Poor (Restricts mouth opening) |
| Treat Access | Yes (Can feed through holes) | No |
| Water Drinking | Yes | No |
| Recommended Duration | Up to 1-2 hours (with breaks) | Under 10-15 minutes |
| Best Use Case | Vet visits, walking, training, emergencies | Quick grooming, emergency first aid |
The ASPCA strongly recommends using a basket-style muzzle for training because it allows the dog to pant, drink water, and accept treats, which are essential for counterconditioning and positive reinforcement.
Essential Supplies and Estimated Costs
To begin your training journey, gather the following supplies. The total initial investment is generally under $50, a small price to pay for a lifetime of stress-free medical care.
- Basket Muzzle: Baskerville Ultra or Jafco ($18 - $28)
- High-Value Squeeze Treats: Kong Stuff'N, plain cream cheese, or squeeze tubes of liverwurst ($6 - $10)
- Treat Pouch: For quick access to solid treats like boiled chicken ($10 - $15)
- Clicker: Optional, for marking desired behaviors ($2 - $5)
The 4-Week Step-by-Step Muzzle Training Protocol
Training should occur in a quiet, low-distraction environment. Keep sessions short—no more than 3 to 5 minutes, twice a day. If your dog shows signs of stress (lip licking, yawning, turning away), end the session on a positive note and lower your criteria for the next session.
Week 1: Desensitization and the "Muzzle Bowl"
The goal of Week 1 is to change your dog's emotional response to the sight of the muzzle. We want the muzzle to predict amazing things.
- The Reveal: Bring out the muzzle and immediately give your dog a high-value treat. Hide the muzzle behind your back. Repeat this 5 times. The dog learns: Muzzle appears = Chicken appears.
- The Muzzle Bowl: Smear a generous amount of cream cheese or peanut butter (ensure it is xylitol-free) inside the front of the basket muzzle. Hold the muzzle out and let your dog lick it out. Do not attempt to put it on their head. Let them approach it voluntarily.
- Duration Building: Gradually reduce the amount of spreadable treat so your dog has to stick their nose further into the basket to get the reward.
Week 2: Touching and Holding
Now we begin introducing the feeling of the muzzle on the snout without the pressure of straps.
- Nose Targeting: Hold a treat against the outside front of the basket. Lure your dog's nose into the muzzle. The moment their nose touches the bottom, say "Yes!" or click, and give the treat through the side holes or pull the muzzle away to reward.
- The 3-Second Rule: Once your dog comfortably shoves their nose in, delay the reward by 1 second, then 2 seconds, then 3 seconds. Hold the muzzle gently with your other hand, applying zero pressure. If they pull back, do not resist; let them go and try again with a shorter duration.
- Meal Replacement: Begin feeding your dog's regular kibble meals out of the muzzle bowl to solidify the positive association.
Week 3: Fastening the Straps
This is often the most challenging phase, as dogs are sensitive to things touching the back of their heads and ears.
- Strap Desensitization: With the muzzle on the snout (unfastened), gently touch the back of your dog's neck with the strap. Click and treat. Repeat until the touch of the strap elicits a happy tail wag or relaxed posture.
- The "Buckle" Game: Bring the straps together behind the ears and fasten them for exactly one second. Immediately unfasten, click, and deliver a jackpot of treats (3-4 pieces of chicken).
- Increasing Time: Over the week, build up to fastening the strap for 5 seconds, then 10 seconds, then 30 seconds. Continuously feed high-value treats through the front basket while the straps are buckled. The moment the treats stop, the muzzle comes off. This teaches the dog that keeping the muzzle on makes the treats flow.
Week 4: Wearing, Moving, and Vet Simulation
A dog must learn to move comfortably while wearing the muzzle before stepping foot in a clinic.
- Indoor Movement: Buckle the muzzle and toss treats on the floor for your dog to forage. Encourage them to walk around the living room, sit, and lie down.
- Outdoor Integration: Put the muzzle on right before your dog's favorite activity: a walk in the park. The excitement of the walk will override the mild annoyance of the new equipment.
- The Vet Clinic Simulation: Drive to your veterinary clinic, but do not go inside. Put the muzzle on in the car, walk your dog around the parking lot, feed them amazing treats, play a quick game of tug (if the muzzle allows), and then get back in the car and go home. This breaks the association that "Muzzle + Vet Building = Bad Things Happen."
Troubleshooting Common Setbacks
Even with careful planning, you may encounter hurdles. As noted by the American Kennel Club (AKC), patience and reading your dog's body language are paramount to successful conditioning.
- My dog paws at the muzzle: This means you moved too fast or the duration was too long. Keep your hands on the muzzle to gently prevent pawing, distract them with a high-value treat, remove the muzzle before they successfully paw it off, and try a shorter duration next time.
- My dog freezes or shuts down: You have pushed past their threshold. Remove the muzzle, take a break for 24 hours, and return to Week 1. Consider using higher-value rewards like real meat or cheese.
- The muzzle rubs their fur: Check the fit. You may need to add a layer of soft fleece or moleskin padding to the nose band or the straps behind the ears to prevent chafing on short-coated breeds.
Maintaining the Positive Association
Muzzle training is not a "set it and forget it" skill. To maintain a positive emotional response, you must continue to use the muzzle in fun, low-stress contexts. Once a month, bring out the muzzle, feed your dog their dinner through it, and put it away. On the day of your actual veterinary visit, exercise your dog thoroughly beforehand to lower their baseline anxiety, bring your treat pouch, and advocate for your dog by asking the veterinary team to allow your dog to acclimate to the exam room before any handling begins.
By investing a few weeks into this step-by-step training guide, you are giving your dog the gift of confidence. You are ensuring that when they are vulnerable, sick, or in pain, they can receive life-saving medical care safely, comfortably, and without fear.
hannah-wickes
All our authors care for dogs every day — read more of their work on the authors page.