2026 No-Pull Dog Harness Training: Stop Leash Pulling Fast
Master leash walking in 2026 with our front-clip no-pull dog harness training guide. Learn step-by-step behavioral conditioning to stop pulling today.
The Biomechanics of Pulling: Why Back-Clip Fails
As we navigate dog ownership and behavioral conditioning in 2026, the veterinary and behavioral consensus has shifted entirely away from aversive tools. According to the Humane Society of the United States, force-free methods and humane management tools like front-clip harnesses are the gold standard for teaching leash manners. When a dog wears a traditional back-clip harness and pulls, the pressure is distributed across their chest and shoulders. This inadvertently triggers the 'opposition reflex'—the exact same biomechanical response that allows sled dogs to pull heavy loads. Essentially, a back-clip harness gives your dog the leverage to pull you down the street.
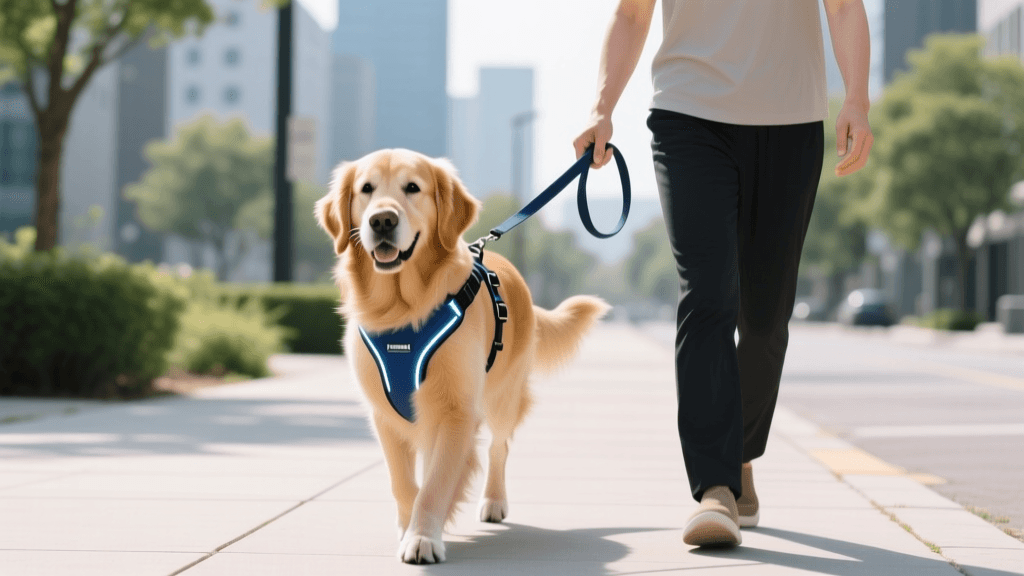
A front-clip no-pull harness features a leash attachment ring located on the dog's sternum. When the dog surges forward and hits the end of the leash, the front attachment point gently redirects their center of mass back toward the handler. This breaks the dog's forward momentum without causing tracheal damage or neck strain, creating a vital window of opportunity for you to reward loose-leash behavior.
Top-Rated No-Pull Harnesses for 2026
Selecting the right equipment is the first step in your training protocol. Here is a comparison of the most reliable, veterinarian-recommended front-clip harnesses available this year.
| 2026 Harness Model | Clip Configuration | Best For | Approx. 2026 Price |
|---|---|---|---|
| Ruffwear Front Range | Dual (Front & Back) | Active dogs, hiking, everyday training | $45.00 |
| Kurgo Tru-Fit Smart | Dual (Front & Back) | Deep-chested breeds, car travel safety | $35.00 |
| Rabbitgoo No-Pull | Dual (Front & Back) | Budget-conscious owners, heavy pullers | $25.00 |
Phase 1: Harness Desensitization and Fitting
Many no-pull harnesses require slipping a loop over the dog's head, which can trigger claustrophobia or handling sensitivity. Before hitting the pavement, spend three to five days desensitizing your dog to the gear indoors.
The 'Head-Loop' Shaping Game
- Step 1: Hold the harness neck loop open in one hand and a high-value treat (like freeze-dried liver or boiled chicken) in the other.
- Step 2: Move the treat through the loop so the dog must voluntarily push their nose through the hole to get the reward.
- Step 3: Mark the behavior with a 'Yes!' or a clicker the moment their nose passes through, then deliver the treat.
- Step 4: Gradually increase the duration their head stays in the loop before marking and treating.
Ensure the 2026 model you chose fits correctly: you should be able to slide exactly two fingers between the harness straps and your dog's body. A loose harness will chafe and allow the dog to slip out, while a tight harness restricts shoulder extension and alters their natural gait.
Phase 2: The 'Redirection' Leash Training Method
According to the ASPCA's guide to leash training, consistency in your physical feedback is just as important as your treat delivery. The front-clip harness is a management tool that facilitates the 'Redirection Method.'
Executing the Redirection
- The Baseline: Attach your leash to the front sternum ring. Use a standard 4-to-6-foot flat leash. Never use a retractable leash during this phase.
- The Surge: When your dog surges forward and the leash goes taut, the front clip will naturally turn their shoulders toward you.
- The Stop: Do not yank or jerk the leash. Simply become a 'tree.' Stand completely still and wait.
- The Reset: The moment your dog turns their head back toward you or takes a single step to loosen the leash, mark the behavior ('Yes!') and deliver a treat right at your pant seam (the 'reward zone').
- The Resume: Only resume walking forward when the leash is visibly slack in a 'J' shape.
Trainer's Note: In the first few weeks of your 2026 training sessions, your walks will be incredibly slow. You might only cover one block in twenty minutes. This is normal. You are rewiring your dog's brain to understand that tension equals a stopped walk, while slack equals forward movement.
Phase 3: The Engage-Disengage Protocol
Dogs often pull not just to move faster, but to reach environmental triggers like other dogs, squirrels, or discarded food. The Engage-Disengage game, a staple in modern behavioral conditioning, teaches your dog to voluntarily check in with you when they spot a trigger.
- Engage: Your dog spots a trigger (e.g., a squirrel) at a distance where they notice it but do not react or pull. The front-clip harness keeps them safely tethered if they miscalculate.
- Mark: The exact second your dog looks at the trigger, use your marker word ('Yes!').
- Disengage: Your dog will turn their head back toward you to get the treat they associate with the marker word.
- Reward: Feed the treat at your side, reinforcing the position you want them in.
Over time, your dog will begin to voluntarily disengage and look at you the moment they see a trigger, effectively eliminating the urge to lunge and pull.
Troubleshooting: Managing the 'Wrap-Around' Tangle
One of the most common complaints regarding front-clip harnesses is that when the dog is redirected, the leash can sometimes wrap around their front legs. This is especially common with wide-chested breeds like Bulldogs or Corgis, or highly erratic puppies.
The 'Dual-Clip' Solution
Many premium 2026 harness models feature both a front and back attachment ring. To prevent leg-tangling while maintaining the anti-pull steering effect, you can use a specialized dual-attachment training leash (often called a 'coupler' or 'Y-leash'). This leash clips to both the front and back rings simultaneously. When the dog pulls, the front clip provides the primary redirection, while the back clip stabilizes the harness and prevents it from twisting or dragging the leash under the dog's legs.
If you do not have a dual-attachment leash, practice the 'Guiding Hand' technique. Keep your non-leash hand ready to gently guide the leash over the dog's back the moment they turn, preventing the rope from dropping into their leg path. This requires active engagement from the handler, which is exactly what modern behavioral conditioning demands. You are not just a passenger holding a rope; you are an active participant in your dog's spatial awareness.
Critical Mistakes to Avoid in 2026
Even with the best equipment, handler errors can sabotage your progress. Avoid these common pitfalls:
- Using Retractable Leashes: Retractable leashes maintain constant, light tension on the harness. This teaches your dog that pulling is the default state required to move forward, completely negating the front-clip's training mechanics.
- Leash Jerking: A front-clip harness is designed for gentle steering and pressure distribution. Jerking the leash can still cause shoulder strain or joint injury, and it damages the trust required for positive reinforcement training.
- Inconsistent Clipping: Switching back and forth between the front-clip and back-clip rings confuses the dog's proprioception. Stick exclusively to the front-clip until your dog has demonstrated three consecutive weeks of reliable loose-leash walking.
Fading the Front Clip: The Ultimate Goal
A no-pull harness is a set of training wheels, not a permanent crutch. Once your dog has mastered the Engage-Disengage protocol and consistently walks with a slack leash, you can begin fading the front clip. Start by attaching the leash to the back-clip ring for the first five minutes of your walk as a 'warm-up,' then switch to the front-clip if pulling resumes. By the end of your training journey, your dog will walk politely on a flat collar or back-clip harness, having internalized the mechanics of a polite, connected walk.
tom-renshaw
All our authors care for dogs every day — read more of their work on the authors page.