Dog Training Tips Video: The Ultimate Visual Guide to Training Your Pup
Master dog training with expert video tips & step-by-step visual guides. Learn sit, stay, recall & more with proven techniques for every breed and skill level.
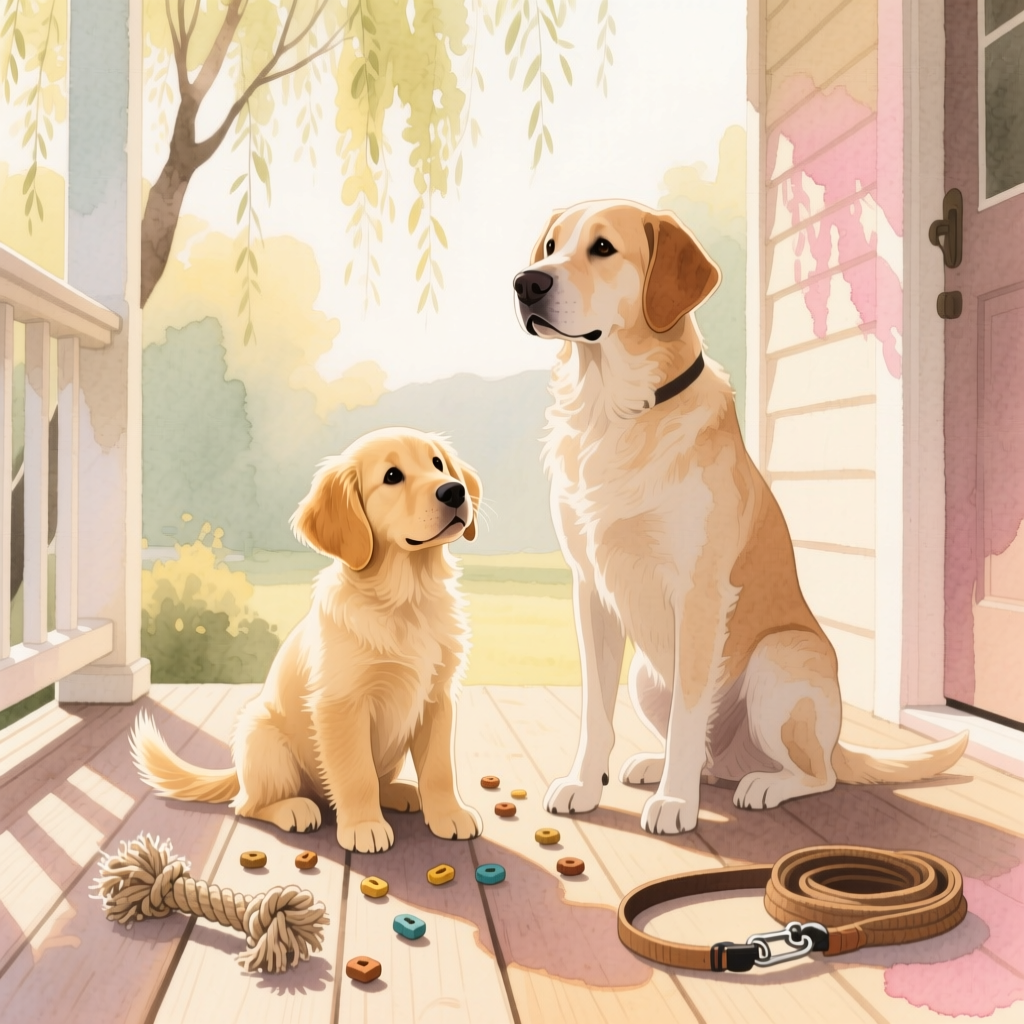
Dog Training Tips Video: The Ultimate Visual Guide to Training Your Pup
There is a reason why video has become the most popular medium for learning dog training. Watching a skilled trainer work with a dog in real time reveals nuances that written instructions simply cannot capture — the subtle shift in body language, the precise timing of a reward, the gentle correction that redirects unwanted behavior. Whether you are bringing home a rambunctious puppy or trying to teach an old dog new tricks, video-based training tips give you a front-row seat to techniques that actually work.
This comprehensive guide breaks down the most effective dog training methods you will find in top-quality training videos. We will walk you through foundational commands, address common behavioral challenges, and show you how to maximize the value of every training session. If you are ready to transform your relationship with your four-legged companion, keep reading — and consider bookmarking our complete dog training hub for ongoing guidance.
Why Video-Based Dog Training Tips Are a Game Changer
Dog training is inherently visual and physical. You can read about a “loose leash walk” all day, but until you see the handler’s posture, the tension (or lack of it) on the leash, and the dog’s response in real time, the concept remains abstract. Video bridges that gap beautifully.
The Advantages of Learning Through Video
- Timing clarity: One of the hardest skills in dog training is mastering the split-second timing of markers and rewards. Video lets you watch, pause, and replay these critical moments until the rhythm clicks.
- Body language awareness: Dogs communicate primarily through body language. Training videos teach you to read ear positions, tail signals, weight shifts, and eye contact — skills that are nearly impossible to convey through text alone.
- Realistic expectations: Videos show you what a training session actually looks like, including the messy middle where the dog gets distracted, makes mistakes, and gradually improves. This sets realistic expectations and reduces frustration.
- Replay value: Unlike a one-time in-person class, video content is available whenever you need a refresher. You can revisit specific techniques before each training session.
Of course, video learning works best when paired with consistent practice and a solid understanding of canine behavior. Our puppy training basics guide is an excellent companion resource for foundational knowledge.
How to Use Training Videos Effectively
Before diving into specific techniques, here is a framework for getting the most out of any dog training video:
- Watch the full video first without your dog present. Absorb the overall flow and key concepts.
- Take notes on the handler’s position, hand signals, verbal cues, and reward timing.
- Watch a second time, this time focusing on the dog’s responses and body language.
- Practice the technique in a low-distraction environment with your own dog.
- Record yourself during practice sessions so you can compare your technique to the video.
Essential Commands Every Dog Should Learn (With Video-Style Breakdowns)
Every great training video series starts with the foundational commands. These are the building blocks upon which all advanced training is constructed. Below, we break down each command as if you were watching a step-by-step video tutorial.
Sit: The Foundation of All Training
The “sit” command is typically the first behavior taught because it is natural, easy to capture, and serves as a default polite behavior for your dog.
Step-by-step technique:
- Stand in front of your dog with a high-value treat held between your thumb and index finger.
- Slowly move the treat from your dog’s nose upward and slightly backward over their head.
- As their nose follows the treat upward, their hindquarters will naturally lower to the ground.
- The instant their bottom touches the floor, say “Yes!” (or click your clicker) and give the treat.
- Repeat 5–10 times per session, gradually adding the verbal cue “Sit” just before the hand motion.
Pro tip: If your dog jumps up instead of sitting, you are likely moving the treat too far back. Keep the motion smooth and close to their nose. Different breeds respond at different speeds — check our Golden Retriever breed page or German Shepherd breed page for breed-specific training insights.
Stay: Building Impulse Control
“Stay” teaches your dog self-control and can be a life-saving command in dangerous situations.
Step-by-step technique:
- Ask your dog to sit.
- Show your open palm toward your dog like a stop sign and say “Stay.”
- Wait one second. If your dog remains in place, mark with “Yes!” and reward.
- Gradually increase the duration: 2 seconds, 5 seconds, 10 seconds, and so on.
- Once your dog can hold a stay for 15–20 seconds, begin adding distance by taking one step back.
- Return to your dog, reward, and release with a cue like “Okay!”
- Slowly increase both distance and duration over multiple sessions, but never both at the same time.
Common mistake: Repeating the word “stay” multiple times. Say it once, clearly, and trust your training. Repeating the cue teaches your dog that they do not need to respond the first time.
Come (Recall): The Most Important Command
A reliable recall could save your dog’s life. This is the command most frequently featured in training videos because it requires precise technique to build a truly dependable response.
Step-by-step technique:
- Start indoors or in a securely fenced area with minimal distractions.
- With your dog on a long leash (15–30 feet), let them wander and explore.
- Say your dog’s name followed by “Come!” in an enthusiastic, happy tone.
- Gently guide them toward you with the leash if needed — never yank.
- When they reach you, deliver a jackpot reward: multiple treats, enthusiastic praise, or a favorite toy.
- Practice in increasingly distracting environments over weeks and months.
Critical rule: Never call your dog to you for something they perceive as negative (bath time, nail trimming, leaving the park). Recall should always predict wonderful outcomes. For more on building a bulletproof recall, visit our reliable recall training guide.
Down: The Calm-Down Command
“Down” asks your dog to lie flat on the ground and is an excellent settling behavior for restaurants, visitors, and calm home environments.
Step-by-step technique:
- Start with your dog in a sit position.
- Hold a treat at their nose and slowly lower it straight down to the floor between their front paws.
- Once the treat reaches the floor, slowly drag it along the ground toward you (creating an “L” shape with the treat path).
- Your dog should follow the treat down into a lying position.
- Mark and reward the instant their elbows and hocks touch the ground.
Leave It: Impulse Control in Action
This command prevents your dog from picking up dangerous items, stealing food, or chasing wildlife.
Step-by-step technique:
- Place a low-value treat on the floor and cover it with your hand.
- Say “Leave it.”
- Your dog will sniff, paw, and nose at your hand. Wait patiently.
- The moment they pull their head back or look away, mark “Yes!” and reward with a different, higher-value treat from your other hand.
- Gradually progress to uncovering the treat, then placing it on the floor without covering it, and eventually dropping treats from a height.
Leash Training Techniques You Can See in Action
Leash pulling is the number one behavioral issue dog owners face, and it is also the topic of countless training videos. The reason is simple: leash training requires physical technique, and seeing it demonstrated visually makes an enormous difference in your success rate.
The Stop-and-Go Method
This is one of the most widely recommended techniques in professional training videos:
- Begin walking with your dog on a standard 4–6 foot leash (avoid retractable leashes for training).
- The instant your dog pulls and the leash goes taut, stop walking immediately. Become a tree.
- Wait. Do not jerk the leash, do not speak. Simply stand still.
- When your dog looks back at you or the leash slackens, mark “Yes!” and resume walking.
- Repeat this process consistently. Over time, your dog learns that pulling makes forward movement stop, while a loose leash makes it continue.
The Direction-Change Method
This technique keeps your dog engaged and attentive:
- Walk forward with your dog.
- When they begin to pull, immediately turn 180 degrees and walk the other direction.
- Say “Let’s go!” in a cheerful voice to encourage them to follow.
- When they catch up and are walking beside you with a loose leash, reward.
- Change directions frequently and unpredictably during early training sessions.
Equipment tip: A front-clip harness can significantly reduce pulling by gently redirecting your dog’s forward momentum. Pair it with the techniques above for faster results. For breed-specific leash training advice, explore our Labrador Retriever breed guide, as Labs are notoriously enthusiastic pullers in their youth.
Solving Common Behavior Problems: Visual Training Strategies
Training videos excel at demonstrating solutions to common behavioral challenges. Here are detailed breakdowns of the techniques you will see professionals use.
Jumping on People
Jumping is a natural greeting behavior for dogs, but it is unwelcome and potentially dangerous, especially with larger breeds.
The “Four on the Floor” technique:
- When your dog jumps on you, immediately turn your back and cross your arms. Give zero attention — no eye contact, no talking, no pushing (pushing can feel like play to a dog).
- The moment all four paws are on the ground, turn around, praise calmly, and offer a treat at chest level or lower.
- If they jump again, repeat the turn-away immediately.
- Practice with family members and eventually with guests, briefing visitors on the protocol before they interact with your dog.
- Teach an incompatible behavior: a dog cannot jump if they are sitting. Ask for a “sit” before every greeting.
Excessive Barking
Before addressing barking, identify the trigger. Boredom barking, alert barking, anxiety barking, and demand barking each require slightly different approaches.
For demand barking (barking at you for attention or food):
- Completely ignore the barking. No eye contact, no verbal response.
- Wait for a moment of silence — even two seconds counts.
- Mark the silence with “Yes!” and reward.
- Gradually require longer periods of silence before rewarding.
For alert barking (barking at doorbells, knocks, passersby):
- Teach a “quiet” cue. When your dog barks, say “Quiet” calmly and hold a treat near their nose.
- They will stop barking to sniff the treat. Mark the silence and reward.
- Practice with controlled triggers: have a friend ring the doorbell while you are ready with treats.
- Over time, your dog learns that the trigger (doorbell) predicts a reward for being quiet rather than an opportunity to bark.
Chewing and Destructive Behavior
Destructive chewing is often a symptom of insufficient mental and physical stimulation, teething discomfort in puppies, or separation anxiety.
Management and redirection strategy:
- Puppy-proof your home by removing tempting items from your dog’s reach.
- Provide a variety of appropriate chew toys in different textures (rubber, rope, nylon, natural wood alternatives).
- When you catch your dog chewing something inappropriate, calmly redirect them to an approved chew toy and praise enthusiastically when they take it.
- Use puzzle feeders and food-stuffed toys (like frozen Kongs) to provide mental enrichment and appropriate chewing outlets.
- Ensure your dog receives adequate exercise for their breed and age. A tired dog is a well-behaved dog.
For more detailed strategies, check our guide to stopping destructive chewing and our separation anxiety solutions article.
Advanced Training Tips and Crate Training Fundamentals
Once your dog has mastered the basics, training videos can guide you through more advanced skills and essential life routines like crate training.
Crate Training: Creating a Safe Haven
Crate training is one of the most valuable skills you can teach your dog, aiding in house training, travel safety, and providing them with a personal sanctuary.
Step-by-step crate training process:
- Introduce the crate positively: Place the crate in a common area with the door open. Toss treats inside and let your dog explore at their own pace. Feed meals near, then inside, the crate.
- Build duration: Once your dog enters willingly, close the door for one second, then open it and reward. Gradually increase to 5 seconds, 10 seconds, 30 seconds, and beyond while you remain nearby.
- Add distance: Begin stepping away from the crate for short periods while your dog is inside. Return before they become distressed.
- Extend time: Work up to 30 minutes, then an hour, then longer periods. Always ensure your dog has been exercised and has had a bathroom break before extended crating.
- Practice departures: Leave the house for short periods while your dog is crated. Start with 5 minutes and gradually increase.
Never use the crate as punishment. The crate should always be associated with positive experiences. For a complete house-training program that incorporates crate training, visit our house training guide.
Clicker Training: Precision Timing Made Visible
Clicker training is a science-based method that uses a distinct “click” sound to mark the exact moment your dog performs the desired behavior. It is incredibly popular in training videos because it produces fast, reliable results.
Getting started with clicker training:
- Charge the clicker: Click the clicker and immediately give your dog a treat. Repeat 20–30 times until your dog visibly perks up at the sound of the click, anticipating a reward.
- Mark desired behaviors: Click at the exact moment your dog performs the behavior you want. The click “takes a picture” of that precise moment.
- Always follow the click with a treat. The click predicts the reward. If you click, you must pay — every single time.
- Shape complex behaviors: Use the clicker to reward successive approximations toward a final behavior. For example, to teach “spin,” click and reward for a head turn, then a step in a circle, then a half turn, and finally a full spin.
Trick Training for Mental Enrichment
Teaching tricks is not just fun — it provides critical mental stimulation that tires your dog out as effectively as physical exercise. Popular tricks featured in training videos include:
- Shake/Paw: Hold a treat in a closed fist. When your dog paws at your hand, mark and reward. Add the verbal cue once the behavior is consistent.
- Roll Over: From a “down” position, lure your dog’s nose to their shoulder, then along their spine, encouraging them to roll onto their side and eventually all the way over.
- Play Dead: Lure your dog from a down position onto their side with a treat near their nose moved toward their back. Add the dramatic cue “Bang!” once the behavior is fluent.
Tips for Maximizing Your Training Success
Regardless of the specific techniques you are learning from training videos, these universal principles will accelerate your progress and strengthen your bond with your dog.
Keep Sessions Short and Sweet
Dogs learn best in short, focused sessions of 5–15 minutes. Multiple brief sessions throughout the day are far more effective than one marathon hour-long session. End every session on a positive note with a behavior your dog performs well, followed by generous rewards and play.
Use High-Value Rewards Strategically
Not all treats are created equal. Reserve the highest-value rewards (real chicken, cheese, freeze-dried liver) for the most challenging tasks and distracting environments. Use lower-value treats (kibble, basic training treats) for well-established behaviors in easy environments. This creates a reward hierarchy that keeps your dog motivated.
Be Consistent Across All Family Members
Everyone in the household must use the same verbal cues, hand signals, and rules. If one person allows the dog on the couch and another scolds them for it, your dog will be confused and training will stall. Hold a brief family meeting to agree on cues and expectations before starting any training program.
Practice in Increasingly Distracting Environments
A dog who responds perfectly in your living room may completely ignore you at the park. This is normal. Training must be “proofed” by practicing in progressively more distracting settings:
- Quiet room in your home
- Different rooms in your home
- Your backyard
- Your front yard
- A quiet park
- A busy park
- A pet-friendly store
At each new location, expect to lower your criteria temporarily and increase your reward value. This process is called “generalization,” and it is essential for reliable real-world behavior.
Record Your Own Training Sessions
One of the most powerful uses of video in dog training is recording yourself. Set up your phone on a tripod or ask someone to film your sessions. Watching yourself train reveals habits you may not notice in the moment: inconsistent timing, unintentional body language, or accidentally rewarding unwanted behaviors.
Common Dog Training Mistakes to Avoid
Even with excellent video resources at your disposal, certain mistakes can undermine your progress. Being aware of these pitfalls helps you avoid them.
Mistake #1: Inconsistent Timing of Rewards
If you mark and reward a behavior two or three seconds after it happens, your dog may associate the reward with whatever they were doing at that later moment. This is why clicker training is so effective — the click provides an instantaneous, precise marker. Always mark the behavior the instant it occurs, then deliver the reward.
Mistake #2: Moving Too Fast Through Training Steps
It is tempting to rush through the steps when you are excited about your dog’s progress. However, each step needs to be solid before you advance. If your dog can hold a “stay” for 5 seconds, do not jump to 30 seconds in the next trial. Build duration in small, achievable increments.
Mistake #3: Training When Frustrated
Dogs are remarkably sensitive to human emotions. If you are frustrated, impatient, or angry, your dog will sense it and may become anxious, shut down, or act out. If you feel frustration building, end the session calmly, take a break, and return when you are in a positive frame of mind.
Mistake #4: Relying Solely on Treats
While food is a powerful motivator, a well-rounded training program incorporates multiple types of rewards: praise, play, access to the environment (like sniffing on a walk), and life rewards (like opening the door to go outside). This variety keeps training engaging and prevents your dog from only responding when food is visible.
Mistake #5: Punishing After the Fact
Dogs do not connect punishment with something they did minutes or even seconds ago. If you come home to a chewed-up shoe and scold your dog, they associate your anger with your arrival home — not with the chewing they did earlier. This erodes trust and creates anxiety without solving the behavior. Focus on management, prevention, and rewarding appropriate behavior instead.
Mistake #6: Not Setting Up for Success
Training in a highly distracting environment before your dog is ready, expecting a puppy to hold a stay for five minutes, or asking for a reliable recall at an off-leash park before building a solid foundation — these are all setups for failure. Always ask yourself: “Has my dog been prepared for this level of difficulty?” If not, take a step back and build the foundation first.
Frequently Asked Questions About Dog Training Videos and Techniques
How long does it take to train a dog using video-based methods?
The timeline varies enormously depending on the dog’s age, breed, temperament, previous training history, and the consistency of the handler. Basic commands like sit, down, and come can typically be taught within 1–3 weeks of daily short sessions. More complex behaviors and reliable proofing in distracting environments may take several months. The key is consistency: 10–15 minutes of focused practice every single day will produce better results than sporadic, lengthy sessions. Remember, training is not a destination but an ongoing process that strengthens your bond throughout your dog’s life.
Can I train my dog entirely through videos, or do I need a professional trainer?
Many dog owners achieve excellent results using video-based training resources, especially for foundational obedience and common behavioral issues. However, a professional trainer or behaviorist is invaluable for serious behavioral challenges like aggression, severe fear or anxiety, resource guarding, or if you feel stuck despite consistent effort. Think of it like learning a musical instrument: you can learn a great deal from video tutorials, but a skilled teacher can identify subtle errors in your technique and provide personalized guidance. Consider combining video learning with occasional in-person or virtual sessions with a certified professional for the best of both worlds.
What equipment do I need to start training my dog at home?
You do not need an elaborate setup to begin training effectively. The essentials include: a standard 4–6 foot leash (not retractable), a well-fitting flat collar or front-clip harness, a clicker (if using clicker training), a treat pouch for easy access to rewards, and high-value training treats cut into small, pea-sized pieces. For specific training goals, you might also want a long line (15–30 feet) for recall practice, a crate for crate training, and puzzle toys for mental enrichment. As you progress, you may add agility equipment, target sticks, or other specialized tools, but the basics will carry you through the vast majority of foundational training. Visit our essential training equipment guide for detailed product recommendations.
Is it too late to train an older dog who has never had formal training?
Absolutely not. The saying “you can’t teach an old dog new tricks” is a myth. Adult and senior dogs can learn new behaviors, and in some ways, they are easier to train than puppies because they have longer attention spans, more impulse control, and are less easily distracted. Older dogs may take slightly longer to unlearn established habits, but with patience, positive reinforcement, and consistent practice, they can absolutely learn obedience commands, tricks, and new routines. The approach remains the same: start with foundational behaviors, use high-value rewards, keep sessions short and positive, and celebrate every success. If your older dog has specific health concerns like arthritis or hearing loss, adapt your training methods accordingly — use hand signals instead of verbal cues for a hearing-impaired dog, for example.
How do I know if a dog training video is giving good advice?
Not all training videos are created equal, and some promote outdated or harmful methods. Look for these indicators of quality, science-based training content: the trainer uses positive reinforcement (rewarding desired behaviors) rather than dominance-based or punishment-heavy methods; they explain the “why” behind each technique; they show realistic training sessions that include mistakes and how to handle them; they emphasize timing, consistency, and patience; and they hold relevant certifications from reputable organizations (such as CPDT-KA, KPA, or IAABC). Be wary of videos that promise instant results, rely heavily on aversive tools like shock collars or alpha rolls, or use intimidation tactics. Good training builds trust and confidence — if a video makes you uncomfortable or the dog appears stressed, look for a better resource. Our training resource library curates only humane, evidence-based methods.
Putting It All Together: Your Training Action Plan
Now that you have a comprehensive understanding of the techniques demonstrated in the best dog training videos, it is time to create your personalized action plan. Here is a suggested weekly framework:
Week 1–2: Foundation
Focus on sit, down, name recognition, and crate introduction. Practice 2–3 short sessions per day in a quiet room.
Week 3–4: Building Reliability
Add stay, come, and leave it. Begin practicing in different rooms of your home. Introduce leash training basics.
Week 5–6: Adding Distractions
Take your training to the backyard, then the front yard. Practice all commands with mild distractions. Begin introducing trick training for mental enrichment.
Week 7–8: Real-World Proofing
Practice at parks, on walks, and in pet-friendly stores. Work on loose leash walking in real-world conditions. Begin practicing recall with a long line in open areas.
Ongoing: Maintenance and Growth
Continue practicing regularly, introducing new tricks, and refining existing skills. Training never truly ends — it evolves into a deeper, more intuitive partnership between you and your dog.
Every dog is an individual, and progress will not always be linear. Some days will feel like huge leaps forward, while others may feel like steps backward. This is completely normal. Trust the process, stay patient, and remember that every moment you spend training is an investment in a happier, safer, and more harmonious life together.
Ready to dive deeper? Explore our full collection of dog training guides, browse breed-specific training tips, and discover how the right approach can unlock your dog’s full potential. Your training journey starts with a single sit — and the video is always ready when you are.
Aaron Whyte
All our authors care for dogs every day — read more of their work on the authors page.