How to Stop a Bleeding Nail on Your Dog: Complete First Aid Guide
Learn how to stop a bleeding nail on your dog with proven first aid techniques, product recommendations, and vet-approved care tips for quick relief.
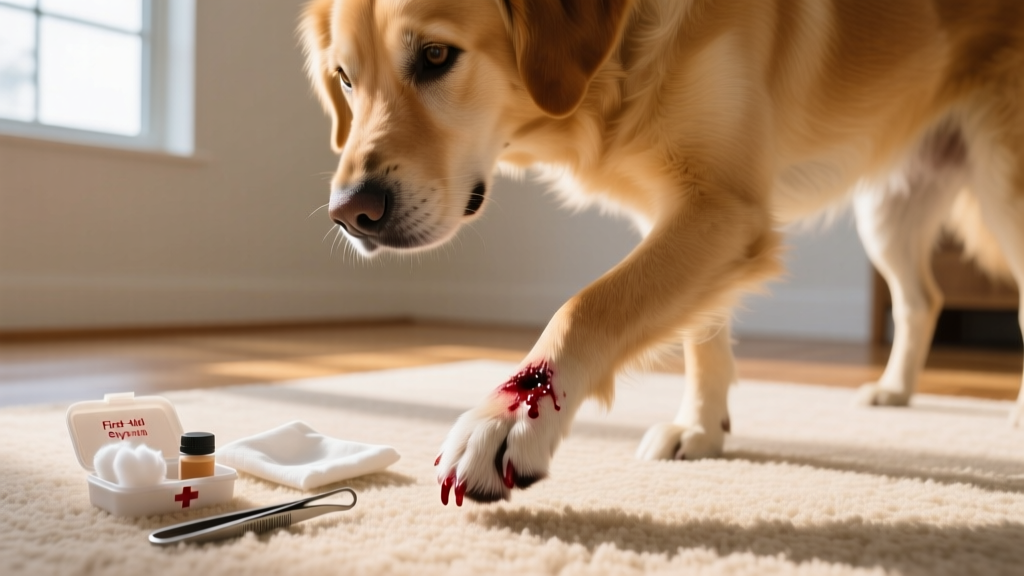
If you've ever trimmed your dog's nails and suddenly saw a spray of blood, you know the panic that follows. A bleeding nail is one of the most common at-home dog care emergencies — and while it looks alarming, most cases are entirely manageable with the right supplies and technique. This guide walks you through exactly how to stop a bleeding nail on your dog, understand the anatomy behind it, and prevent future mishaps.
Veterinary disclaimer: This guide covers first aid for minor nail bleeding. If bleeding does not stop after 15–20 minutes of direct pressure and styptic treatment, or if the nail is torn at the base, consult your veterinarian immediately.
Dog Nail Anatomy: Why Bleeding Happens So Fast
Anatomy Quick Primer: The Quick Explained
A dog's nail (technically called a claw) is fundamentally different from a human fingernail. In humans, the nail plate is entirely dead keratin — cutting it causes no pain or bleeding. In dogs, each nail contains a living structure called the quick (or dermis), which is a blood vessel and nerve bundle that extends from the nail bed into the center of the claw.
Key differences from human nails:
- Blood supply: The quick is richly vascular — cutting it causes immediate, sometimes profuse bleeding because the nail's hollow shape channels blood outward.
- Nerve endings: The quick is highly sensitive, which is why dogs yelp or pull away when you cut too close.
- Visibility: On light-colored nails, the quick appears as a pink or salmon-colored core visible through the translucent keratin. On dark or black nails, it is invisible from the outside.
- Growth pattern: The quick grows longer alongside the nail. Dogs with infrequently trimmed nails often have very long quicks, meaning you can't trim as short without hitting it.
The Merck Veterinary Manual notes that canine nail structures are prone to splitting, breaking, and quick exposure due to their weight-bearing function and the forces applied during running and digging.
How to Check Your Dog's Nails: A Home Examination
Regular nail inspections help you catch problems early and keep the quick at a manageable length. Here's a step-by-step home exam technique:
Step-by-Step Nail Examination
- Position your dog: Have your dog sit or lie on their side on a non-slip surface. For anxious dogs, work during a calm moment after exercise, not when they're hyper.
- Lift each paw gently: Hold the paw firmly but without squeezing. Separate the toes with your fingers to access each nail individually.
- Inspect the nail length: With your dog standing, nails should not touch the ground. If you hear clicking on hard floors, they're too long. Ideal length is 1–2 mm above the floor surface.
- Check the quick (light nails): Hold the nail up to a light source. The pink quick should be visible as a tapered core inside the nail. Note where it ends — this is your cutting landmark.
- Examine the nail surface: Look for vertical cracks, horizontal splits, peeling layers, or rough edges that could catch on fabric.
- Check the nail base: Gently press around the nail bed (where the nail meets the toe). There should be no swelling, redness, discharge, or foul odor.
- Inspect dewclaws: Don't forget the dewclaws (the higher, inner nails on the front legs, and sometimes rear legs). These don't touch the ground and can grow in curves that embed into the skin.
- Look between the pads: Check for matted fur, foreign objects (burrs, glass, ice balls), or redness between the toe pads that might indicate infection.
Normal vs. Abnormal: What Healthy Dog Nails Look Like
| Feature | Normal / Healthy | Abnormal / Concerning |
|---|---|---|
| Length | 1–2 mm above ground when standing | Touching or curling under; clicking on hard floors |
| Color | White, gray, black, or brown — consistent per nail | Sudden darkening, red/brown staining near base (possible infection or licking) |
| Surface texture | Smooth, slightly glossy, hard | Brittle, flaking, peeling, ridged, or crumbly |
| Shape | Slight downward curve, symmetrical | Twisted, splayed sideways, or growing into adjacent toe |
| Nail bed | Clean, dry, no odor, skin flush with nail base | Swollen, red, oozing, crusty, or foul-smelling |
| Behavior | Dog walks normally, tolerates paw handling | Limping, excessive licking, pulling paw away when touched |
How to Stop a Bleeding Dog Nail: Step-by-Step First Aid
This is the core procedure. Stay calm — your dog will mirror your energy. A bleeding quick bleeds more than you'd expect from such a small wound because the nail acts like a funnel directing blood flow outward.
Step 1: Restrain and Comfort
Have a second person gently hold your dog if possible. If you're alone, position your dog on their side on a towel (which also catches blood). Speak in a calm, low voice. Offer a high-value treat like a lick mat with peanut butter to distract them.
Step 2: Apply Direct Pressure
Using a clean gauze pad or cloth, press firmly against the tip of the bleeding nail for at least 2 full minutes without lifting to check. Continuous pressure is critical — releasing too soon restarts the clotting process. A timer on your phone helps you resist the urge to peek.
Step 3: Apply a Styptic Agent
After 2 minutes of pressure, apply one of these hemostatic agents directly to the nail tip:
| Product | Type | How to Apply | Price Range (2026) |
|---|---|---|---|
| Kwik Stop Styptic Powder | Ferric subsulfate powder | Pour small amount into lid, press nail tip into powder for 5–10 seconds | $6–$10 (1.5 oz) |
| PetAg Pro-Stop Styptic Powder | Aluminum sulfate powder | Pinch powder between fingers, press onto nail tip | $5–$8 (0.5 oz) |
| Safety Dog Nail Trimmer with Sensor (e.g., Resco Deluxe) | Preventive tool | LED sensor illuminates the quick in light-colored nails | $18–$30 |
| Cornstarch or flour (home backup) | Household alternative | Pack into nail tip opening; less effective than styptic powder but works in a pinch | Pantry item |
| Styptic pencil (aluminum sulfate) | Solid stick form | Wet tip, press against nail for 10–15 seconds | $4–$7 |
Pro tip: Keep your styptic powder in a small container with a wide lid opening so you can dip the nail directly in rather than trying to sprinkle powder onto a squirming dog.
Step 4: Protect the Nail
After the bleeding stops (typically 1–5 minutes after styptic application), keep your dog off hard surfaces for at least 30 minutes. The clot is fragile and can be knocked loose. You can slip a clean sock over the paw or use a self-adhesive bandage (Vetrap, $5–$8 per roll) loosely wrapped to protect the nail. Do not wrap tightly — you should be able to slide two fingers underneath.
Step 5: Monitor for 24–48 Hours
Check the nail twice daily for signs of infection: swelling, warmth, discharge, or your dog licking the area excessively. If you notice any of these, contact your vet. A mild antiseptic spray (chlorhexidine-based, like Vetericyn Plus at $12–$18) can be applied once daily for 2–3 days as a preventive measure.
🚨 When to Call the Vet About a Bleeding Nail
- Bleeding continues beyond 15–20 minutes despite direct pressure and styptic powder
- The nail is torn at the base or hanging by a thread of tissue — do not pull it off yourself
- The entire nail has been pulled out (avulsion) — this exposes bone and requires veterinary treatment
- You see pus, green/yellow discharge, or the toe becomes swollen and hot within 24–72 hours
- Your dog is limping persistently more than 24 hours after the injury
- Your dog has a known clotting disorder (e.g., von Willebrand disease, hemophilia, or is on anticoagulant medication)
- The quick appears dark, necrotic, or has a foul odor — possible deep infection
In cases of severe uncontrolled bleeding, apply continuous pressure with a clean cloth and transport to the nearest emergency veterinary clinic. For suspected poisoning or toxic exposure related to nail products, contact ASPCA Animal Poison Control: (888) 426-4435 (24/7, consultation fee applies).
Common Dog Nail Problems: Symptoms and What They Mean
| Condition | Symptoms | Common Cause | Home Care vs. Vet |
|---|---|---|---|
| Quick injury (cut too short) | Bright red bleeding, yelping, paw withdrawal | Nail trimming error | Home — styptic powder + pressure |
| Nail splitting or cracking | Visible crack, occasional bleeding, rough edge catching on fabric | Dry nails, trauma, nutritional deficiency | Home if superficial; vet if crack reaches quick |
| Broken or torn nail | Sudden limp, bleeding, visible nail fragment dangling | Caught on carpet, fence, or during play | Vet if nail is partially attached or torn at base |
| Overgrown nails | Clicking on floors, splayed toes, altered gait, curled nails pressing into pads | Infrequent trimming, low activity on soft surfaces | Home — gradual trimming every 1–2 weeks to recede quick |
| Ingrown dewclaw | Curved nail growing into pad skin, swelling, limping, possible infection | Dewclaws never touch ground so don't self-wear | Vet if embedded; home prevention with regular trimming |
| Nail bed infection (paronychia) | Swollen, red nail base, pus, odor, excessive licking | Bacterial or fungal entry through damaged nail bed | Vet — requires antibiotics or antifungal treatment |
| Symmetrical lupoid onychodystrophy (SLO) | Multiple nails becoming brittle, lifting from bed, sloughing off | Autoimmune condition | Vet — requires immunosuppressive therapy |
Nail Care Routine: Trimming Frequency and Technique
Recommended Nail Maintenance Schedule
- Active dogs on hard surfaces (concrete, asphalt): Nails may self-wear. Check every 3–4 weeks; trim as needed.
- Most pet dogs (mixed surfaces): Trim every 2–3 weeks to maintain proper length and keep the quick receded.
- Senior or low-activity dogs: Trim every 1–2 weeks — decreased activity means less natural wear and faster overgrowth.
- Dewclaws (all dogs): Check and trim every 2 weeks regardless of activity level.
- Full nail inspection: Weekly visual check as described in the home exam above.
Safe Trimming Technique to Avoid Quick Injuries
- Use sharp, high-quality clippers — dull blades crush the nail and increase splitting risk. Guillotine-style (e.g., Resco Original, $12–$18) or scissor-style (e.g., Millers Forge Professional, $15–$25) both work; choose what you're comfortable with.
- For dark nails where the quick is invisible, make tiny cuts of 1–2 mm at a time. After each cut, examine the cross-section: when you see a dark or grayish oval in the center of the freshly cut surface, you're approaching the quick. Stop cutting.
- Cut at a 45-degree angle, following the natural curve of the nail.
- If your dog is fearful, use cooperative care techniques: teach a "chin rest" or "paw target" behavior using positive reinforcement with treats, and trim only 1–2 nails per session until your dog is comfortable.
- Consider a rotary nail grinder (e.g., Dremel 7300-PT Pet Grooming Tool, $25–$35) for gradual filing. Grinders reduce quick-strike risk because you remove small amounts at a time, though some dogs are startled by the vibration and noise — introduce gradually.
Breed Predispositions: Which Dogs Have More Nail Problems?
| Breed or Type | Nail Concern | Why |
|---|---|---|
| Greyhounds, Whippets, sighthounds | Long, fast-growing nails; sensitive quicks | Low body fat means less padding; nails bear concentrated force during sprinting |
| German Shepherds, Rottweilers | Rear dewclaws (sometimes double dewclaws) | Breed standard includes rear dewclaws; extra nails that never self-wear |
| Great Pyrenees, Briards, Beaucerons | Double rear dewclaws | Genetic trait — these extra nails require regular trimming to prevent ingrowth |
| Small/toy breeds (Chihuahuas, Yorkies, Pomeranians) | Overgrowth, curved nails, luxation-related gait changes | Light body weight doesn't wear nails down; patellar luxation alters weight distribution |
| Doberman Pinschers | Von Willebrand disease (clotting disorder) | Genetic predisposition means nail injuries bleed longer and may require veterinary intervention |
| Labrador Retrievers, Golden Retrievers | Nail trauma from active play | High-activity breeds that dig, run on rough terrain, and play hard are prone to torn nails |
Preventing Nail Bleeding and Other Nail Problems
Prevention is straightforward and comes down to consistency:
- Trim regularly to recede the quick: The more frequently you trim (even just 1 mm off every 1–2 weeks), the more the quick retreats into the nail. Over several months, you'll be able to trim shorter safely. The American Kennel Club recommends gradual trimming as the safest approach for dogs with long quicks.
- Use the right tools: Dull clippers crush rather than cut, increasing the risk of splitting that can extend into the quick. Replace blades or clippers annually.
- Desensitize your dog to paw handling: Start in puppyhood — touch paws daily, pair with treats, and build up to holding clippers near nails without cutting. Dogs that are comfortable with paw handling are less likely to jerk during trimming, which is a major cause of accidental quick cuts.
- Walk on varied surfaces: Regular walks on concrete or asphalt naturally file nails. However, this alone is rarely sufficient — supplement with trimming.
- Keep styptic powder accessible: Store Kwik Stop or equivalent in your grooming kit, your first aid kit, and near wherever you typically trim nails. When a nail bleeds, you don't want to be searching cabinets.
- Address nutritional gaps: Brittle, splitting nails can indicate omega-3 fatty acid deficiency or biotin insufficiency. Consult your vet about adding a fish oil supplement (e.g., Nordic Naturals Omega-3 Pet, $18–$28) if your dog's nails are chronically dry and crumbly.
Frequently Asked Questions
Can I use human styptic powder or a styptic pencil on my dog?
Yes, standard aluminum sulfate styptic pencils (sold for human shaving nicks) are safe for dogs in an emergency. However, pet-specific styptic powders like Kwik Stop contain benzocaine, which provides mild topical pain relief in addition to stopping bleeding. Avoid products containing silver nitrate, as these can cause tissue damage if over-applied.
How long does it take for a dog's nail quick to heal after being cut?
The quick typically seals within 24–48 hours and fully heals in 5–7 days. During this window, the nail is more sensitive, and re-bleeding can occur if the clot is disturbed. Avoid trimming that particular nail for at least 7–10 days.
My dog has black nails and I can't see the quick. How do I avoid cutting it?
Make very small cuts (1–2 mm) and examine the cross-section after each one. When you see a chalky white or gray oval appear in the center of the cut surface, stop — that's the start of the quick's outer sheath. Another technique: look at the underside of the nail. Many dark nails have a slight groove on the underside that narrows as you approach the quick.
Should I take my dog to the vet every time a nail bleeds?
No — most quick injuries from routine trimming can be managed at home with styptic powder and pressure. See the vet if bleeding doesn't stop within 15–20 minutes, if the nail is torn at the base or fully avulsed, or if you notice signs of infection in the following days. Dogs with known clotting disorders should see a vet for any nail bleeding.
Can a broken dog nail heal on its own?
Superficial cracks or chips above the quick can heal on their own — the nail will grow out and the damaged portion will eventually be trimmed away. However, if the break is at or below the quick line, or if the nail is partially detached, veterinary care is needed. Your vet may need to remove the damaged portion under sedation and prescribe antibiotics to prevent infection. According to the VCA Animal Hospitals network, nail bed injuries that expose the underlying bone (P3) require professional treatment to heal properly.
How much does a vet charge to treat a torn dog nail?
Costs vary by region and severity. Expect $50–$120 for a simple nail removal and bandaging under local anesthesia. If sedation is required, add $80–$200. If the injury involves infection requiring culture, antibiotics, and follow-up visits, total costs can reach $250–$450. Emergency after-hours visits may carry an additional $100–$200 exam fee.
Robin Maitland
All our authors care for dogs every day — read more of their work on the authors page.