Dog Nail Scratch Board Training: Complete Paw & Nail Care Guide
Learn how a dog nail scratch board transforms paw and nail care. Covers nail anatomy, common problems, home exams, and when to see the vet.
Long nails aren't just a cosmetic issue — they alter your dog's gait, put stress on joints, and can lead to painful orthopedic problems over time. Yet for many dogs, traditional nail trimming is a battle of wills that leaves both owner and pet stressed. Enter the dog nail scratch board: a simple, force-free tool that lets your dog file their own nails through a trained scratching behavior. But a scratch board is only one piece of a comprehensive paw and nail care strategy. This guide covers everything you need to know about canine nail anatomy, common problems, home examinations, and how to integrate a scratch board into a complete maintenance routine.
Nail and Paw Anatomy: How Your Dog's Nails Actually Work
Dog Nails vs. Human Nails: Key Differences
Human nails grow from the nail matrix beneath the cuticle and sit flat against the fingertip. Dog nails are fundamentally different structures:
- Weight-bearing function: Dog nails contact the ground during movement and provide traction. Unlike human nails, they bear mechanical load with every step.
- The quick (dermis): Each dog nail contains a living core called the quick — a vascular and nerve-rich tissue that grows alongside the nail keratin. This has no equivalent in human nails. Cutting the quick causes bleeding and significant pain.
- Claw shape: Dog nails curve downward and are designed to grip terrain. The curved shape means overgrowth changes the angle of the entire toe, affecting posture and movement.
- Dewclaws: Most dogs have a fifth nail (dewclaw) on the inner front legs, and some breeds have rear dewclaws. These never contact the ground and are entirely dependent on manual trimming.
- Growth rate: Dog nails grow continuously at approximately 1-2 mm per week, though this varies by breed, age, diet, and activity level on hard surfaces.
The paw pad itself consists of thick, keratinized epithelium with subcutaneous fat pads that absorb shock. Digital pads bear weight, while the larger metacarpal (front) or metatarsal (rear) pad provides the primary cushion. The carpal pad, located higher on the front leg, acts as a brake during downhill movement or sudden stops.
Understanding this anatomy is essential because overgrown nails don't just look unkempt — they push the toes upward and backward, forcing the dog to redistribute weight onto the heel of the paw. Over months and years, this altered posture contributes to joint strain, particularly in the carpal and tarsal joints. According to the Merck Veterinary Manual, chronic nail overgrowth can lead to secondary orthopedic issues that are often misattributed to arthritis or aging.
Common Nail and Paw Problems in Dogs
Recognizing problems early is the difference between a simple home-care fix and an emergency vet visit. Here are the conditions dog owners encounter most frequently:
| Problem | Symptoms | Severity | Typical Cause |
|---|---|---|---|
| Overgrown nails | Clicking on hard floors, nails curving into paw pads, altered gait, reluctance to walk | Moderate — progressive | Insufficient trimming or natural wear |
| Split or cracked nails | Limping, licking at one nail, visible fracture line, bleeding | Moderate to High | Trauma, dry brittle nails, nutritional deficiency |
| Broken nail with quick exposure | Active bleeding, intense pain, dog refuses to bear weight on that paw | High — urgent | Caught nail on carpet/terrain, overgrown nail catching |
| Ingrown nails | Nail curving into pad, swelling, discharge, foul odor, limping | High — infection risk | Severe overgrowth, especially dewclaws |
| Nail bed infection (paronychia) | Redness, swelling, discharge around nail base, pain on touch, excessive licking | Moderate to High | Bacterial or fungal entry through cracked nail or wound |
| Symmetrical lupoid onychodystrophy (SLO) | Multiple nails brittle, splitting, lifting from nail bed; often all claws affected | High — chronic | Autoimmune disease (idiopathic) |
| Pad abrasions or burns | Raw pads, limping, licking paws, visible peeling or blistering | Moderate | Hot pavement, ice, rough terrain, chemical deicers |
| Interdigital cysts | Red, raised bumps between toes, licking, occasional drainage | Moderate — chronic | Allergies, foreign bodies, breed predisposition |
How to Perform a Home Nail and Paw Examination
A systematic weekly examination catches problems before they escalate. Here's a step-by-step technique you can use at home, ideally when your dog is calm — after a walk or during a relaxed evening.
- Position your dog comfortably. Have your dog stand on a non-slip surface (a yoga mat or rubber bath mat works well). For small dogs, place them on a table at your eye level with a non-slip mat underneath. Offer a high-value treat (freeze-dried liver, small pieces of chicken) to create a positive association.
- Inspect each paw pad. Gently lift one paw at a time. Examine the digital pads and metacarpal/metatarsal pad for cracks, peeling, discoloration, or embedded debris (gravel, thorns, ice balls in winter). Check between the toes for redness, swelling, or moisture — signs of interdigital dermatitis.
- Assess nail length. With your dog standing, look at where the nails meet the ground. Properly trimmed nails should NOT touch the floor when the dog is standing in a neutral position. If you hear clicking on hard surfaces, the nails are too long. The ideal clearance is approximately 1-2 mm above the ground.
- Examine each nail individually. Look for splitting, cracking, irregular growth patterns, or discoloration. In light-colored nails, the quick is visible as a pinkish core. In dark nails, you cannot see the quick directly, so look for a chalky white or gray center at the nail tip — the quick begins where the color changes to darker tissue.
- Check dewclaws carefully. Dewclaws never wear down naturally. Examine them for overgrowth, curving toward the leg, or signs of the nail beginning to penetrate the skin. This is especially critical in breeds with rear dewclaws.
- Test nail stability. Gently wiggle each nail. Any looseness, movement at the base, or pain response warrants a veterinary visit — this can indicate a nail bed tumor, infection, or SLO.
- Smell the paws. A mild "corn chip" odor is normal (caused by naturally occurring Pseudomonas and Proteus bacteria). A sharp, yeasty, or putrid smell indicates a potential infection that needs veterinary evaluation.
Normal vs. Abnormal: What Healthy Nails and Paws Look Like
Knowing what's normal prevents both unnecessary worry and missed warning signs. Use this comparison as your reference guide:
✓ Normal / Healthy
- Nails do not touch the ground when dog stands on a flat surface
- Nail surface is smooth, hard, and consistent in color
- Quick visible in light nails as a pink core, extending roughly 2/3 of nail length
- Paw pads are slightly rough, uniformly colored (pink, brown, or black depending on pigmentation), and supple
- Interdigital spaces are clean, dry, and free of redness
- Dewclaws are short, straight, and not curving toward skin
- Mild "corn chip" or neutral odor
- Dog walks without limping, licking, or favoring any paw
✗ Abnormal / Concerning
- Nails visibly touching or curling under when dog stands
- Cracks, splits, or flaking on nail surface
- Nails that are soft, crumbly, or lifting from the nail bed
- Pads that are cracked, bleeding, blistered, or excessively dry/hard
- Red, moist, or swollen skin between toes
- Dewclaws curving into the leg or penetrating skin
- Strong yeasty, foul, or metallic (blood) odor
- Limping, excessive paw licking, reluctance to walk on hard surfaces
- Multiple nails affected simultaneously (possible systemic or autoimmune issue)
Using a Dog Nail Scratch Board: Training and Technique
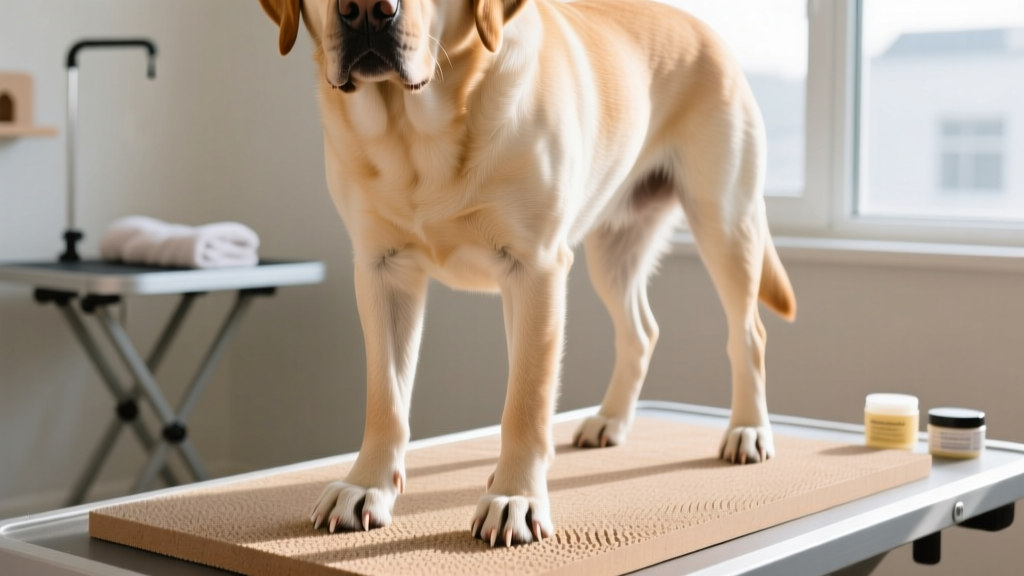
A dog nail scratch board is a textured surface — typically a board with adhered sandpaper or a commercial abrasive panel — that your dog scratches with their front paws to naturally file their nails. It's an excellent alternative or supplement to clipping, particularly for dogs who are fearful of nail trimmers. The scratch board works through positive reinforcement training: your dog learns that scratching the board earns rewards, and the abrasive surface does the filing work.
How to Train Your Dog to Use a Scratch Board
Training a scratch board behavior typically takes 3-10 sessions of 3-5 minutes each, depending on your dog's temperament and prior training experience. Here's the proven shaping protocol:
- Introduce the board flat on the ground. Let your dog sniff it. Click (or say "yes!") and treat any interaction — sniffing, stepping on it, looking at it.
- Capture a paw touch. Wait for your dog to place a paw on the board. Mark and reward. Repeat until your dog is deliberately stepping on the board for treats.
- Shape a forward scratch. Hold a treat near the board's surface, encouraging your dog to paw at it. Mark and reward any forward scratching motion. Do NOT physically move your dog's paw — let them offer the behavior.
- Add a verbal cue. Once your dog is reliably scratching, add a cue like "file" or "scratch" just before the behavior. Reward enthusiastically.
- Build duration gradually. Start rewarding only longer scratching sequences (3-5 scratches in a row, then 8-10). This is where the actual filing happens.
- Train both front paws independently. Most dogs will favor one paw. Encourage alternating by positioning the board slightly left or right.
Important limitation: Scratch boards only file front nails effectively. Rear nails still require manual trimming, grinding, or natural wear from exercise on hard surfaces. Dewclaws cannot be filed with a scratch board at all.
DIY vs. Commercial Scratch Boards
| Feature | DIY Board | Commercial Board |
|---|---|---|
| Cost | $8-$15 (board + sandpaper + adhesive) | $25-$65 |
| Abrasive surface | 80-grit sandpaper (replace when worn) | Replaceable abrasive pads or built-in textured surface |
| Durability | 3-6 months before sandpaper replacement | 1-3 years depending on model and dog size |
| Angle options | Flat only unless you build an angled frame | Some models offer 30-45° angled surfaces for better ergonomics |
| Best for | Testing whether your dog will use one | Dogs already trained to the behavior; multi-dog households |
Complete Paw and Nail Care Routine
A scratch board is one tool in a broader maintenance system. Here's a comprehensive routine that covers all aspects of nail and paw health:
Weekly Care Checklist
- Nail length check: Stand your dog on a hard floor. Nails should clear the ground by 1-2 mm. If using a scratch board, schedule 2-3 short sessions (3-5 minutes) per week for front nails.
- Visual paw inspection: Check pads for cracks, debris, and discoloration. Examine between toes for redness or moisture.
- Dewclaw check: Verify dewclaws are not curving toward skin. Trim manually with scissor-style clippers or a rotary grinder (e.g., Dremel 7300-PT or equivalent) if overgrown.
- Pad moisturizing (if needed): Apply a dog-specific paw balm (containing shea butter, beeswax, or vitamin E) to dry or cracking pads. Avoid human lotions — they soften pads excessively and increase injury risk.
Monthly Care Checklist
- Full nail trim or grind: Even with scratch board use, trim rear nails and dewclaws monthly. Take off 1-2 mm at a time to avoid the quick. In dark nails, look for the chalky-white center that signals you're approaching the quick.
- Fur trimming between pads: For breeds with hairy feet (e.g., Cocker Spaniels, Bernese Mountain Dogs), trim interdigital fur flush with the pad surface to prevent matting and improve traction.
- Deep pad inspection: Check for embedded foreign material — foxtail awns, small stones, glass fragments. Use blunt-tipped tweezers for visible debris; see a vet for deeply embedded objects.
Seasonal Additions
- Winter: Rinse paws with lukewarm water after walks to remove chemical deicers (rock salt, calcium chloride). Apply paw wax (e.g., Musher's Secret or similar) before walks on treated surfaces. Check for ice ball accumulation between toes.
- Summer: Test pavement temperature with the back of your hand — if it's too hot to hold for 7 seconds, it will burn paw pads. Walk during early morning or evening. Check for foxtail awns after walks in grassy areas.
Recommended Products for Home Nail and Paw Care
| Product Type | Specific Recommendations | Price Range (2026) | Notes |
|---|---|---|---|
| Scratch board (commercial) | ScratchPaws, ScratchSquare, or similar textured board | $25-$65 | Look for replaceable abrasive pads; angled boards reduce wrist strain for the dog |
| Scissor-style nail clippers | Millers Forge Professional Nail Clipper (medium or large) | $15-$25 | Sharp blades produce clean cuts; replace or sharpen every 12-18 months |
| Rotary nail grinder | Dremel 7300-PT Paw & Nail Guard or Casfuy Dog Nail Grinder | $20-$40 | Quieter models reduce fear; use 2-minute sessions to avoid heat buildup on the nail |
| Styptic powder | Kwik Stop or equivalent styptic powder | $5-$10 | Essential for any nail trimming kit; applies pressure + clotting agent to bleeding quick |
| Paw balm/wax | Musher's Secret, Natural Dog Company Paw Soother | $12-$22 | Apply thin layer; avoid over-application which makes paws slippery |
| DIY scratch board materials | 12"×18" plywood + 80-grit sandpaper + spray adhesive | $8-$15 | Replace sandpaper every 4-8 weeks depending on use frequency |
When to See the Vet: Red Flag Symptoms
🚨 Call Your Veterinarian If You Notice:
- Active bleeding from a nail that won't stop within 5 minutes of applying styptic powder and direct pressure
- A nail torn at or below the nail bed — the vet may need to remove the remaining nail fragment under sedation to prevent infection and allow proper healing
- Multiple nails affected simultaneously — splitting, crumbling, or lifting across several claws can indicate symmetrical lupoid onychodystrophy (SLO), an autoimmune condition requiring immunosuppressive therapy
- Swelling, redness, or discharge at the nail base — paronychia (nail bed infection) requires antibiotics or antifungal medication prescribed by your vet
- A nail growing at an abnormal angle or changing color/shape — especially in older dogs, this can signal a nail bed tumor (squamous cell carcinoma or melanoma), which requires biopsy
- Persistent limping or paw-licking lasting more than 24 hours without an obvious cause
- A dewclaw that has penetrated the skin — this requires veterinary removal and wound management
- Pads that are deeply cracked, bleeding, or blistered — chemical burns or severe abrasions need professional wound care
Always consult your veterinarian for any nail or paw condition you cannot confidently identify. Home treatment of infections, autoimmune conditions, or tumors can delay critical care and worsen prognosis.
Breed Predispositions: Which Dogs Are Most at Risk
Certain breeds face higher risks for specific nail and paw conditions due to anatomy, coat type, genetics, or working history:
| Breed / Type | Predisposed Condition | Why |
|---|---|---|
| German Shepherds, Rottweilers, Giant Schnauzers | Symmetrical lupoid onychodystrophy (SLO) | Genetic autoimmune predisposition; estimated prevalence of 1-2% in German Shepherds |
| Great Pyrenees, Briards, Icelandic Sheepdogs | Rear dewclaw injuries, ingrown dewclaws | Breed standard includes double rear dewclaws; these are loosely attached and catch easily |
| Bulldogs, Pugs, Boston Terriers | Interdigital cysts, pododermatitis | Short-haired, wide-set toes with skin folds create moist environments prone to infection |
| Greyhounds, Whippets, other sighthounds | Pad abrasions, nail trauma | High-speed running on varied terrain; thin skin and minimal paw padding |
| Dachshunds, Basset Hounds | Overgrown nail complications, joint stress from altered gait | Long spinal structure makes altered weight distribution from long nails especially damaging to the back |
| Labrador Retrievers, Golden Retrievers | Interdigital cysts, foreign body penetration (foxtails) | Active outdoor lifestyle; webbed feet with skin between toes prone to trapping debris |
| Senior dogs (all breeds) | Brittle nails, reduced pad elasticity, nail bed tumors | Reduced activity means less natural nail wear; aging tissues are more fragile; tumor risk increases with age |
Prevention Strategies: Keeping Nails and Paws Healthy
Prevention is always less expensive and less stressful than treatment. These strategies reduce the likelihood of the problems listed above:
- Consistent exercise on varied surfaces: Regular walks on concrete, asphalt, or packed dirt provide natural nail wear. Aim for at least 30 minutes daily on hard surfaces if your dog's joints allow it. This reduces (but rarely eliminates) the need for manual trimming.
- Use a dog nail scratch board 2-3 times per week: For front nails, trained scratch board sessions supplement natural wear and reduce the frequency of clipper or grinder use. This is especially valuable for dogs who are fearful of traditional nail trimming.
- Monthly trimming minimum: Even with scratch board use and hard-surface walks, check and trim rear nails and dewclaws at least once per month. Set a recurring calendar reminder.
- Winter paw protection: Use dog boots (e.g., Ruffwear Grip Trex or similar) or apply paw wax before walks on salted or chemically treated surfaces. Rinse paws immediately after exposure to deicers — calcium chloride and magnesium chloride are irritating and potentially toxic if licked off paws.
- Summer heat awareness: Asphalt can reach 140-160°F (60-71°C) on a 85°F (29°C) day — hot enough to cause third-degree burns in 60 seconds. Use the 7-second hand test before every walk.
- Nutrition for nail and pad health: Ensure your dog's diet meets AAFCO standards for complete and balanced nutrition. Omega-3 fatty acids (EPA and DHA from fish oil) support skin and nail health. If your dog's nails are persistently brittle, discuss biotin and zinc supplementation with your veterinarian — do not supplement without veterinary guidance, as excess zinc can cause toxicity.
- Positive reinforcement training for handling: Dogs who are comfortable having their paws handled are easier to examine and treat. Practice gentle paw handling from puppyhood, pairing each touch with treats. This is foundational for both scratch board training and traditional nail care.
- Regular veterinary wellness exams: Ask your vet to check nails and paws during every wellness visit (typically every 6-12 months). They can catch early signs of SLO, nail bed tumors, or orthopedic changes from chronic overgrowth that you might miss at home.
Frequently Asked Questions
How long does it take to train a dog to use a nail scratch board?
Most dogs learn the basic scratching behavior within 3-10 short training sessions (3-5 minutes each). Dogs with prior paw-target training or those who naturally paw at objects may learn in 1-2 sessions. Fearful or handling-sensitive dogs may take 2-4 weeks of desensitization before they're comfortable interacting with the board. Patience and high-value treats are key — never force your dog's paw onto the board, as this creates a negative association and undermines the training.
Can a scratch board replace nail trimming entirely?
No. A scratch board effectively files front nails but cannot address rear nails or dewclaws. Even for front nails, the board may not achieve the precise length and shape that manual trimming provides. Think of it as a supplement that reduces trimming frequency — many owners find they only need to clip every 6-8 weeks instead of every 3-4 weeks when using a scratch board regularly.
My dog's nails are black. How do I avoid cutting the quick?
With dark nails, trim 1-2 mm at a time and examine the cross-section after each cut. When you see a chalky white or gray center with a small dark dot in the middle, stop — you're approaching the quick. Another technique: look at the nail from the underside. The quick often creates a slight groove or channel visible from below. If you accidentally cut the quick, apply styptic powder with firm pressure for 30-60 seconds. The bleeding should stop within 2-5 minutes. If it doesn't, contact your veterinarian.
What grit sandpaper should I use for a DIY scratch board?
80-grit aluminum oxide sandpaper is the standard recommendation — it's abrasive enough to file nails efficiently but not so coarse that it damages the pad skin if your dog's paw slides. For very large breeds with thick nails, some owners start with 60-grit and move to 80-grit as nails get shorter. For small breeds, 100-grit may be more appropriate. Always secure the sandpaper firmly with spray adhesive or staples so it doesn't bunch up and catch a nail.
How much does a veterinary nail trim cost if I can't do it at home?
Most veterinary clinics charge $10-$25 for a nail trim as a standalone service (2026 pricing, varies by region). Groomers typically charge $10-$20. Some clinics offer "tech appointments" where a veterinary technician trims nails without a full exam fee. If your dog requires sedation for nail trimming due to extreme fear or aggression, costs increase significantly — typically $80-$200 depending on the sedation protocol and your dog's size. Investing in scratch board training and positive reinforcement desensitization can eliminate the need for sedated trims over time.
Are nail grinders safe for dogs?
Yes, when used correctly. Rotary grinders (like the Dremel 7300-PT) are safe and effective for most dogs. Key safety rules: use a low speed setting, grind for no more than 3-5 seconds per nail to prevent heat buildup, and keep long hair away from the spinning head. Some dogs are frightened by the noise and vibration — a scratch board is an excellent alternative for noise-sensitive dogs. According to the American Kennel Club, both grinders and clippers are acceptable tools when the handler is trained and the dog is comfortable.
Disclaimer: This article is for educational purposes and does not replace professional veterinary advice. Always consult your veterinarian for diagnosis and treatment of any nail, paw, or orthopedic condition. If your dog has ingested a potentially toxic substance (including chemical deicers or paw treatments not labeled as safe for ingestion), contact the ASPCA Animal Poison Control Center at (888) 426-4435 (24/7, consultation fee applies) or the Pet Poison Helpline at (855) 764-7661.
Tom Renshaw
All our authors care for dogs every day — read more of their work on the authors page.